Now that we have Headscale installed, and configured, it is time we connect to our Headscale (well, Tailscale) VPN Network. In this article we will use Android, but as we will see, there are multiple apps for a variety of Operating Systems we can use.
Step 1: Get the app
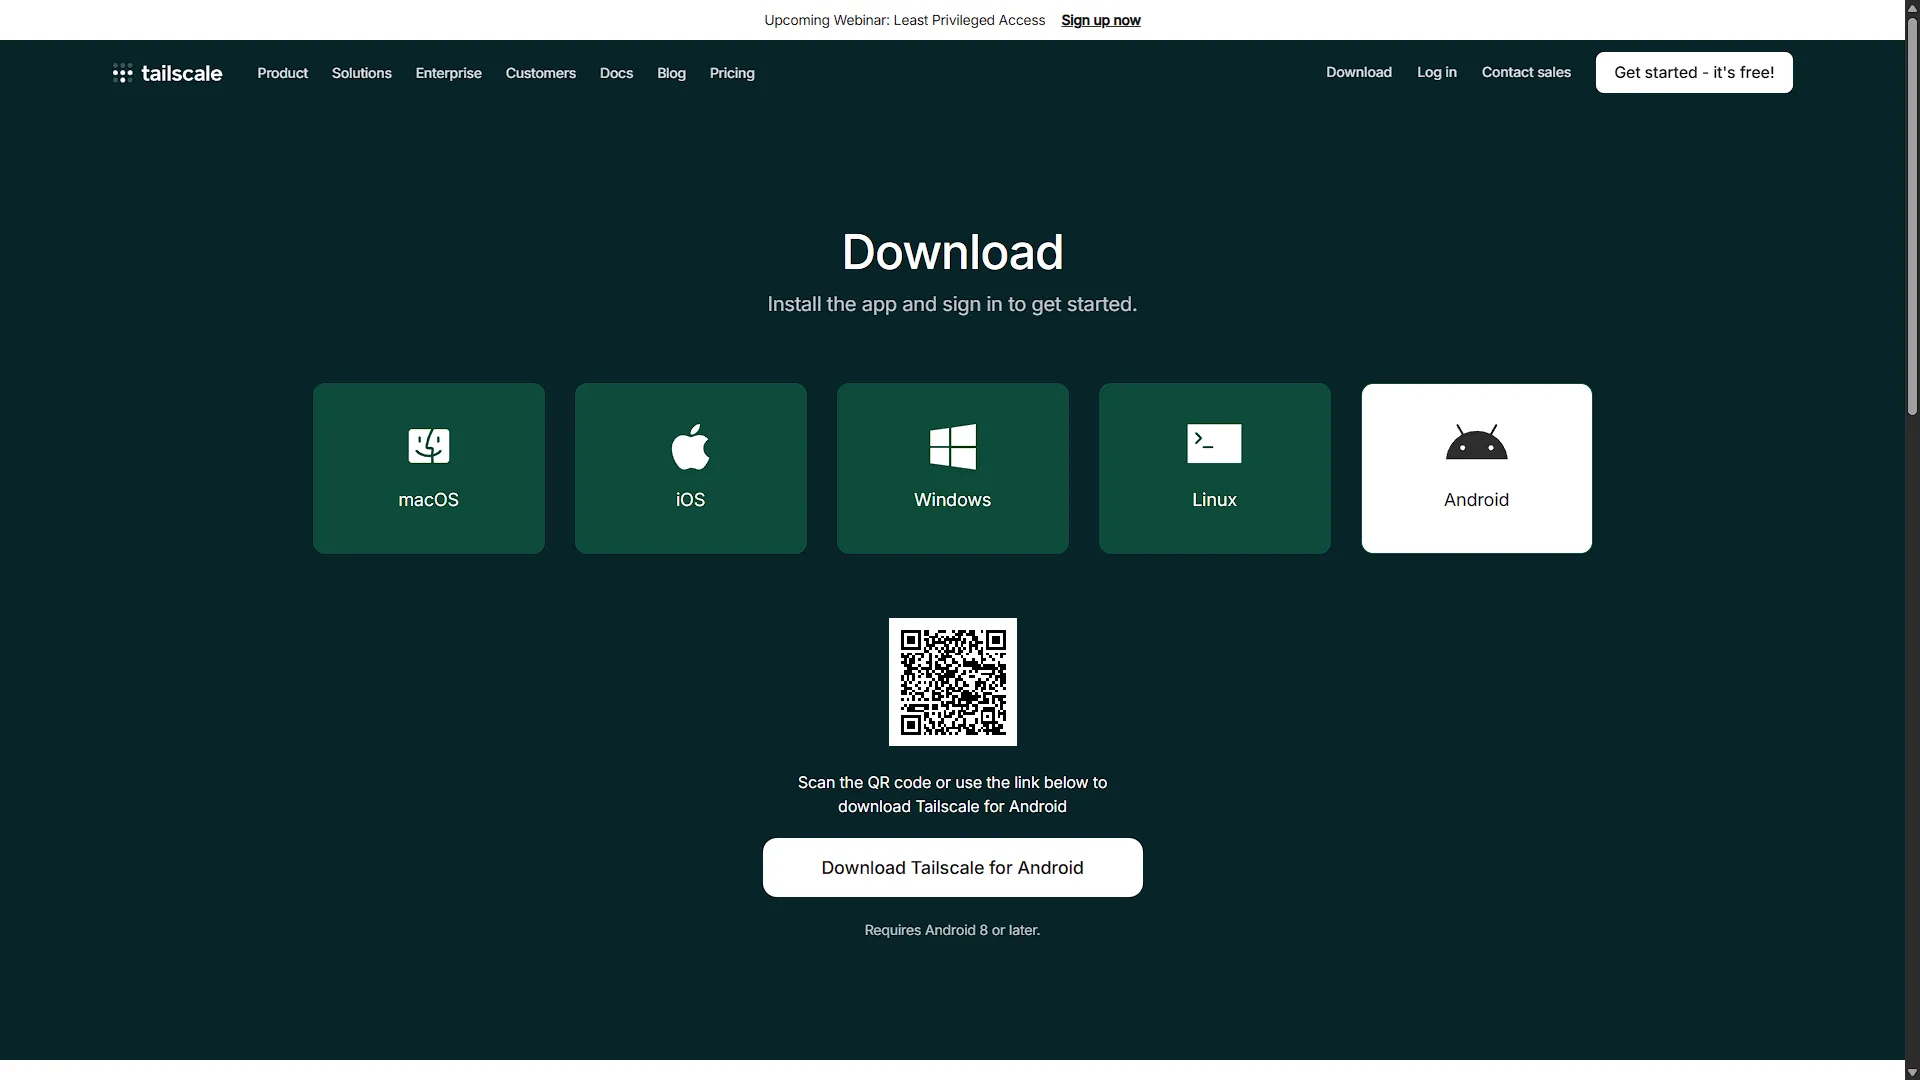
Seeing as Headscale is an implementation of Tailscale, we will need to use the Tailscale App to connect to our Headscale instance. Go to the official site here: https://tailscale.com/download Select the app for your operating system to download and install it.
Step 2 - Get the connection command
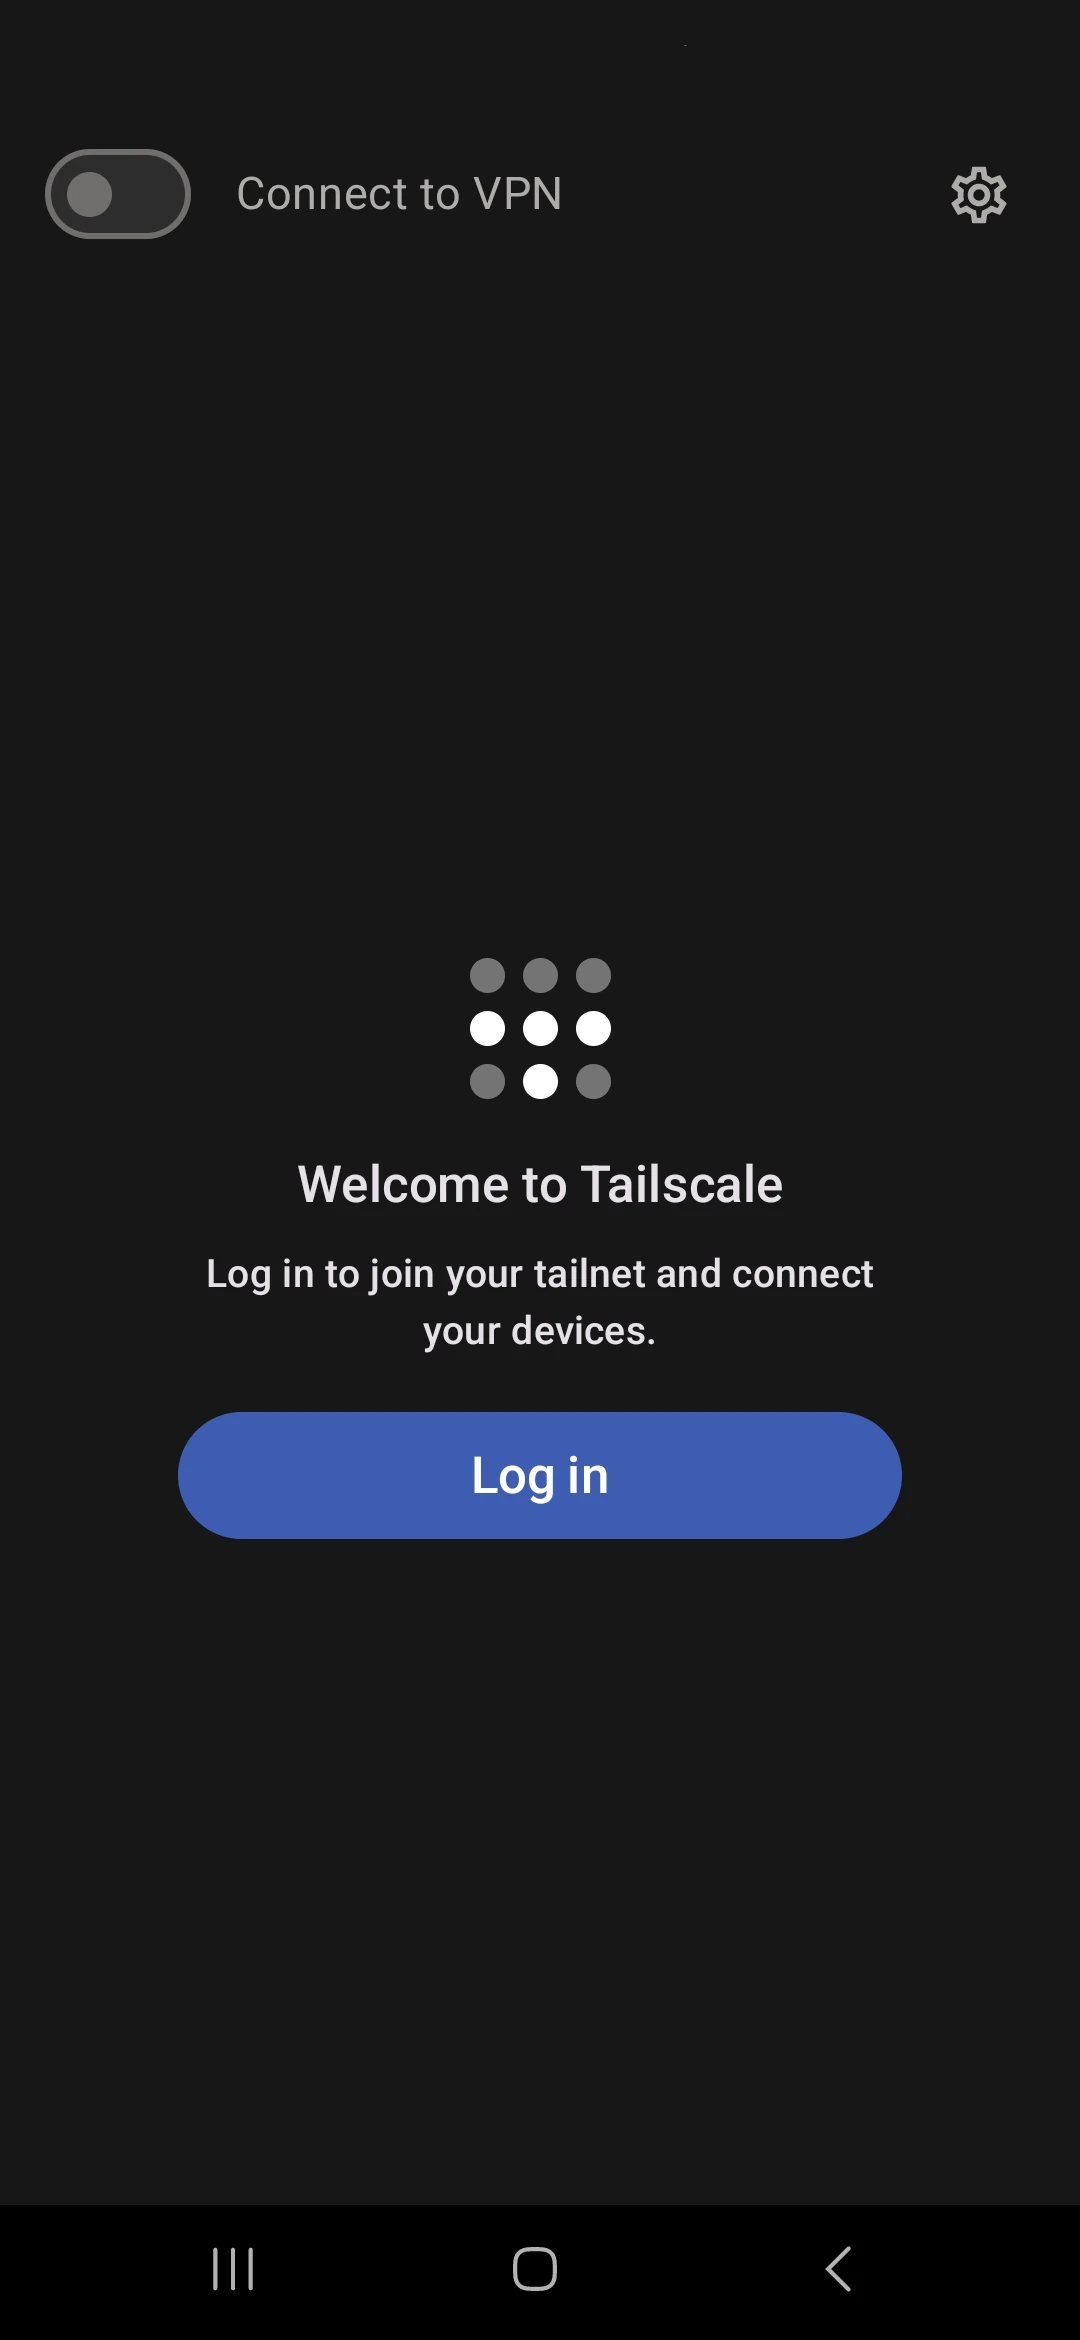
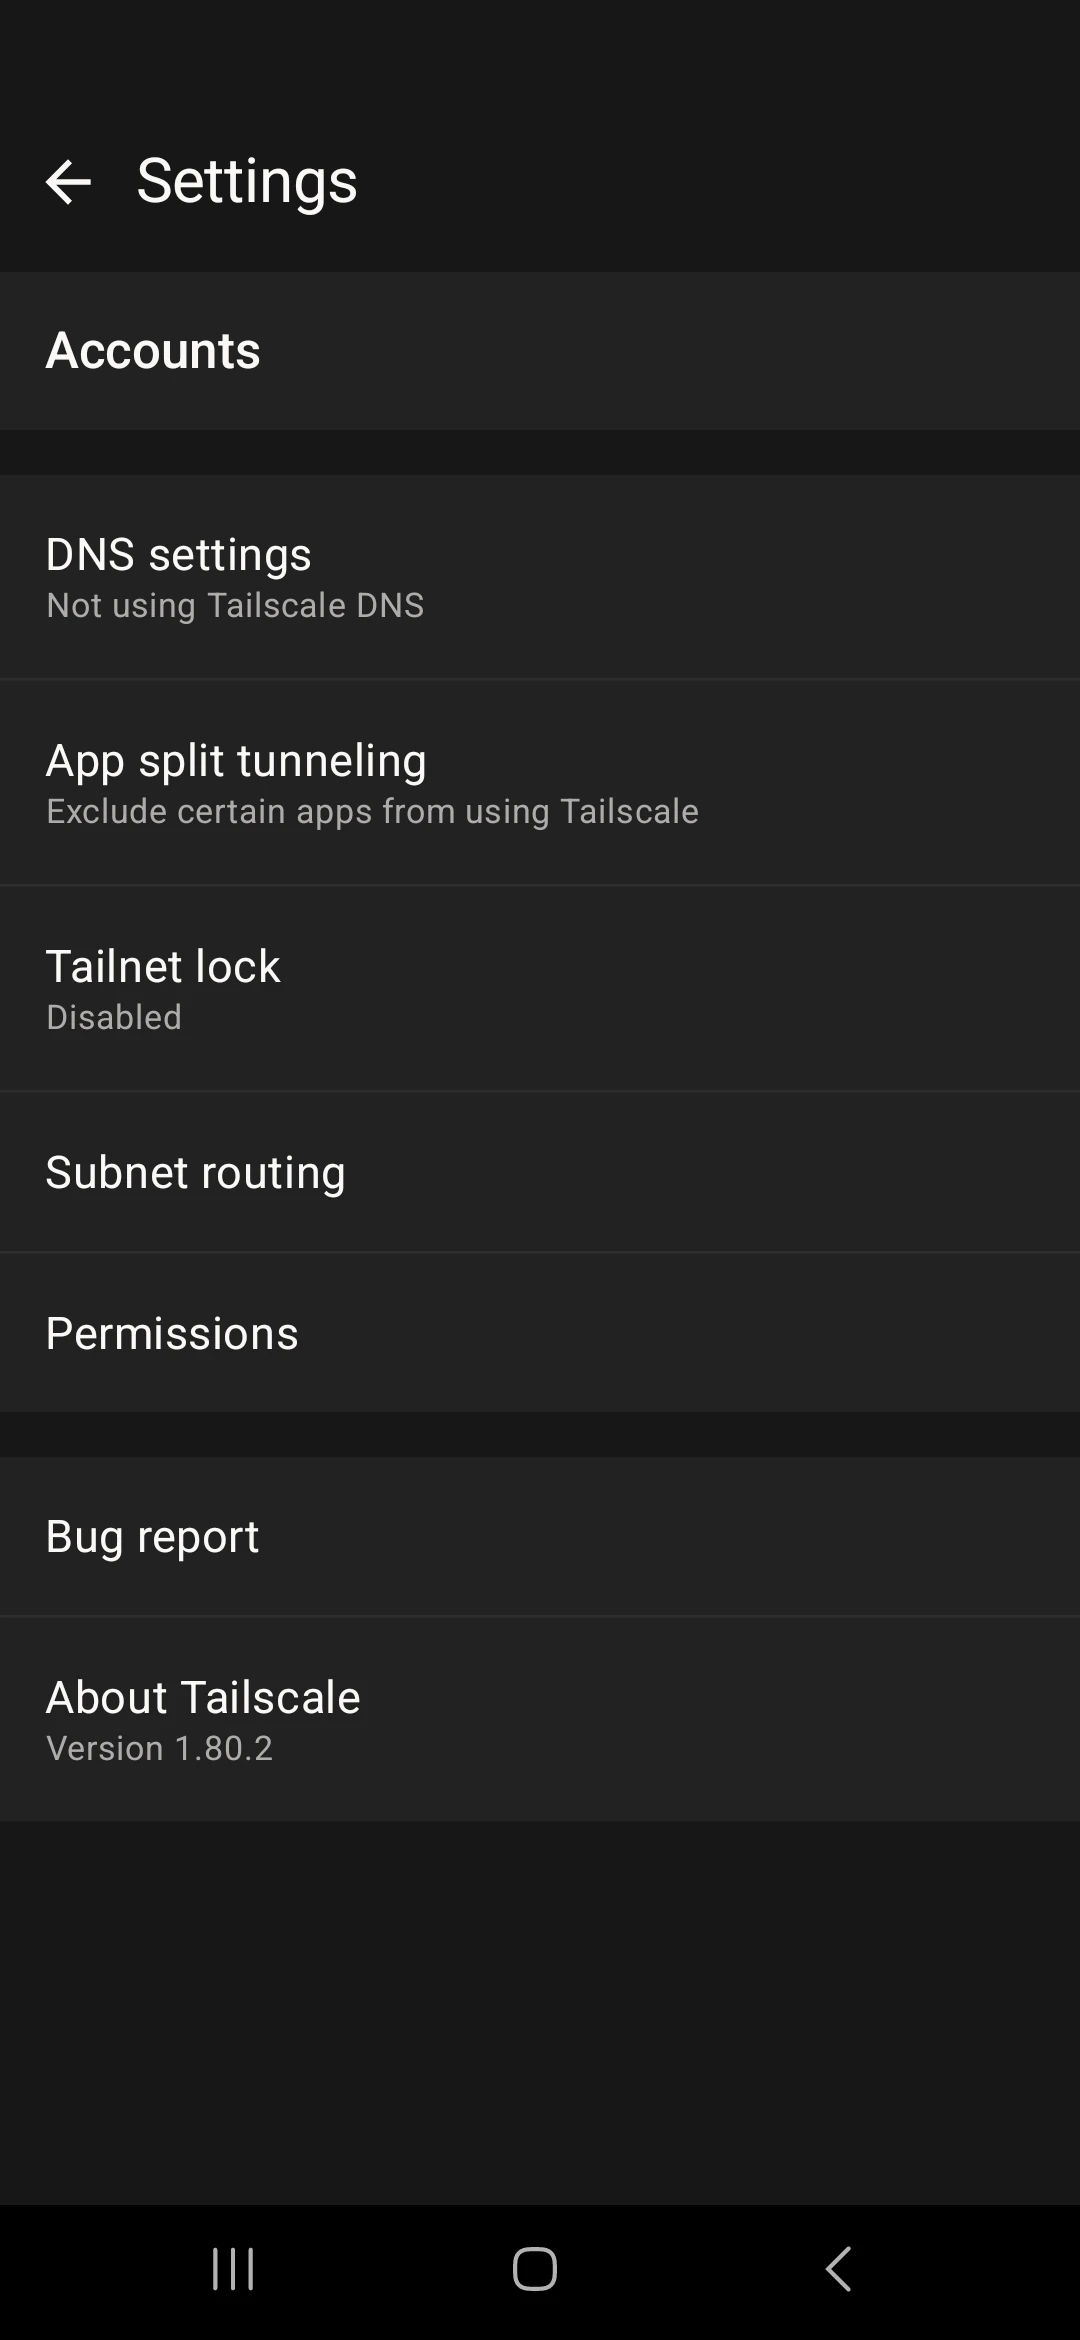
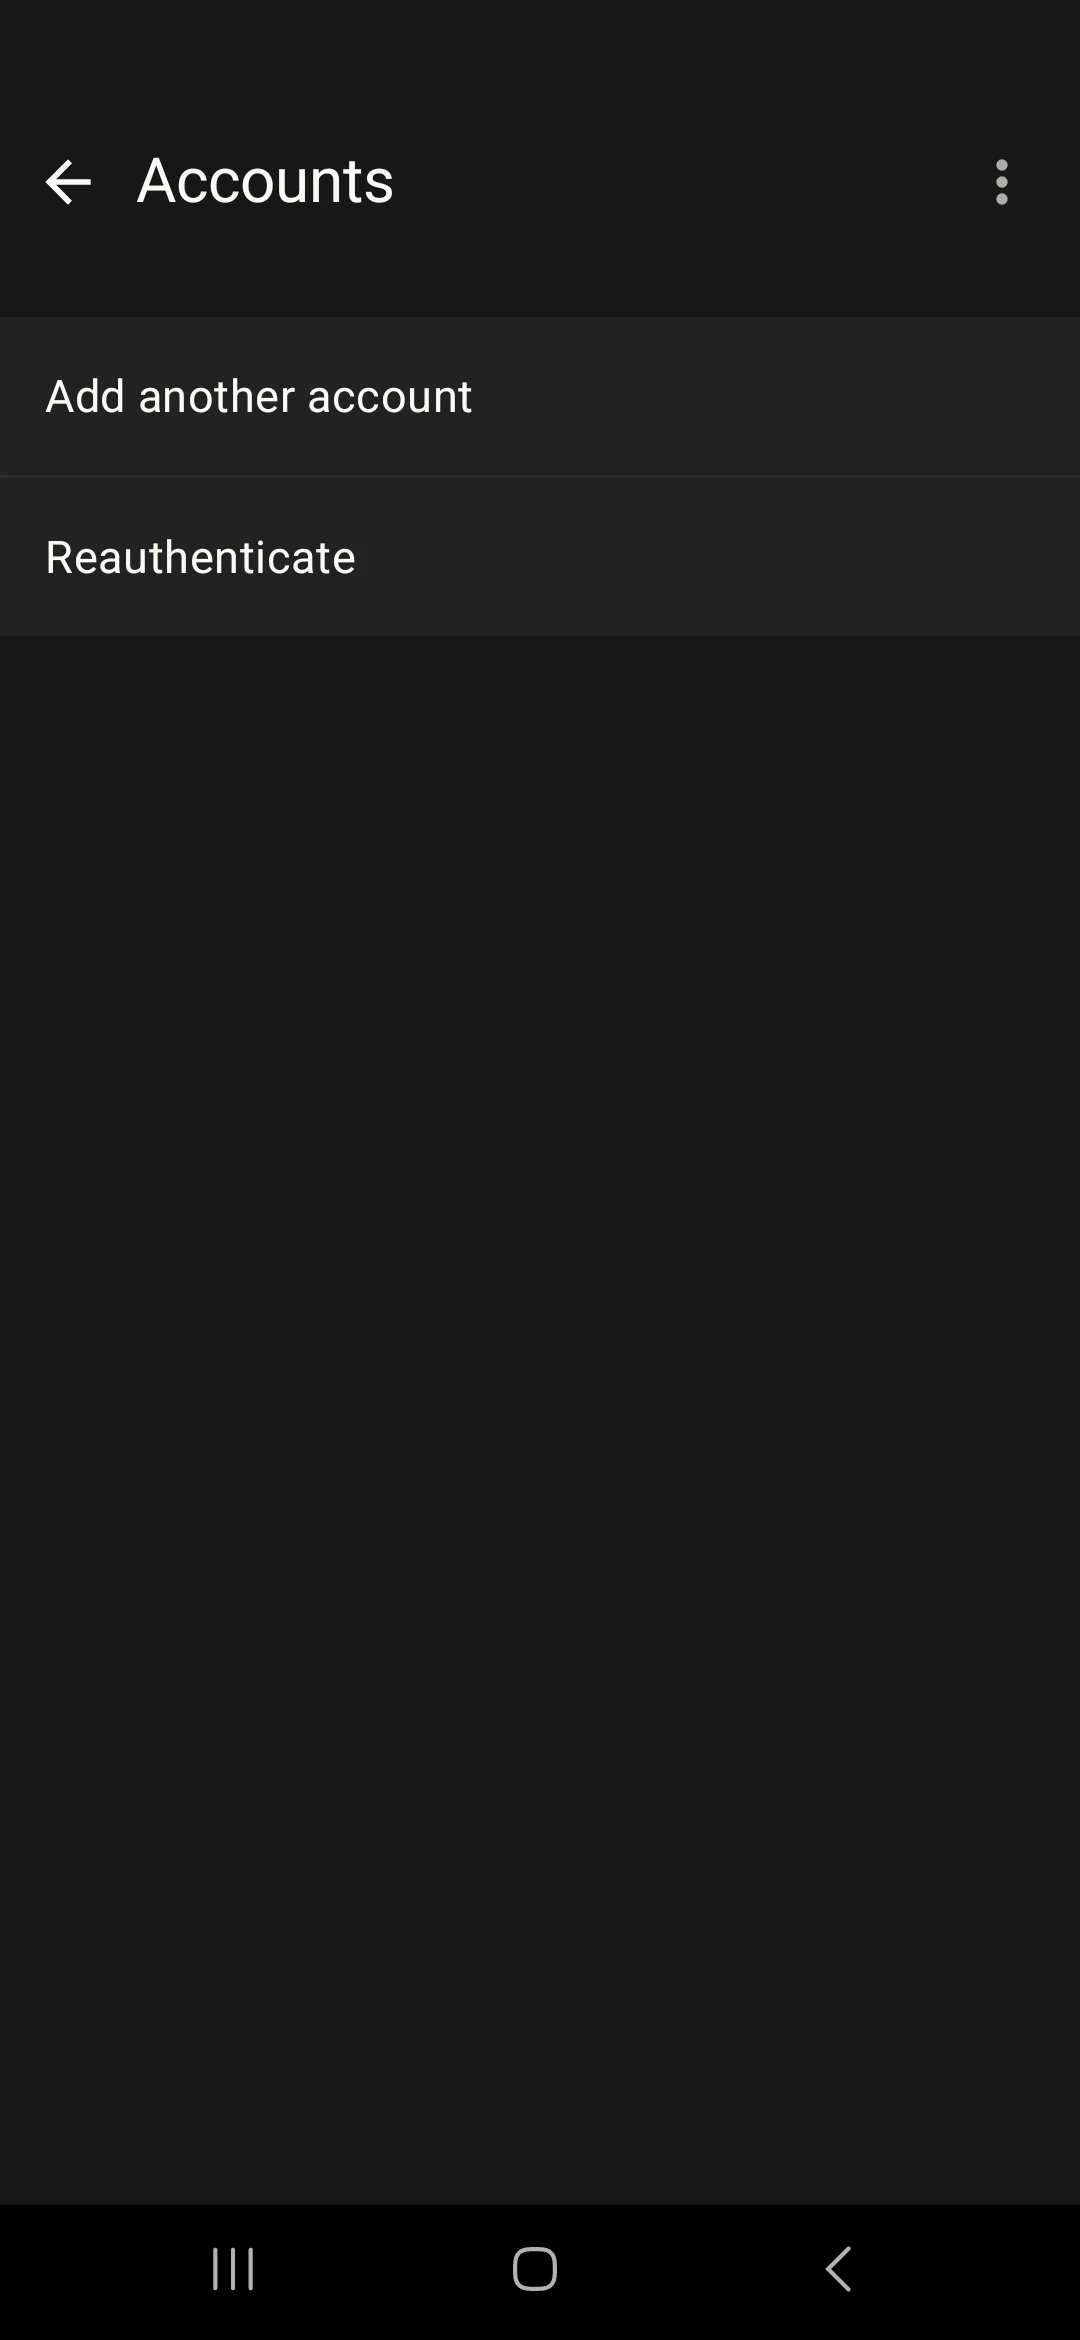
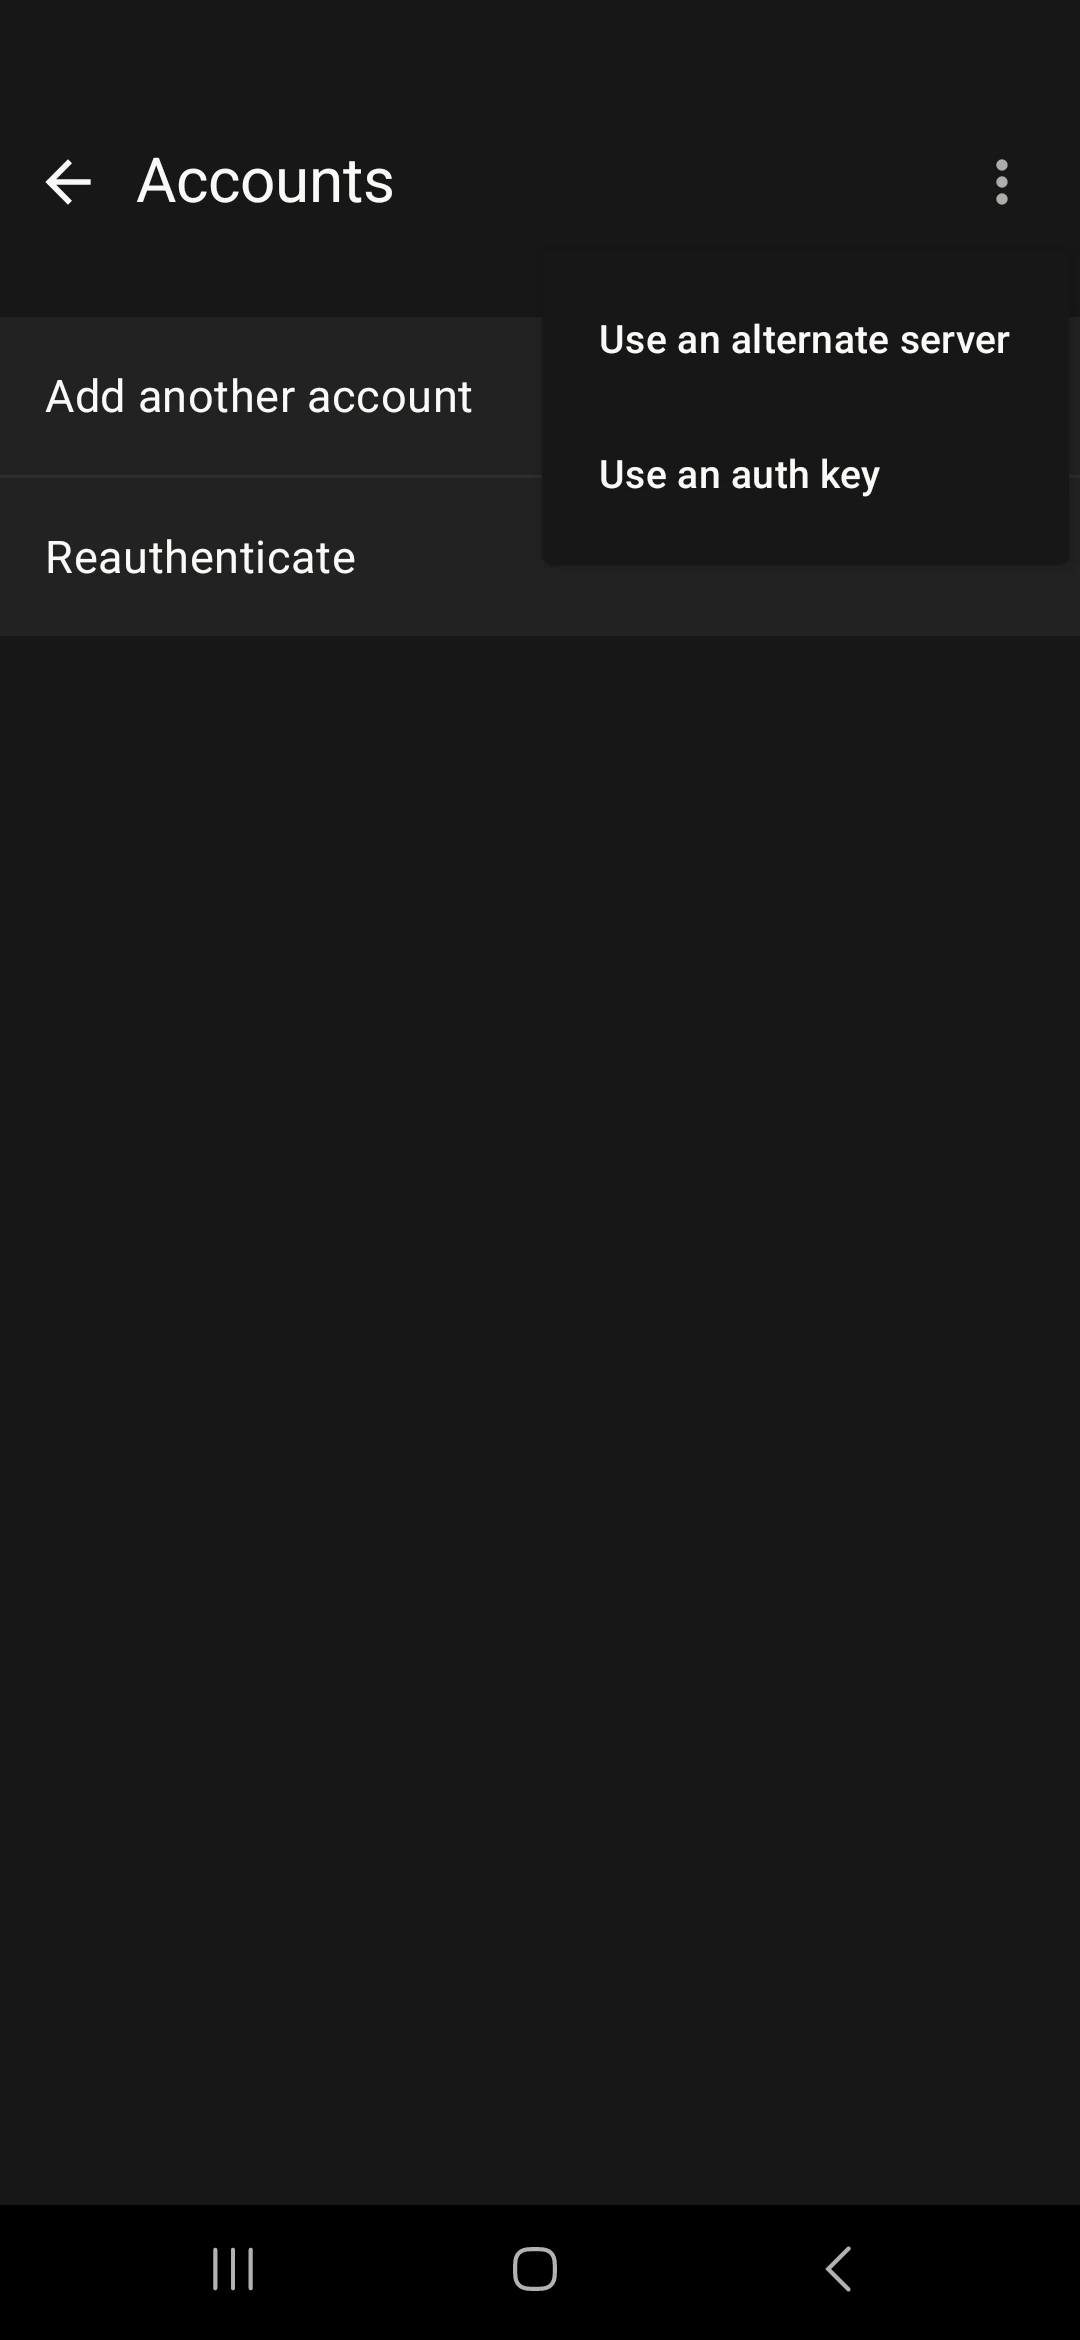
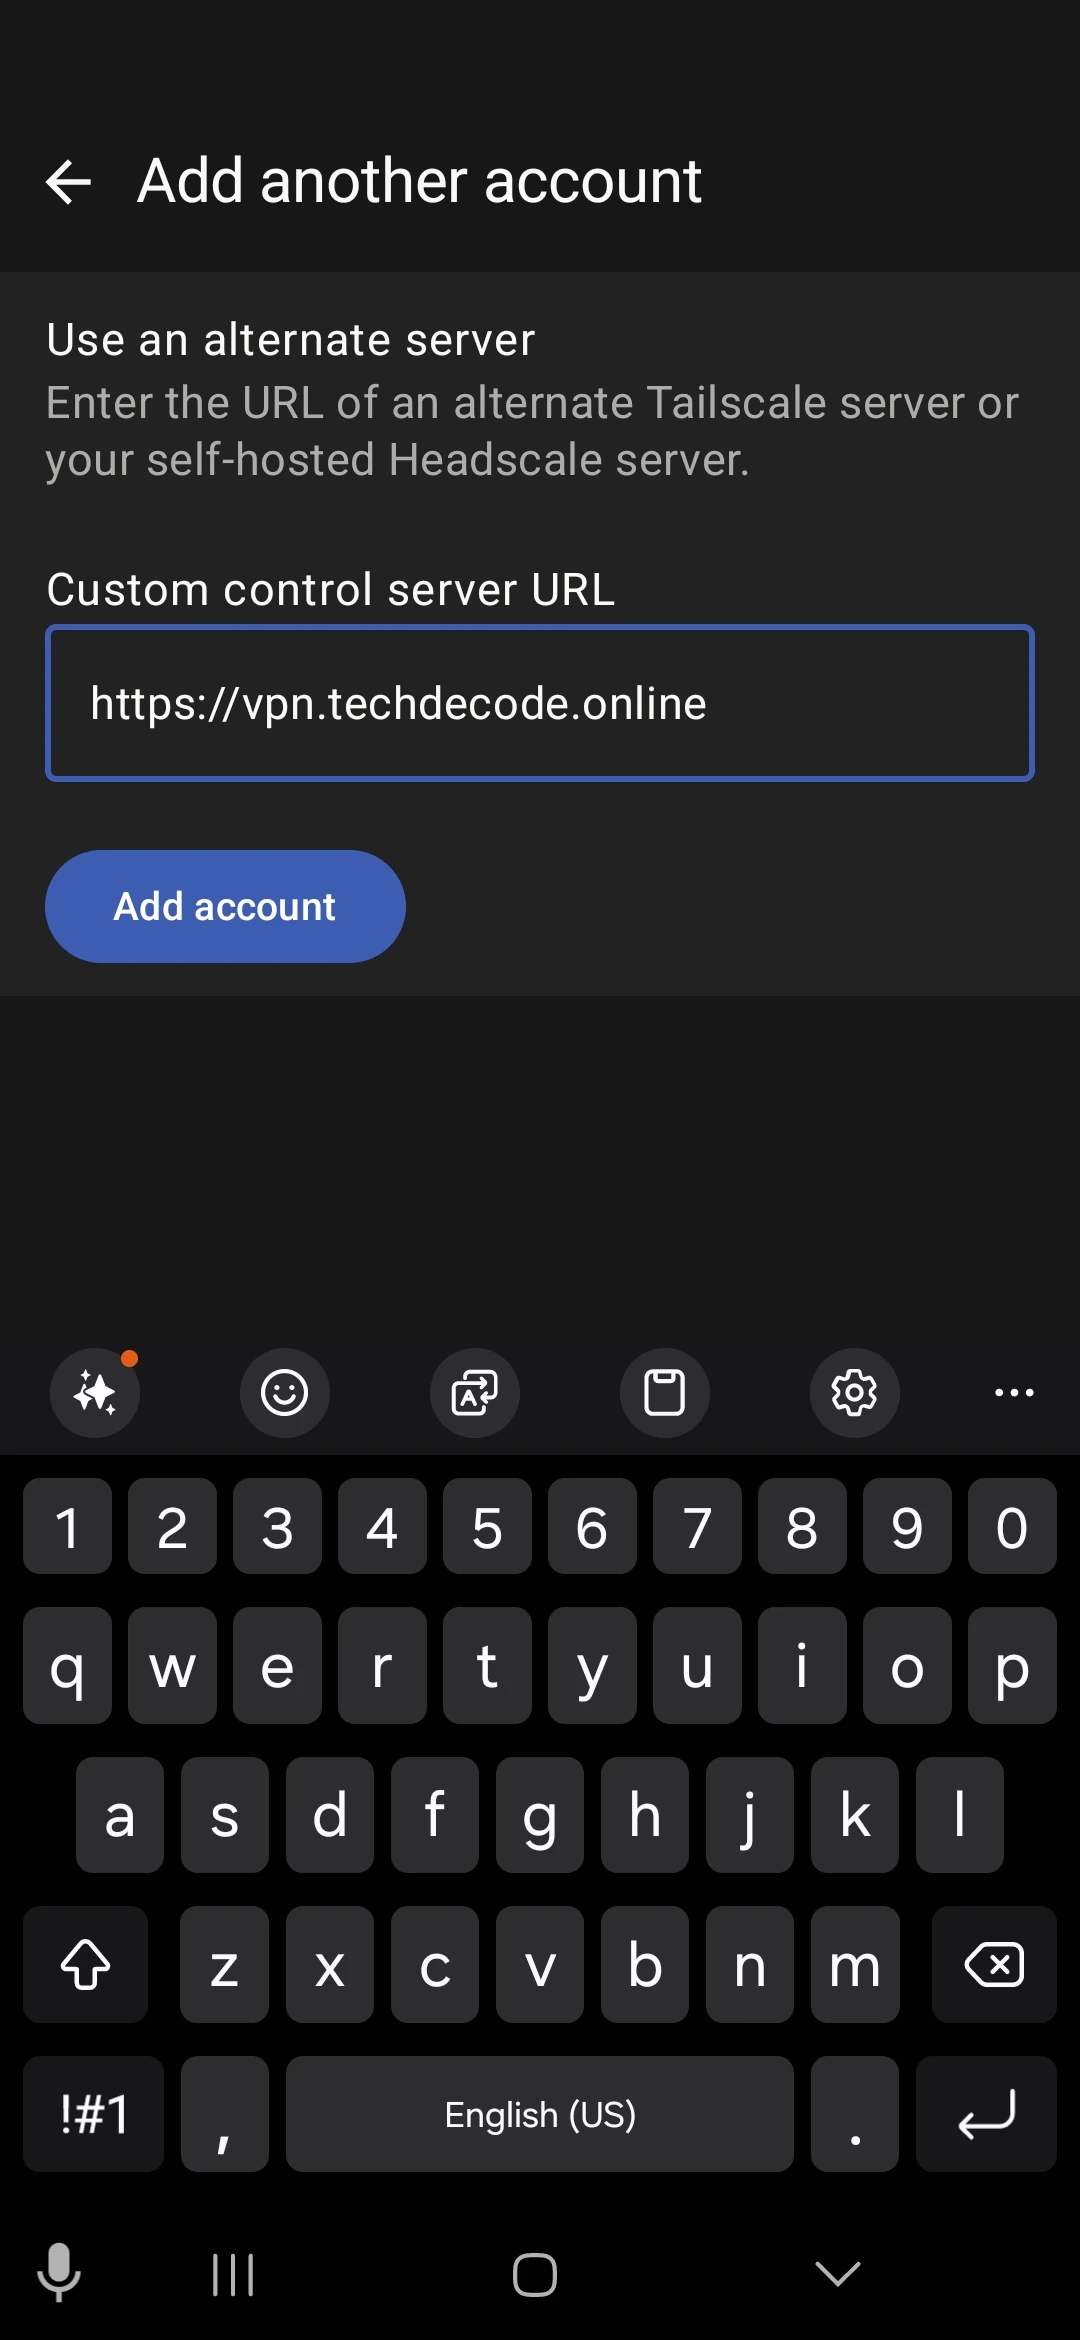
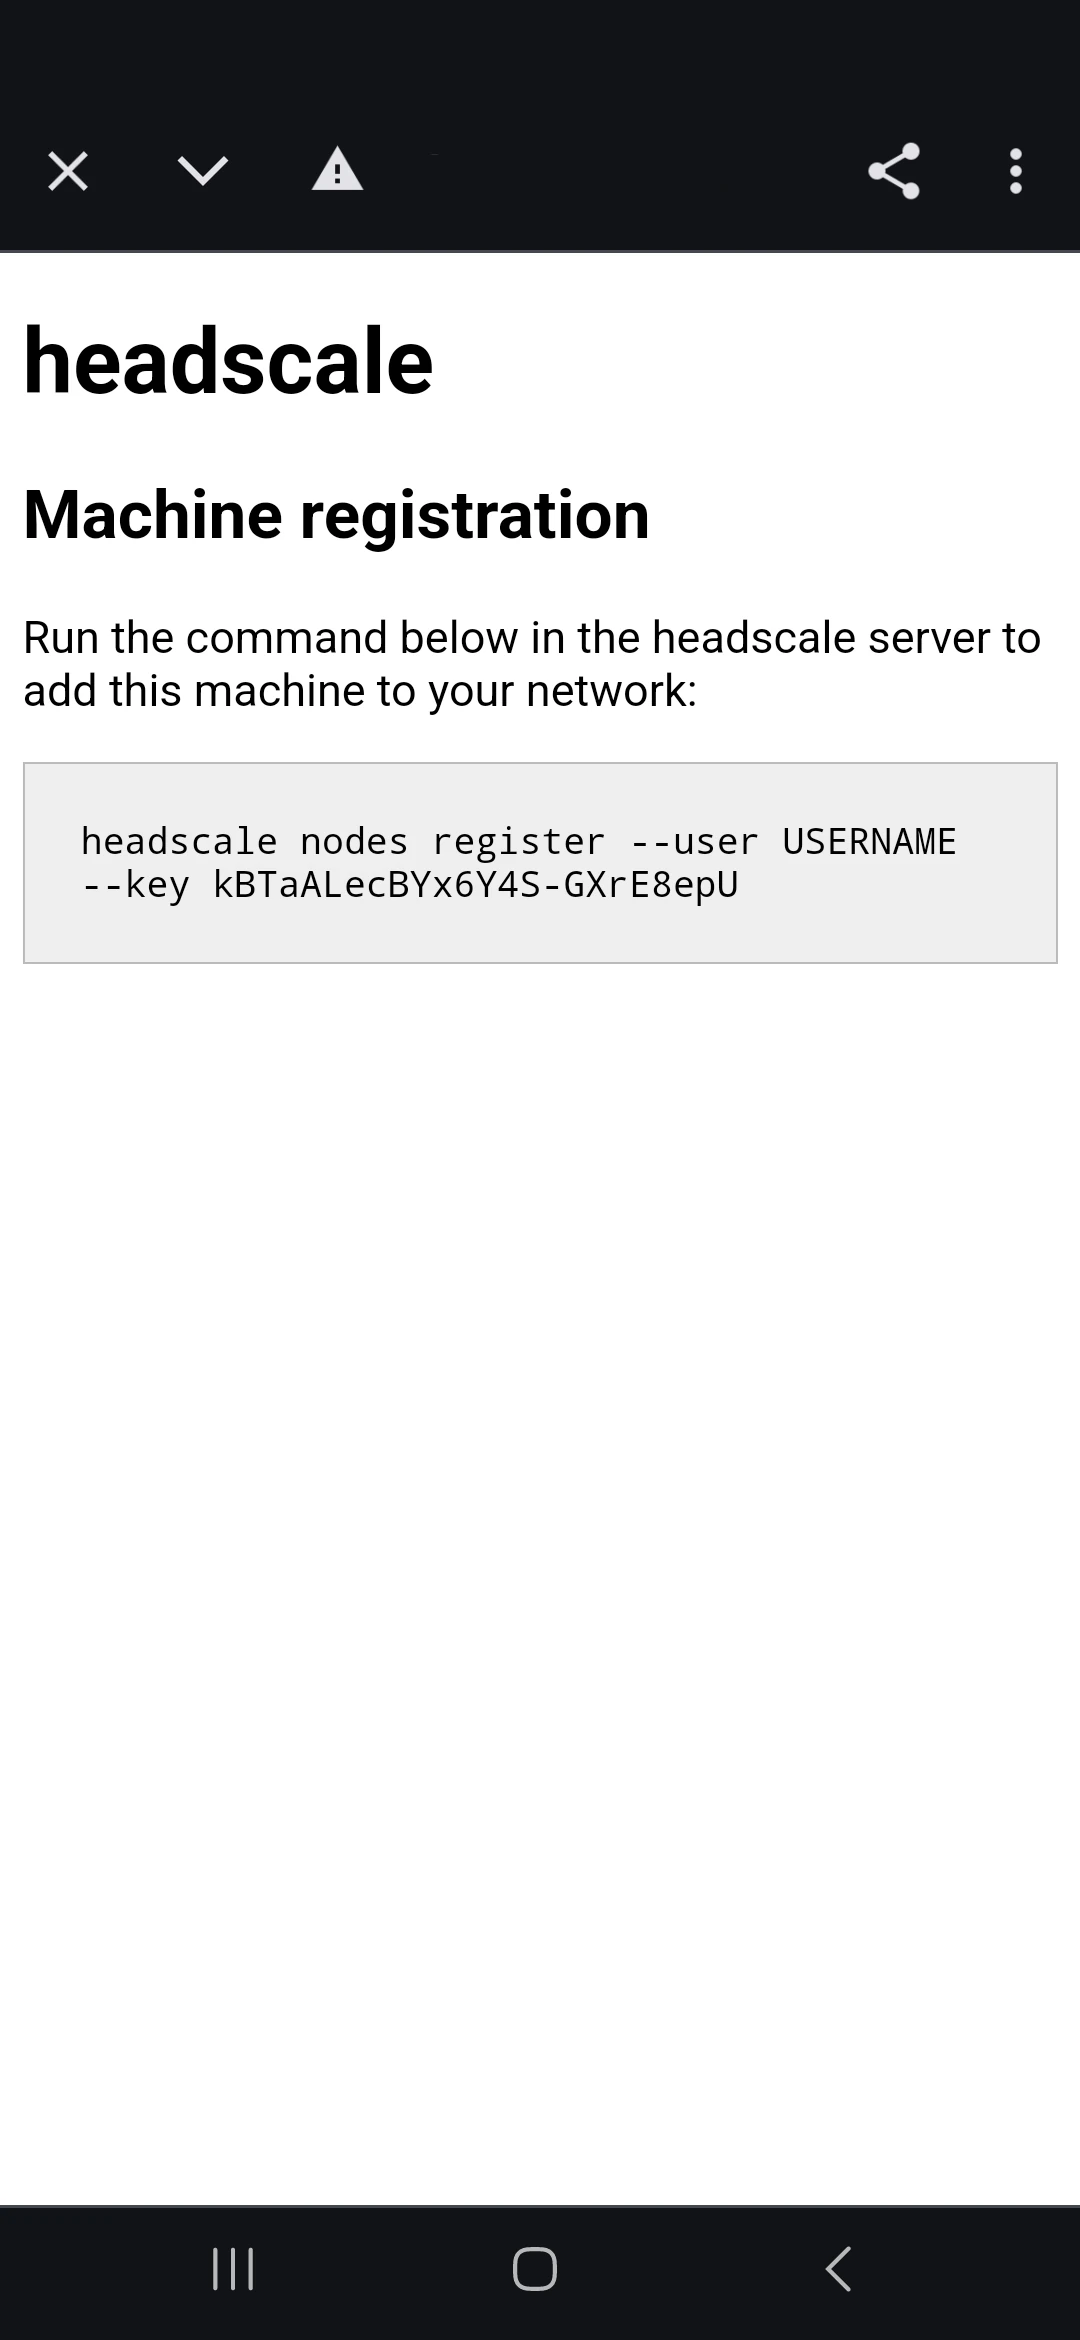
From our newly installed app, we need to first add the new address we created. Click on the settings menu in the top right. From here, select Accounts then click the three dots in the top right. An option will appear to Use an alternative server. Here we need to edit the server to the name of our set up server, in our case it will be https://vpn.techdecode.online. As soon as the server is added, we will be presented with an install command that we need to run on our Headscale instance. Copy this command and get it to the machine we are going to use to connect to Proxmox.
Step 3: Authenticate the device
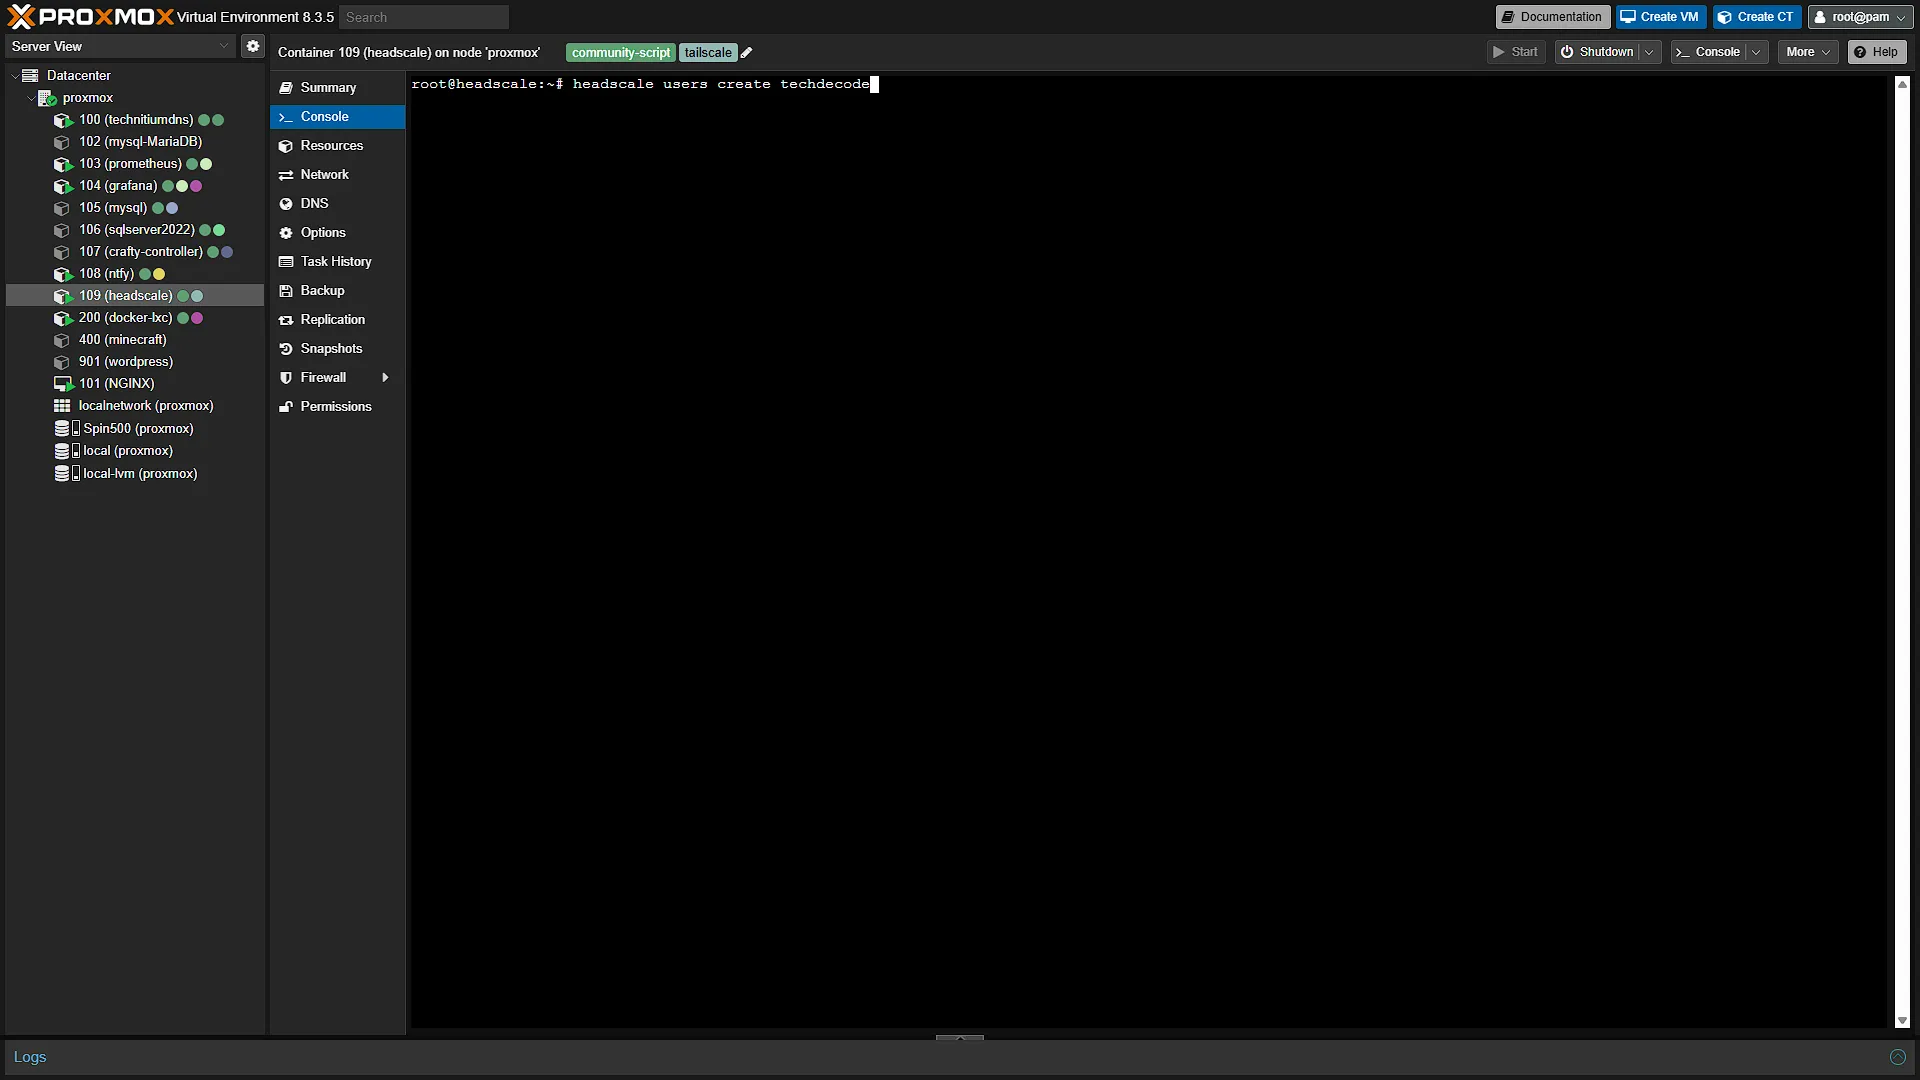
From Proxmox, we need to access the console of our Headscale LXC again. It is in this console that we need to run the command from the previous step. HOWEVER, we need to first create a new user. From the console, run the command:
headscale users create techdecodeThe screenshots create the user techdecode. You can choose another username, but substitute it consistently in the registration command and Part 34. If this user already exists, use it instead of trying to create it again.
Take the register command from the previous step and add this username into the command after the --user part. The screenshot uses headscale nodes register --user techdecode --key followed by the device's generated key. Copy the fresh command from your own registration page rather than copying the key visible in the screenshot. Run it in the Headscale LXC to associate this device with the chosen user. A newer server may generate different syntax; the separate compatibility notes below cover that case.
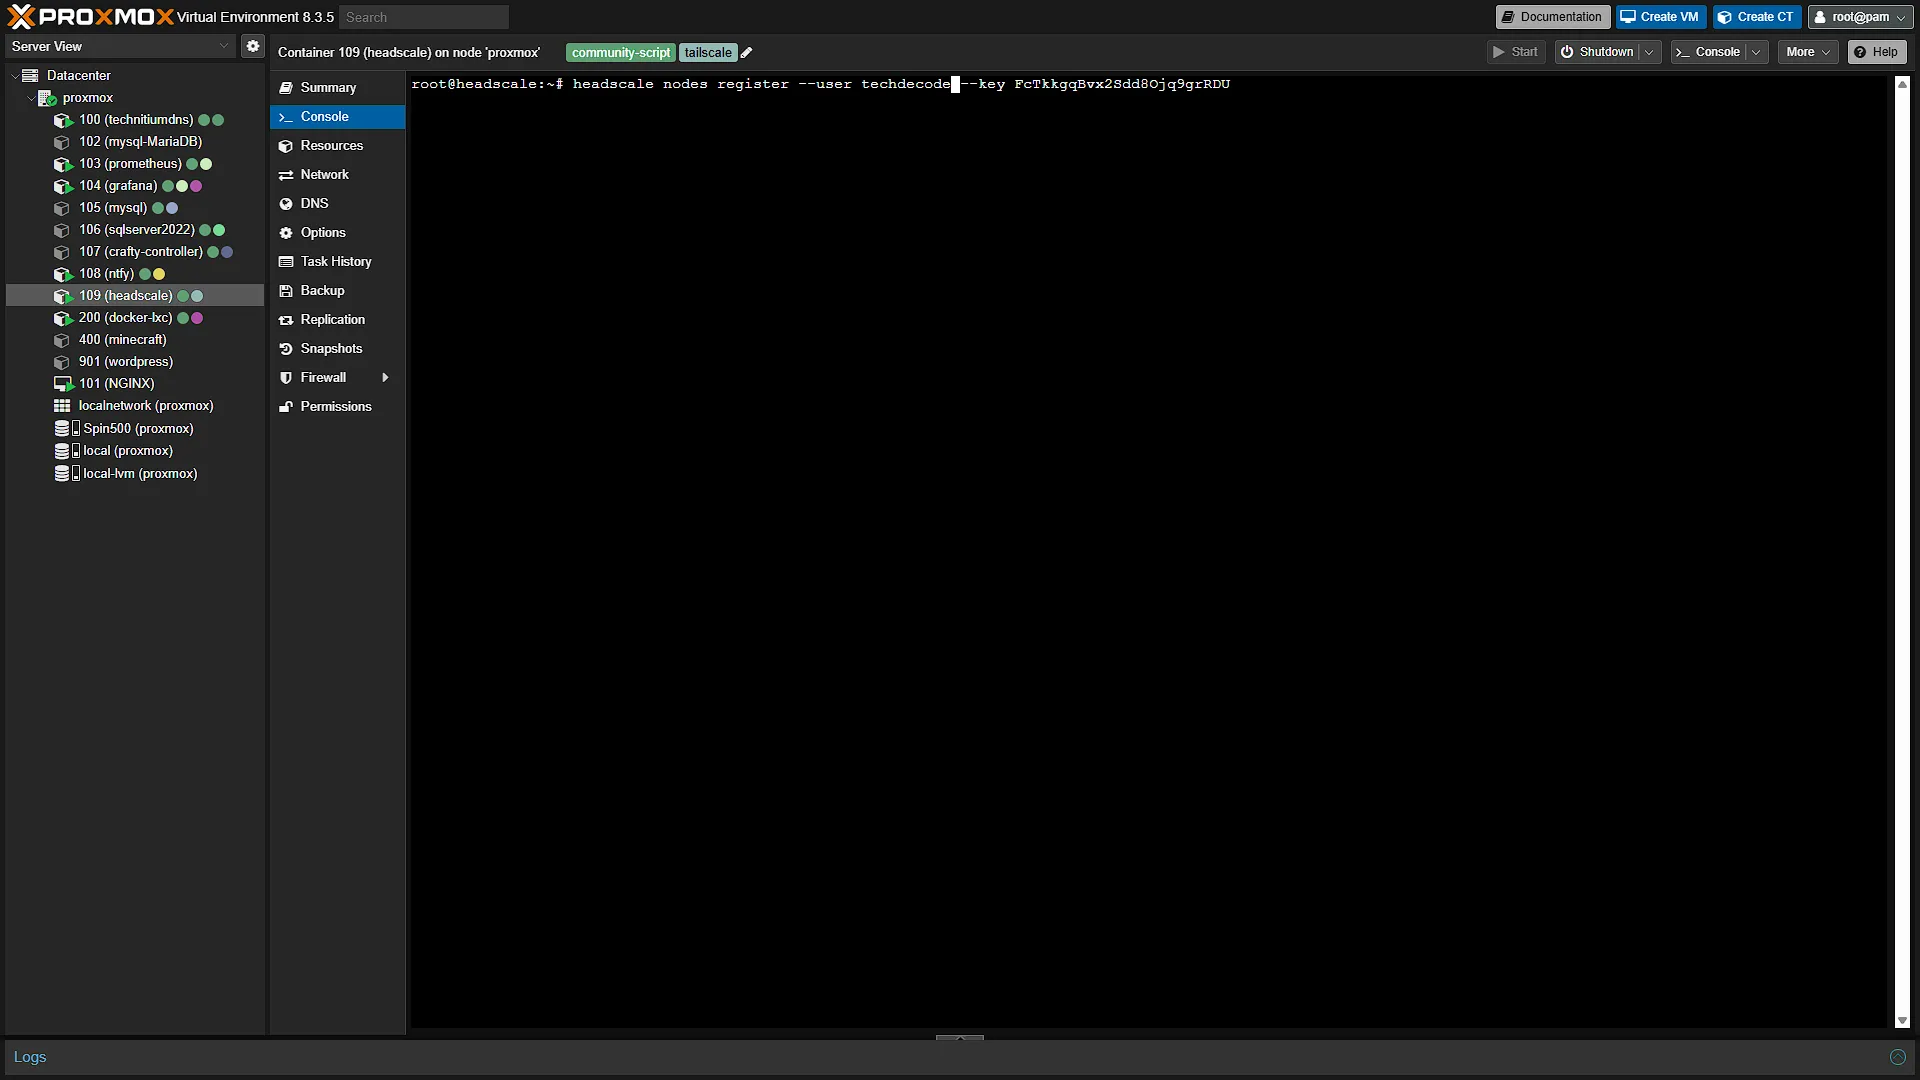
Once the command is run, go back to your Android phone to see that you are connected:
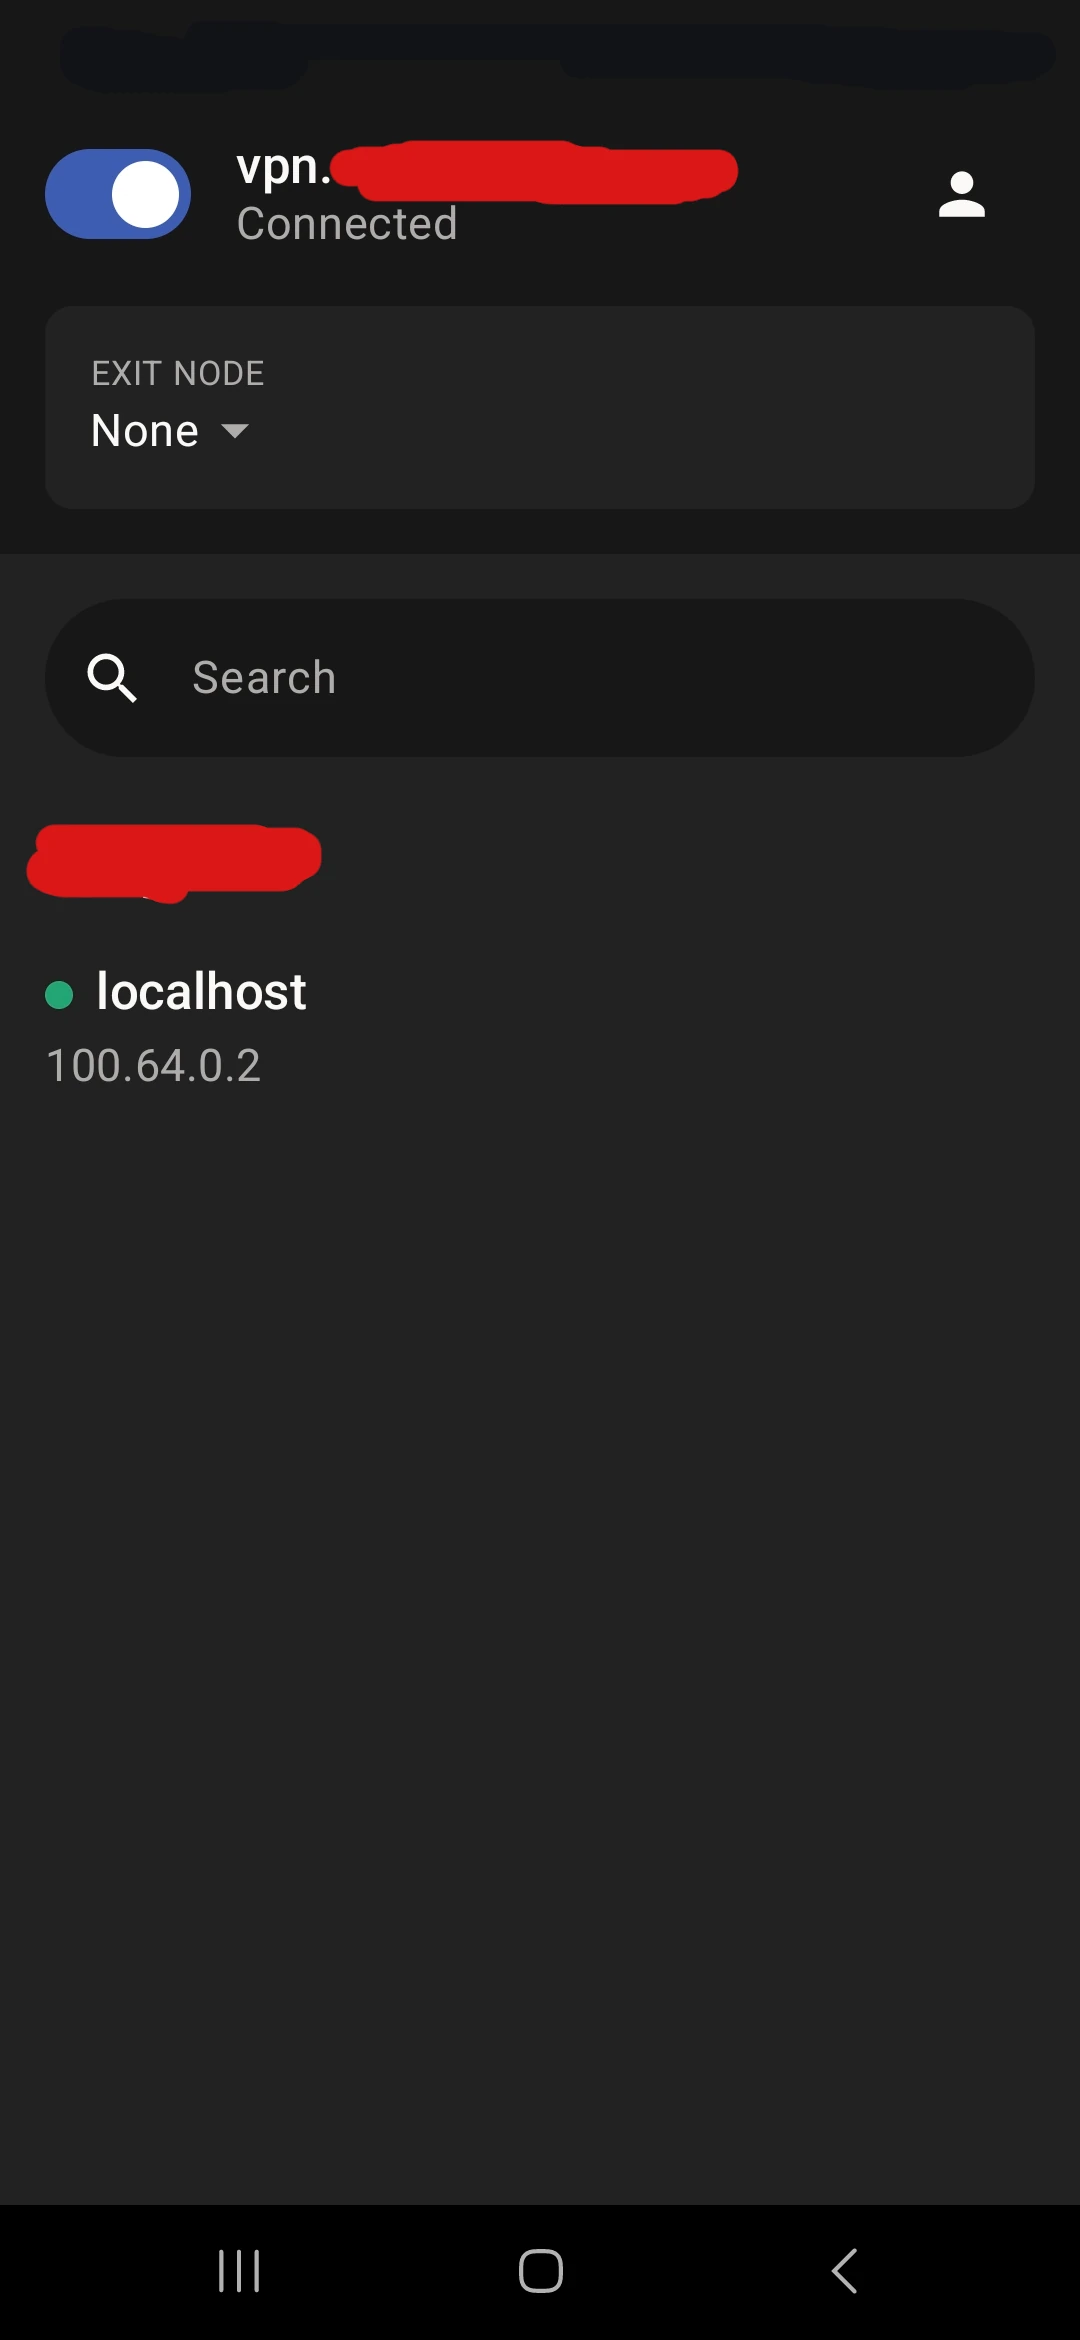
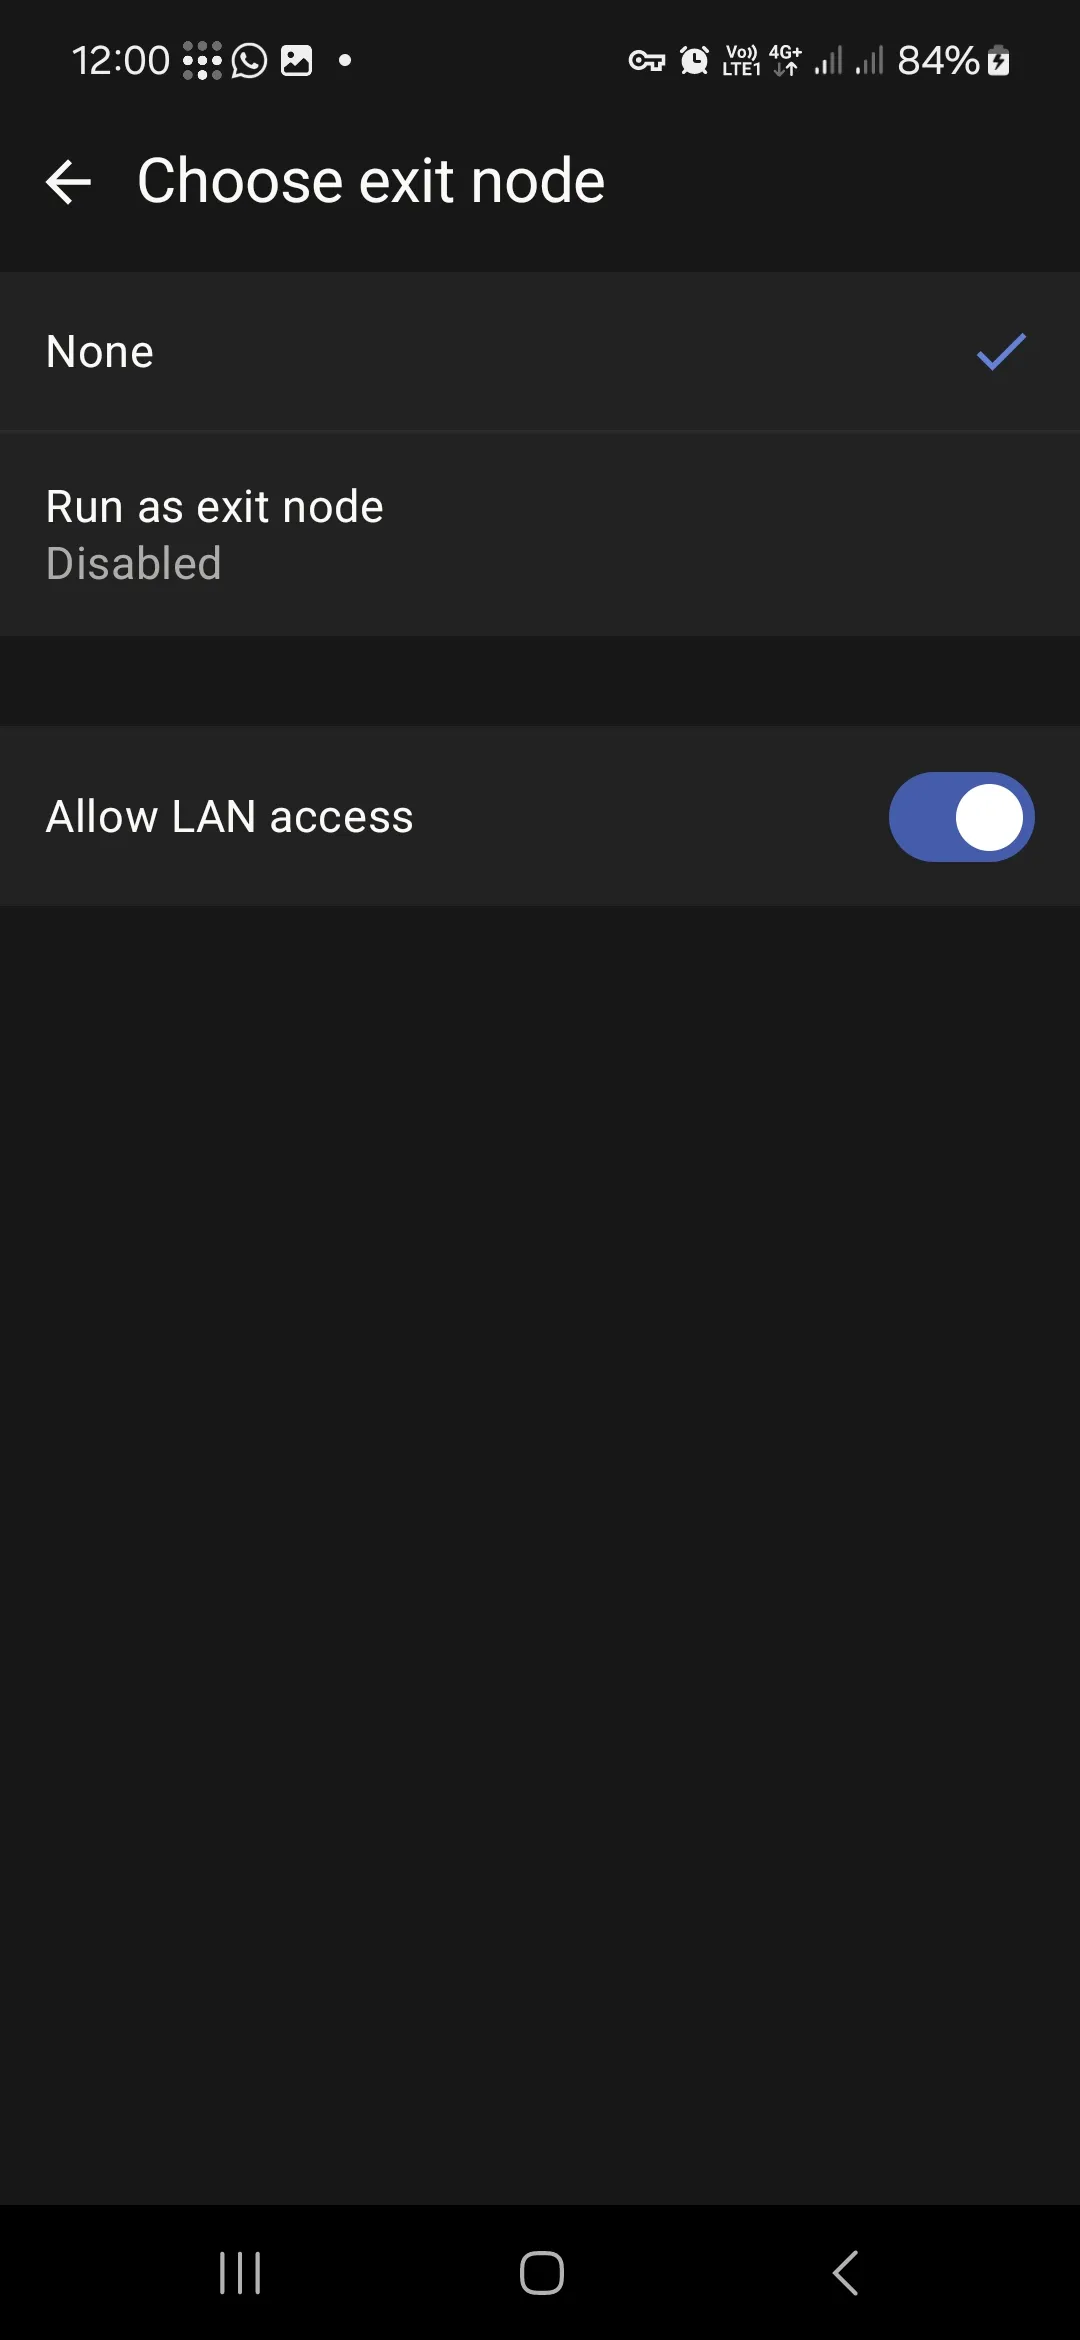
The phone is now enrolled in the tailnet, as shown in the screenshots. Continue to Part 34, where the demonstrated LXC runs a Tailscale client and advertises both the home subnet and exit-node capability. Subnet routing provides the LAN path; choosing the exit node also routes general internet traffic through home. The phone's “Allow LAN Access” setting alone does not advertise the home subnet.
Compatibility Notes: Newer Headscale Releases and Other Clients
These notes are separate from the Android screenshots. The screenshot-compatible nodes register command is valid for the demonstrated release. Current stable documentation describes auth register with an authentication ID. Use headscale version, the installed command's help and the registration page produced by that same server to choose the correct syntax. Do not replace an older server's generated command with one copied from current documentation.
Use the official Tailscale client supported on your operating system and configure the Headscale coordination URL. Android's account menu includes an alternate-server option, as shown above. Apple and Windows workflows vary by client distribution and release, so use the matching Headscale client guide rather than assuming a hidden menu gesture or executable path exists everywhere.
On a supported Linux client, tailscale up --login-server=https://vpn.techdecode.online illustrates the login-server option; replace the example hostname with your own. Read the command's output and complete registration on your server. If the device belongs to another tailnet, decide deliberately whether to change accounts: logging out can interrupt the remote access session you are currently using.
Optional: Short-Lived Credentials for Headless Enrollment
Interactive registration above is sufficient for this phone. Pre-authentication keys are an optional alternative for headless enrollment. The current documented default is single use with a one-hour lifetime. Prefer that limited scope for a one-off device rather than a reusable key. Inspect headscale preauthkeys create --help and headscale users list to supply the owner ID your installed command expects.
Transfer the generated key through a protected channel and pass it to the client's auth-key option using the documented secure handling supported by that release. Do not paste it into a shared script, screenshot or support log. Expiry limits later enrollment with the key; it is not the same as removing a node that has already joined. Check node ownership after enrollment and revoke unused enrollment credentials.
Check Ownership and Connectivity
# On the coordination server
headscale version
headscale users list
headscale nodes list

# On a client with the CLI available
tailscale status
tailscale ping 100.64.0.1
Replace the ping destination with the actual tailnet address of a second enrolled device. Its output can identify a direct or relayed path; latency depends on the network and is not guaranteed to be sub-millisecond. Test the actual service too: a successful peer ping does not establish that the service is listening, its host firewall permits access or your traffic policy grants that port.
Troubleshoot the Stage That Failed
- No registration page: Verify the alternate-server hostname, DNS, certificate and reachability from the phone's current connection.
- Registration rejected: Check the server version, generated command, chosen owner and startup or authentication logs. Do not solve a syntax mismatch by granting administrator permissions.
- Node online but service unreachable: Check the destination address, service listener, host firewall and tailnet policy.
- Tailnet peers reachable but NAS LAN address unreachable: Check the subnet-router advertisement, approval, forwarding and client route acceptance.
If a proxy reports an upgrade error, compare its configuration with the reverse-proxy requirements for your Headscale release. Avoid adding a $connection_upgrade variable unless the corresponding NGINX map exists. A copied header line cannot fix a wrong backend port or an invalid public URL.
Test Peer, Subnet and Exit Access Separately
| Goal | Required path | Useful test |
|---|---|---|
| Reach an enrolled server | Tailnet peer connection and allowed service | Open one known service using its tailnet address |
| Reach a LAN-only NAS | Approved subnet route and forwarding node | Open the NAS at its private address from mobile data |
| Send general internet traffic through home | Approved, selected exit node | Check the egress address and ordinary browsing separately |
Start with peer access, then add subnet routing only if you need it. Use a non-sensitive service as the first test. Leave Wi-Fi off to ensure the phone is not simply reaching the NAS locally. Where home and remote networks use overlapping private subnets, routing can become ambiguous; record both networks before assuming enrollment failed.
Run the test with the intended access policy, not a temporary allow-everything rule that is forgotten afterward. Check a service the device should reach and one it should not reach. Save the result, relevant node names and date in your maintenance notes. Repeat after a client upgrade or route-policy change, because enrollment and authorization are separate moving parts.
Retire Lost and Replaced Devices
Keep node names recognizable enough to identify a replaced phone. For a lost device, inspect the server's node-management help, confirm its identifier and expire or remove the correct registration. Revoke associated reusable enrollment credentials and application sessions as appropriate. A VPN registration cleanup does not invalidate a browser session or a token held by a separate homelab application.
Before removing a node used for routing, check which devices depend on it. Keep an alternative administrative path while making changes. Once the replacement device is enrolled, verify its ownership, policy and actual service access rather than assuming the old device's permissions and routes followed it automatically.
Conclusion
The Android app has joined the Headscale network using the user and registration workflow shown in the screenshots. Keep that username consistent and use your server's generated command for its installed version. Continue to Part 34 for the demonstrated subnet and exit-node setup. The compatibility and diagnostic notes help when a different release or network requires investigation.