The Raspberry Pi is a fantastic little computer for tinkering, learning and useful home projects. Our guides to Home Assistant on Raspberry Pi and running Steam Link on a Raspberry Pi show some of those possibilities, and there are many applications and uses for a Raspberry Pi. As projects grow, storage capacity or a need for AI acceleration can become more important than another software tweak.
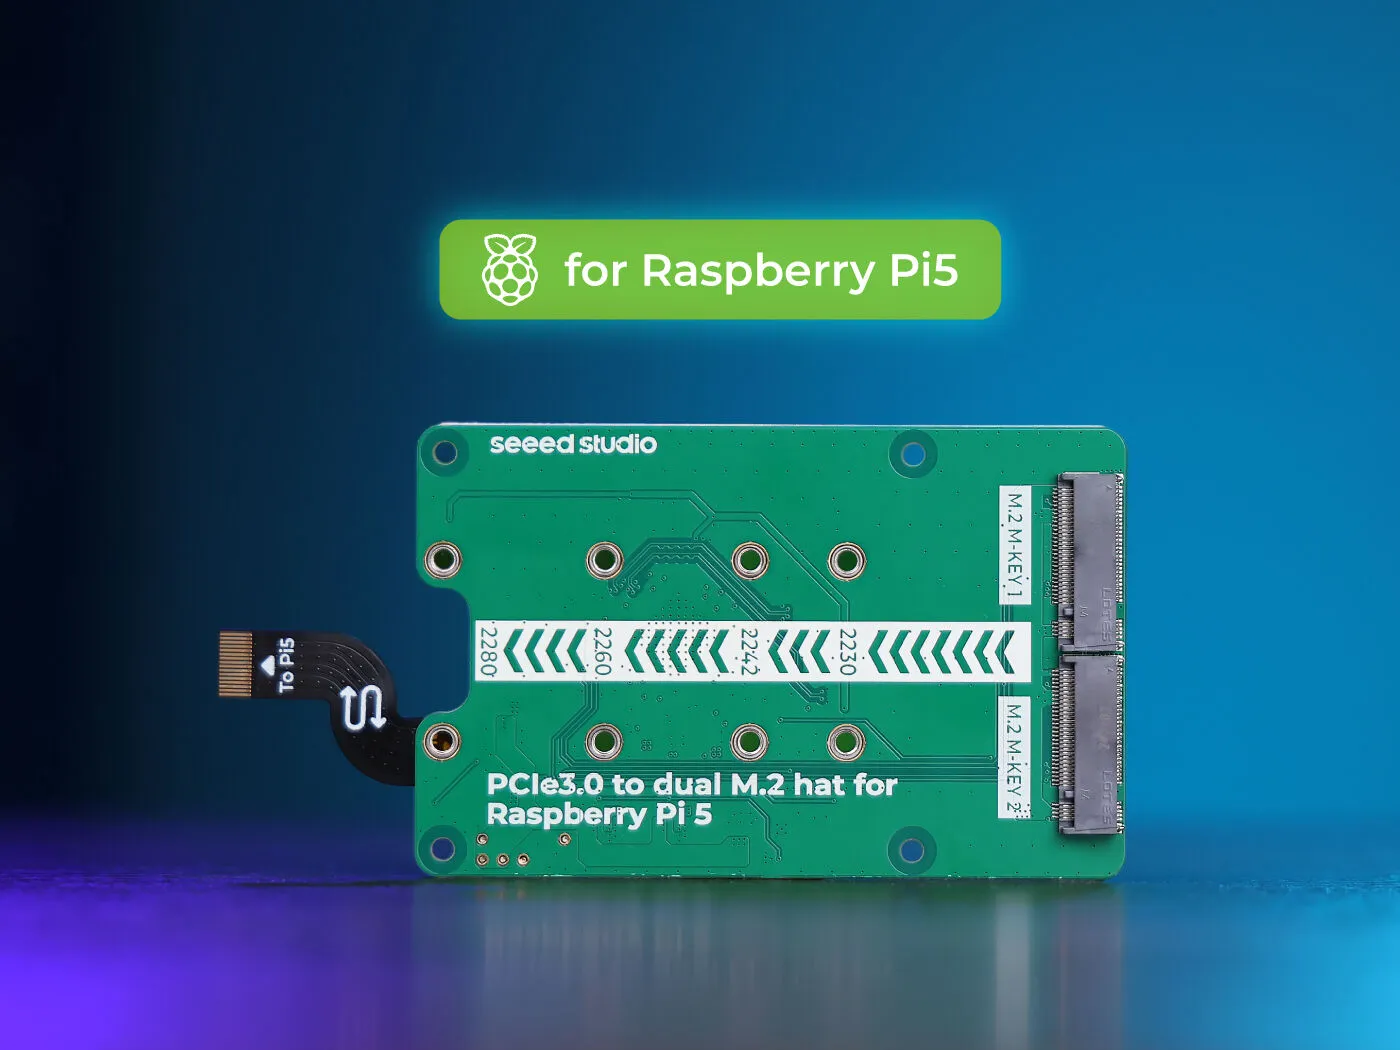
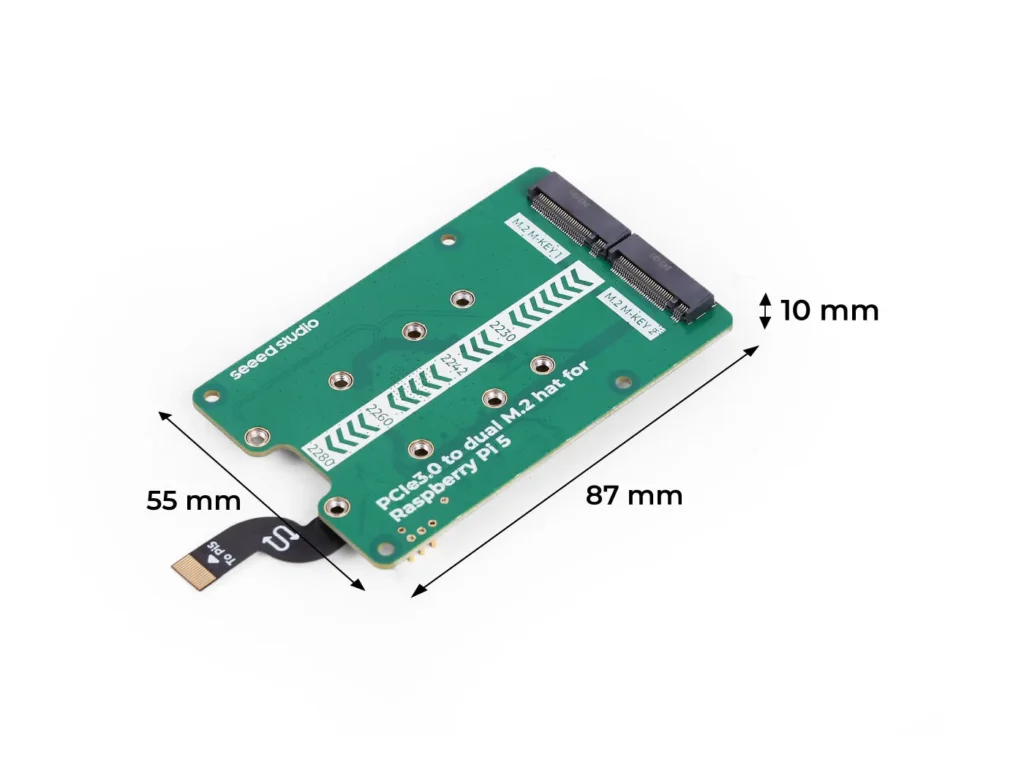
Seeed Studio's PCIe 3.0 Switch to Dual M.2 HAT gives the Raspberry Pi 5 two peripheral slots on one expansion board. It is worth considering for extra NVMe storage, or for combining a supported AI accelerator with an SSD. Its flexibility is the attraction: two slots do not require you to buy two SSDs or configure RAID before the board becomes useful.
What the dual-M.2 board actually connects
The Raspberry Pi 5 exposes a PCIe interface through a ribbon-cable connector. PCIe data does not travel through the 40-pin GPIO header. An M.2 expansion board connects that PCIe interface to compatible peripherals and provides their required power and mounting.
A dual board uses a PCIe switch to connect multiple devices behind the Pi's single upstream lane. The slots can be visible as separate devices, but both still share that upstream connection. Think of adding more destinations to a road, rather than building a separate full-width road for each destination.
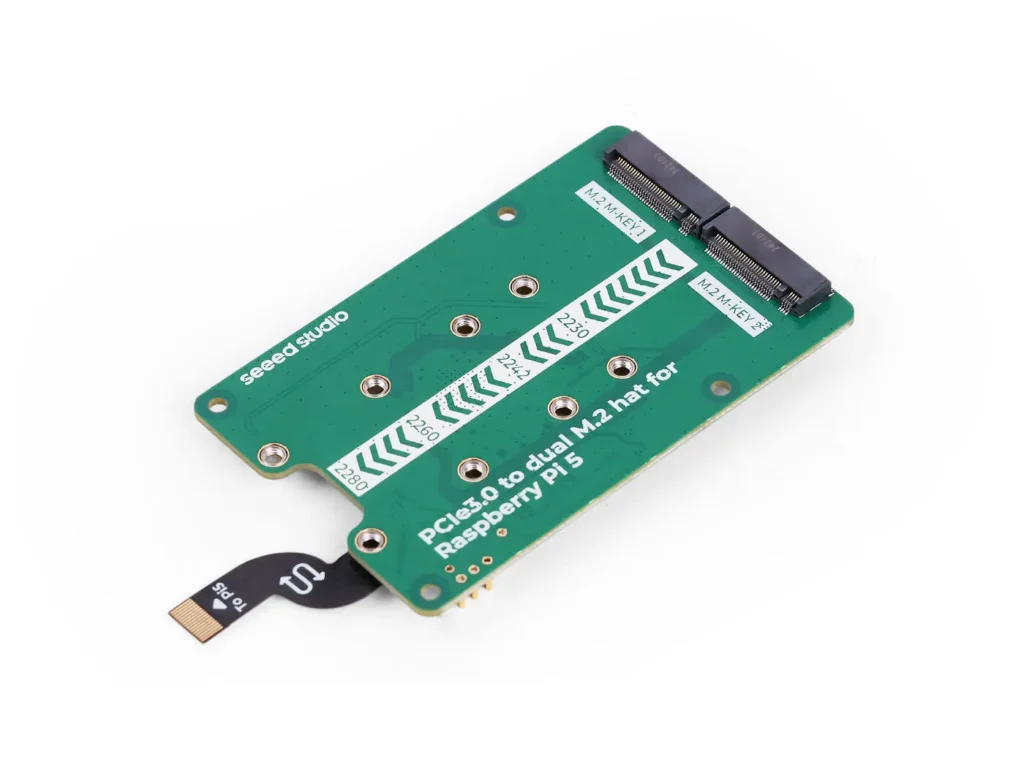
The specific Seeed PCIe 3.0 model discussed here is SKU 103110065 with an ASMedia ASM2806 switch. Its manufacturer datasheet describes a back-mounted design, an S-shaped PCIe cable and pogo-pin power contacts, leaving the 40-pin header available. It should not be confused with Seeed's separate PCIe 2.0 board or a different vendor's dual adapter.
Choose the right M.2 devices
| Check | What matters for this Seeed board |
|---|---|
| Host computer | Raspberry Pi 5 with its external PCIe connector |
| Slots and switch | Two M.2 slots behind the ASM2806 PCIe 3.0 switch |
| Storage | Compatible PCIe NVMe SSDs; SATA M.2 SSDs are not supported |
| Listed module lengths | 2230, 2242, 2260 and 2280 |
| AI modules | Manufacturer-listed Hailo-8/8L B+M-key variants and suitable Coral modules; check exact module and software compatibility |
| Mechanical fit | Back installation with appropriate fixings; the manufacturer says the standard official Pi case is not compatible |
M.2 describes a connector and physical form factor, not one universal storage protocol. A SATA module can look similar to an NVMe SSD without working on this board. An AI module also needs the correct connector key, physical clearance, driver and application support. Do not buy any card labelled “M.2” on the assumption it will fit and function.
The length codes describe board dimensions: a 2280 module is longer than a 2242 module. Check where its screw mounting point, controller and heatsink will sit. Include room for the Pi, cables and accessories; the bare expansion-board dimensions are not the final assembled case dimensions.
Two slots share the bandwidth
Raspberry Pi documents the external interface as PCIe Gen 2 x1 by default, at 5 GT/s. The Pi can be configured for Gen 3 at 8 GT/s, but Raspberry Pi explicitly warns that it is not certified for Gen 3 and that connections may be unstable. A Gen 3-capable switch therefore does not turn that setting into a guaranteed supported speed for the complete installation.
Link signalling rates are not application transfer results. Encoding, protocol overhead, the SSDs and simultaneous workloads all affect useful throughput. Two busy devices do not necessarily divide the bandwidth into equal halves, and a fast SSD's desktop benchmark is not a promise for a Pi behind a switch.
For a media library, sufficient capacity and dependable operation may matter more than the maximum sequential rate. For an AI application, storage traffic and accelerator transfers can compete on the same link. Test the actual mixed workload rather than choosing a board solely from a nominal generation number.
Useful ways to use the two slots
Two SSDs can hold separate operating-system and project volumes, or separate media and backup destinations. A larger second drive can make a database, recording collection or dataset easier to manage. It does not automatically make CPU-bound software faster, and a second disk in the same enclosure still shares the same power supply and host.
A supported SSD-plus-accelerator combination is particularly interesting. The SSD can hold data or recordings while the accelerator runs suitable inference models. An accelerator requires a compatible runtime and prepared model; it is not a general replacement for the CPU, nor does adding storage guarantee that any training workload will run efficiently.
Seeed documents SSD-plus-Hailo operation, and its product page qualifies the listed Hailo support to the appropriate B+M-key modules. Verify the exact application and operating-system support before purchasing. Raspberry Pi's older AI Kit documentation is now reference material because that kit is no longer in production; a current AI HAT is a different product, rather than a removable module to assume fits either slot.
RAID is an optional software decision
The board connects devices; it is not an automatic hardware RAID controller. Linux software can arrange compatible drives into an array if that is your chosen design. RAID 0 combines storage through striping without drive redundancy. A two-drive RAID 1 mirror keeps copies across the members, with usable capacity limited by the smaller member rather than the sum of both.
A mirror can improve tolerance of a drive failure, but it does not guarantee continuous uptime. The host, switch, filesystem, power supply and application can still fail. Deletion and unwanted file changes can affect both copies, so maintain a separate backup and test restoring important files. An SSD and an AI card cannot form a two-drive storage mirror.
Plan the layout before writing to disks. Array creation, imaging and formatting can overwrite existing contents. Identify disks by model, serial number, size and mounted partitions, and back up what matters first. Keep a working boot medium and a recovery plan; generic device numbers are not sufficient evidence that a disk is safe to erase.
Installation and boot need board-specific instructions
Disconnect power before fitting peripherals. Follow Seeed's assembly pictures for the exact board and cable orientation, ensure the contacts seat correctly and use the proper spacers and screws. Its bottom-mounted design and power contacts differ from a conventional top-mounted header board. Do not force a ribbon latch or improvise an additional power feed.
Start with a supported, updated operating system and bootloader, then confirm the switch and intended devices are recognised. Seeed's guide covers PCIe settings, switch compatibility and an overlay fix; those requirements can depend on the software image. Follow its current instructions and keep a copy of the original boot configuration before changing it.
The following read-only checks can help identify the PCIe tree and storage devices. They do not create an array or format a disk; lspci must be available on the installed system.
lspci -tv
lsblk -o NAME,SIZE,MODEL,SERIAL,TYPE,MOUNTPOINTS
Seeing an NVMe device inside Linux and booting from it are separate checks. NVMe boot requires the appropriate bootloader configuration, and devices behind a switch need supported enumeration. Keep the existing SD boot available until a clean reboot from the chosen SSD has been confirmed. Booting an ordinary SSD is not the same as proving a mirrored root filesystem can recover from every failure.
Power, cooling and practical validation
Raspberry Pi recommends its 27 W USB-C supply for Pi 5, but you must still account for the complete workload and the board's power limits. Seeed specifies a maximum 5 V/3 A feed to this board through its documented connector and pogo contacts. That is a board input rating, not a measured consumption figure or permission to attach two arbitrary high-power drives.
Use the SSD and accelerator manufacturers' power requirements and check the assembly under simultaneous activity. If drives disappear or errors occur during transfers, investigate power, contacts, link configuration and cooling rather than assuming RAID will hide the fault. Avoid adding an unsupported second supply to a board without the manufacturer's wiring guidance.
Allow airflow around the Pi, SSD controllers and accelerator. Select cooling hardware that fits the actual clearances; a universal thermal-pad thickness is inappropriate for every drive and enclosure. Compare sustained operation with short bursts, and check logs and device temperatures where supported. Any benchmark should record the exact devices, link settings, workload and whether it writes disposable test data.
Is a dual-M.2 HAT worthwhile?
The Seeed dual-M.2 board is a fantastic addition to consider when a Pi 5 project genuinely needs two compatible PCIe peripherals. More capacity, flexible device combinations and SSD-backed projects can justify it for a small NAS, media server or inference experiment. The costs are the board, chosen modules, power and cooling, as well as additional setup complexity.
A single-drive adapter may be simpler if one SSD already meets the need. A dual board is most compelling when the second slot solves a clear storage or accelerator requirement. Choose dependable compatibility and recoverable data handling over an assumed enterprise-server rating or an advertised speed you cannot use.
Visit the official page/store for the dual M.2 for Raspberry Pi 5