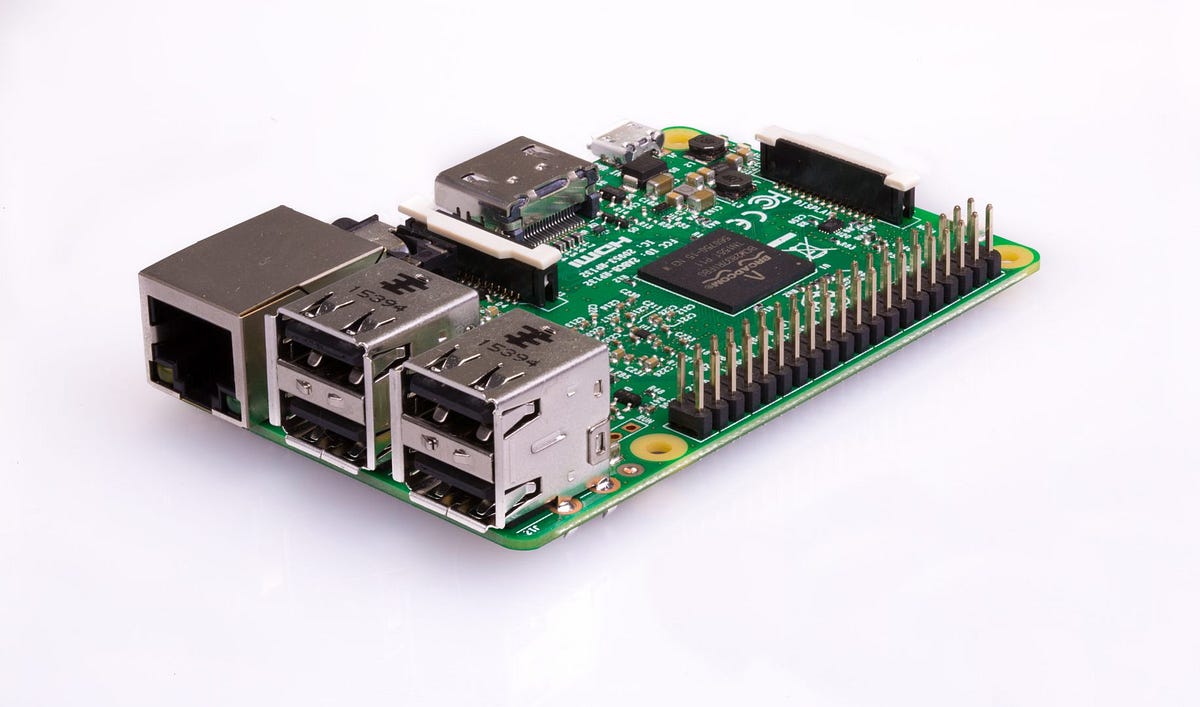
Imagine a world where your movies, TV shows, and music are all accessible from any device in your house, without relying on clunky external hard drives or expensive streaming services. That's the magic of a Raspberry Pi home media server!
In the age of digital media consumption, having a centralized hub for all your favorite movies, music, and photos is essential. While there are numerous options available for setting up a home media server, none quite match the versatility, affordability, and DIY appeal of using a Raspberry Pi. In this guide, we'll explore the pros and cons of using a Raspberry Pi as a media server, why you'd want to do it, and provide detailed instructions on setting it up from scratch.
Why Raspberry Pi?
Pros:
- Cost-effective: A Raspberry Pi can be affordable, particularly if you already own one; include storage, power, cooling and accessories in the comparison, and you can use storage you already have (with some limitations).
- Flexibility: Choose the media server software that suits you, and customize your setup to your needs.
- Privacy: Keep your media collection local and avoid relying on streaming service subscriptions.
- Offline access: Locally stored media can play over a working LAN without internet, subject to the chosen server/client’s authentication and feature requirements. Cloud metadata and remote access still need connectivity.
- Low Power Consumption: It consumes minimal power, reducing energy costs compared to traditional servers.
- Silent Operation: The bare board has no moving parts; a cooling fan or mechanical drive can add noise, ideal for home environments.
- Full Control: You have complete control over your server, including upgrades, modifications, and customization.
- Sustainability: Power consumption depends on the board, drives and workload. Reusing suitable hardware can be attractive, but environmental impact cannot be determined from the device name alone.
Cons:
- Setup effort: Setting up a Raspberry Pi media server requires some technical knowledge.
- Limited processing power: Older Raspberry Pi models might struggle with high-resolution content.
- Storage considerations: You'll need external storage for your media library, which adds to the cost.
- ARM Architecture: Raspberry Pi CPUs are based on ARM architecture, so x86 and x64 applications won’t run natively. Ensure your software supports ARM.
Why You Want This:
- Centralized Media Hub: Streamline your media library by having all your content accessible from one device.
- Access Anywhere, Anytime: With network connectivity, you can access your media remotely, whether at home or on the go.
- Customization: Tailor your media server to your preferences, adding features like remote access, media scraping, and more.
- Learn New Skills: Building and managing a Raspberry Pi media server is a fantastic way to learn about networking, Linux, and server administration.
Turning Your Pi into a Media Mastermind
Here's a step-by-step guide to get your Raspberry Pi media server up and running:
1. Choose Your Weapon: Hardware and Software
- Raspberry Pi: Choose a model and operating system supported by the server software. Pi 4 and Pi 5 have useful network/storage interfaces, but neither guarantees real-time transcoding. Current Jellyfin 10.11 no longer supports 32-bit ARM operating systems.
- MicroSD card: Install your chosen operating system (OS) here. Choose the OS for the role: LibreELEC is a Kodi-focused playback appliance, while Raspberry Pi OS Lite can host server software. OpenMediaVault adds NAS management and has its own installation requirements.
- Storage: Connect an external hard drive or SSD via USB for your media library.
- Media Server Software: Plex, Emby and Jellyfin are media-server options with their own supported platforms and client apps. Kodi is chiefly a playback and media-library application, with optional UPnP sharing; it is not interchangeable with a dedicated remote streaming server.
2. Flashing the OS and Initial Setup
Download the Raspberry Pi Imager tool and your chosen OS image. Flash the image onto your microSD card using the Imager. Boot up your Raspberry Pi with the microSD card inserted, following the on-screen instructions for the initial setup of your OS.
3. Installing and Configuring Media Server Software
The installation process will vary depending on your chosen media server software. Consult the official documentation for specific instructions. Typically, it involves enabling SSH access on your Raspberry Pi and using command-line tools for installation.
4. Setting Up Your Media Library
Most media server software allows you to add media folders by browsing your network. Navigate to the storage location of your media files on the Raspberry Pi and add them to your library. The software will automatically scrape information about your movies, TV shows, and music from online databases.
5. Accessing Your Media Empire
With your media library set up, you can access it from any device that supports your chosen media server software. Most media servers offer client apps for smartphones, tablets, smart TVs, game consoles, and even web browsers.
6. Enable Remote Access: If desired, configure your router to allow remote access to your media server. This may involve port forwarding and setting up dynamic DNS to access your server from outside your home network.
Refer to our guides on Dynamic DNS and Port Forwarding for more information
Troubleshooting Common Issues:
- Connectivity Problems: Ensure your Raspberry Pi and devices are on the same network. Check for firewall restrictions that might block access to the media server.
- Playback Issues: If your device struggles to play certain media formats, check whether the actual player supports the video, audio, container and subtitles. Preparing compatible files in advance on suitable hardware may be preferable to attempting live conversion on the Pi.
- Media Library Issues: Double-check that your media files are named correctly and organized in a way that your media server software can understand.
- Buffering or Playback Issues: Ensure your network connection is stable and capable of handling the streaming bitrate. Check the playback mode before lowering quality: a lower requested bitrate can trigger transcoding and increase CPU load.
- Incompatibility with File Formats: Use media transcoding software or ensure your media files are in a compatible format for your chosen media server software.
- Overheating: Raspberry Pi may overheat under heavy load. Ensure proper ventilation and consider adding heatsinks or a fan to dissipate heat.
Media server specific tips:
- For Kodi: Enable UPnP in settings.
- For Plex: Organize your media library and ensure proper file formats.
- For ReadyMedia: Configure shared folders and scan for media files.
- For Mopidy: Install extensions and configure music sources.
- For HiFiBerryOS: Set up audio output and configure music services.
- For OpenMediaVault: Follow the setup wizard and configure shared folders.
Conclusion
By following these steps and being aware of potential challenges, you can transform your Raspberry Pi into a powerful home media server, providing endless entertainment possibilities for you and your family. Embrace the DIY spirit, unleash your creativity, and enjoy the convenience of having your media library at your fingertips.
Direct Play, remuxing and transcoding
Direct Play sends a compatible file without converting it, so the client handles decoding. Remuxing changes the container while keeping media streams; direct streaming may convert audio while leaving video intact. Video transcoding decodes and re-encodes video, which is much more demanding. Jellyfin’s dashboard reports the active playback type.
A codec label such as HEVC is only one part of compatibility. Bit depth, profile, HDR handling, audio passthrough and subtitles can also affect the result. Subtitles that must be burned into frames can trigger video conversion. Test a representative file in the exact client app, including the subtitle and audio track you normally use.
Jellyfin has deprecated Raspberry Pi hardware acceleration, and its documentation notes that Pi 5 lacks hardware encoders. Do not buy a Pi on a promise of a specific number of 4K streams, a fixed CPU percentage or guaranteed 1080p software transcoding. Direct Play may be workable for an existing Pi and compatible clients, while a server with supported acceleration is more suitable when live conversion is required. Our dedicated Jellyfin and Plex articles provide further context.
Make storage predictable
The server’s service account must be able to traverse directories and read media files. Changing only the empty mount directory’s permissions does not guarantee access after a filesystem is mounted over it. Check the mounted filesystem’s ownership and permissions, and grant only the access the service needs.
For a Linux host managed directly, identify the actual filesystem and its UUID before configuring a persistent mount:
lsblk -f
sudo blkid
Back up /etc/fstab before editing it. A filesystem UUID and PARTUUID are different identifiers and need their matching prefixes. Use the real value from your own system and options appropriate to its filesystem. An ext4 example is not a recipe for NTFS or exFAT. On systemd hosts, reload systemd after changing fstab, then test the intended mount and verify it with findmnt /mnt/media before rebooting.
The nofail option can let a machine boot when a disk is missing; it does not make storage fault-tolerant or ensure the media service waits for it. Confirm the drive is mounted before a library scan, and avoid writing new data into the bare mount directory when the disk is absent. If OpenMediaVault manages the storage, use its documented storage workflow rather than editing a managed mount independently.
Check power, network and recovery
Drive startup demand matters. Raspberry Pi 4 has a shared 1.2 A USB peripheral budget. Pi 5 provides 1.6 A when it detects a compatible 5 V/5 A supply, otherwise the normal limit is 600 mA; its USB and fan budget is shared. Compare the actual attached devices’ requirements and use a suitably powered hub or drive enclosure when needed. One drive is not automatically safe merely because there is only one.
Use Ethernet when practical and test the intended playback locations. Peak bitrate can exceed a file’s average, and Wi-Fi or remote upload limits can bottleneck a Direct Play session even when the server CPU is idle. Remote access also requires appropriate authentication and network policy; DDNS cannot itself overcome carrier-grade NAT. Verify local playback first, then follow the server’s documented remote-access method.
Keep the media files and server configuration backed up. Metadata can often be downloaded again, but playlists, watched status, custom artwork and your own recordings may be harder to recreate. Test a restart with storage connected, inspect a sample of the library and confirm a backup can recover configuration. These checks retain the DIY appeal while making the result useful beyond the first successful playback.