If you are anything like me, there are constantly a million and one things on your to-do list, and another couple of hundred on the backlog. Well, maybe not THAT many, but it sure does feel like there are so many things that need to get done, and one of the most stressful ones is to not forget anything that is on this imaginary list. But what if the list was not imaginary? What if there was software out there that can help organise our busy lives? Luckily there is, and it is called Vikunja. "But isn't Vikunja a paid service?" I hear you say. Vikunja offers paid managed hosting, but its core task manager can also be self-hosted without a software subscription. Your hardware, electricity, backups and maintenance still have costs. Does that sound like a plan? Well, let's dive in and take a closer look at Vikunja.
What is Vikunja?
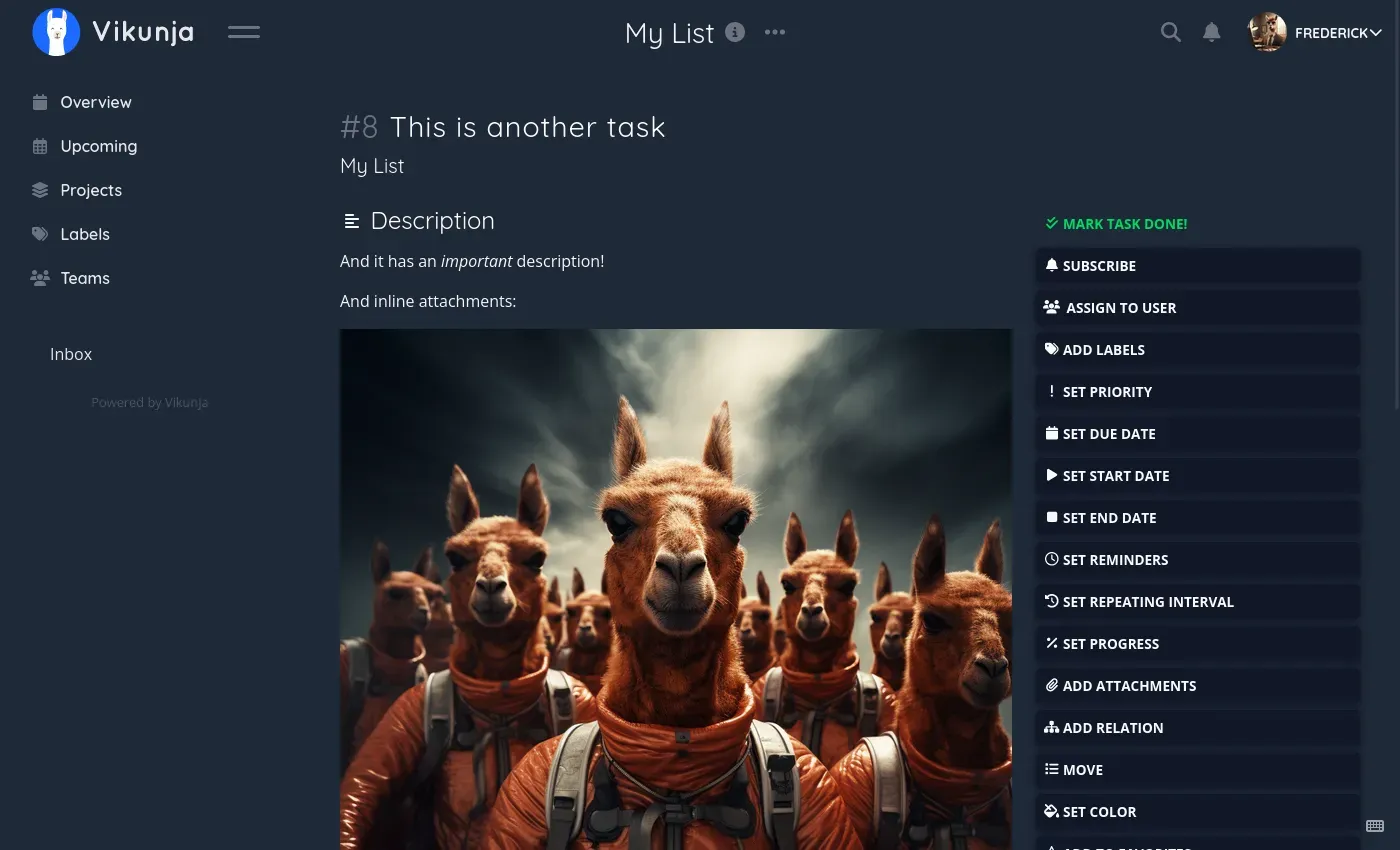
Vikunja is an open-source, self-hostable task management tool designed to help users organize tasks, projects, and teams efficiently. It serves as an alternative to proprietary solutions like Trello, Asana, or Microsoft To Do. With Vikunja, you can create lists, set deadlines, assign tasks, and even collaborate with others—all while having full control over your data. (Yes, you can "collaborate" with your significant other on the shopping list as well...)
How Does Vikunja Work?
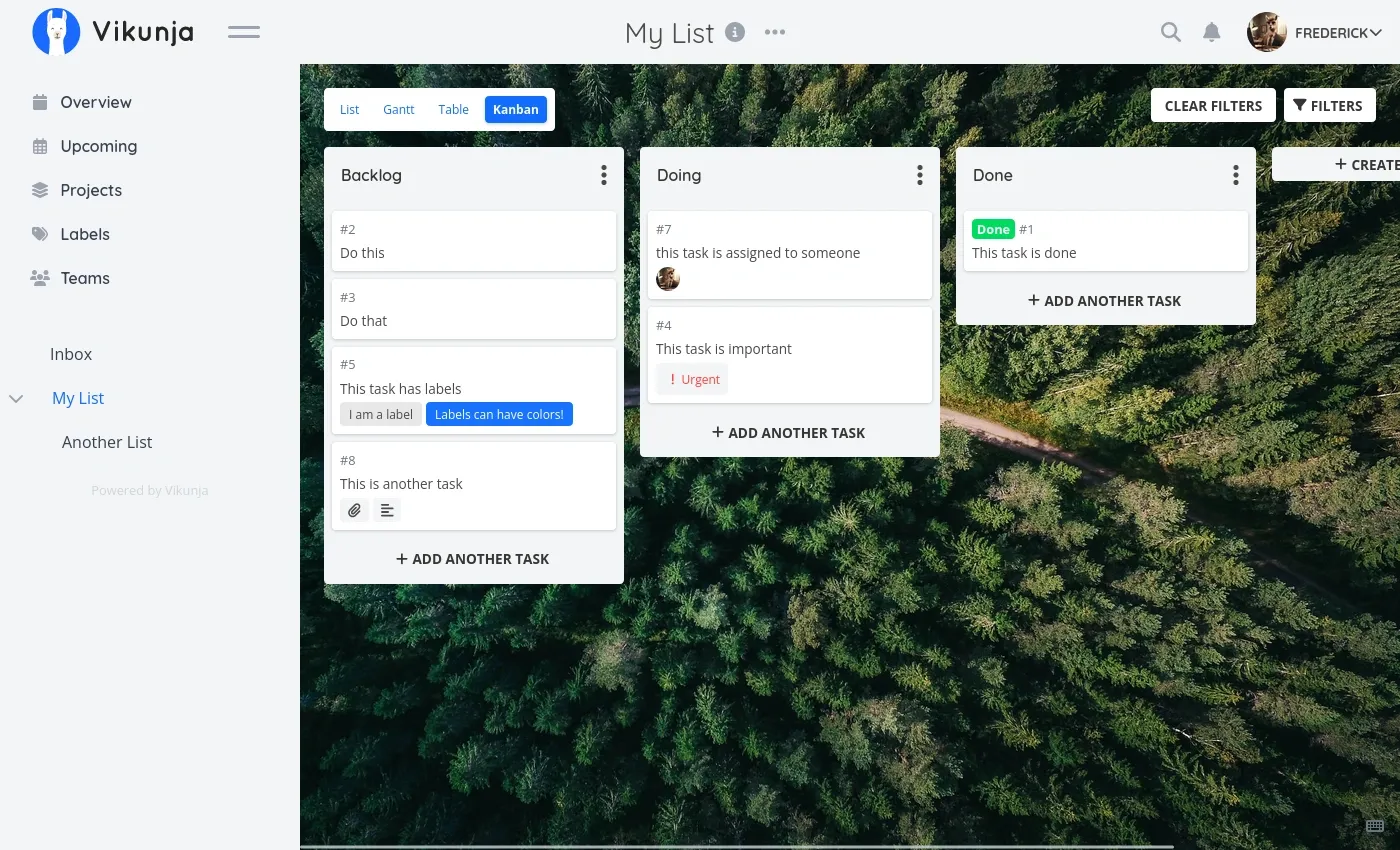
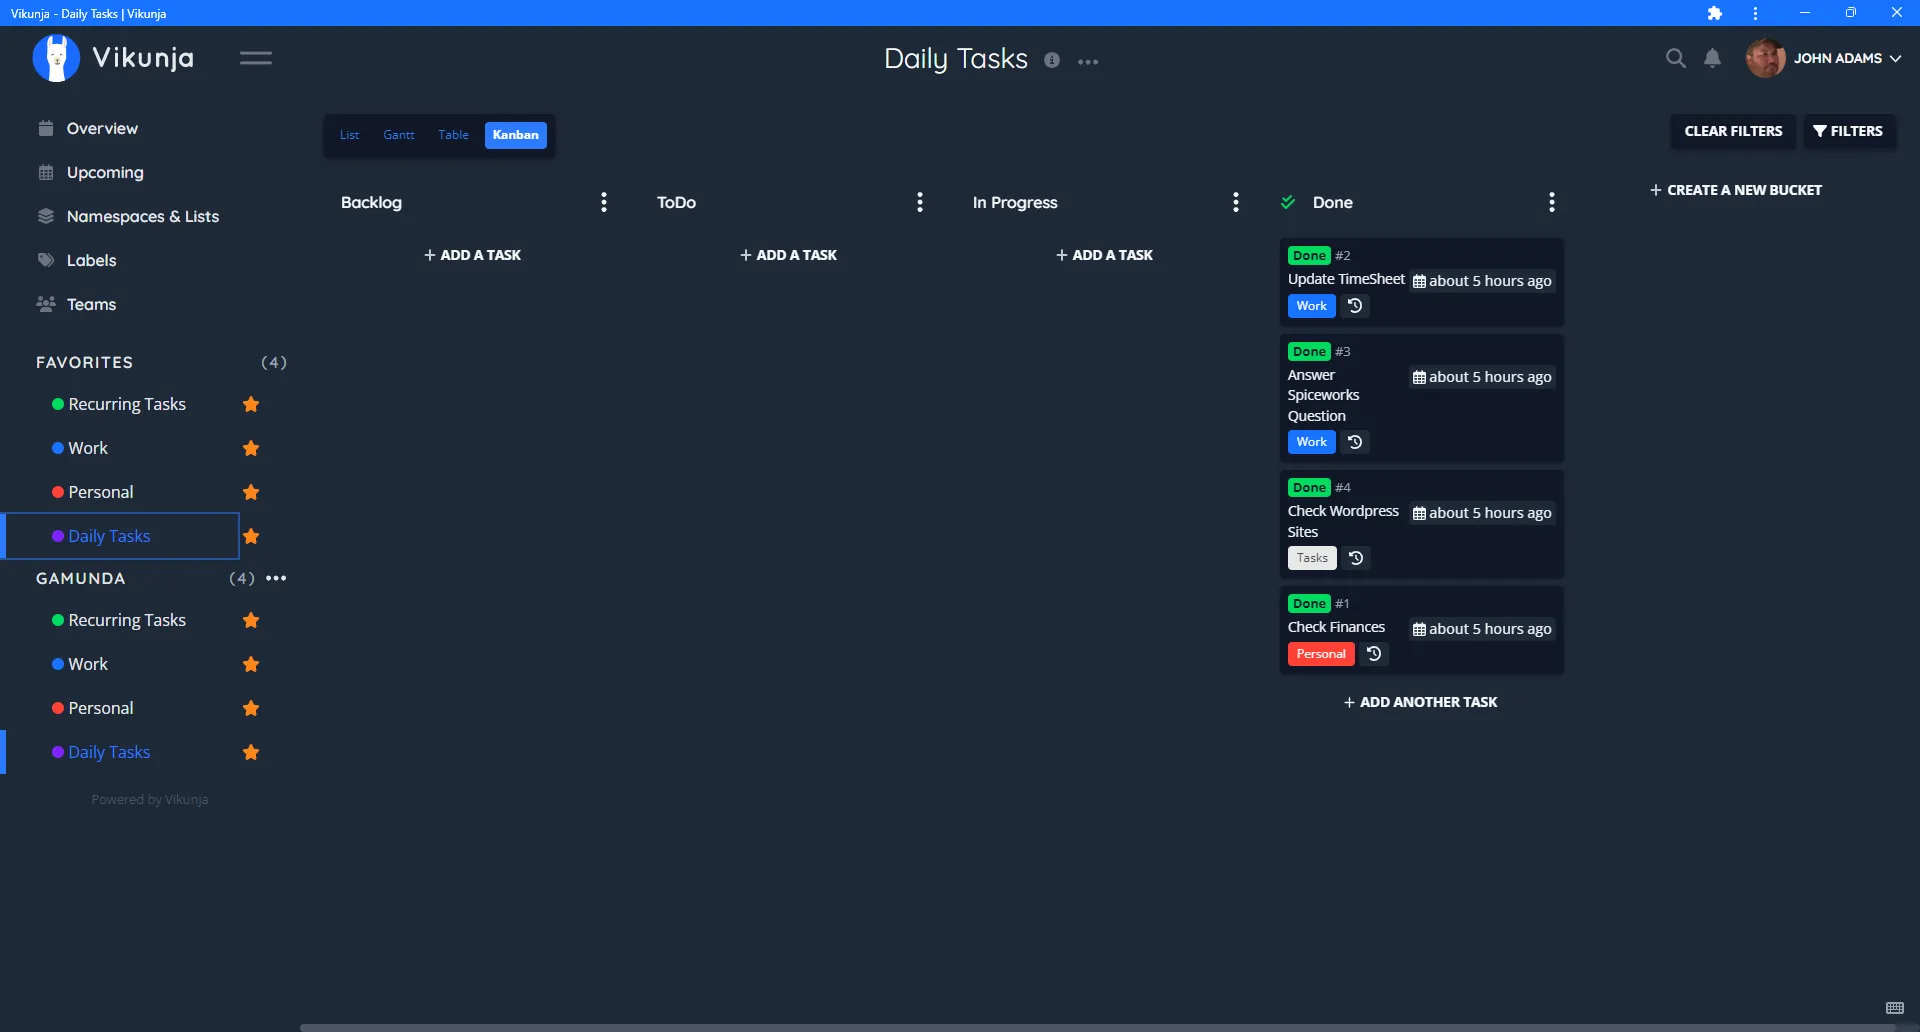
Vikunja uses a hierarchical structure. Tasks belong to projects, and projects can be nested into a hierarchy. List, Kanban, Gantt and table views display project tasks in different ways. This allows you to break down large goals into smaller, manageable steps. Think of it like folders within folders, keeping everything neatly organized.
Vikunja offers different deployment models:
- Cloud: You can use Vikunja's hosted service (more on this later).
- Self-Hosted: You install Vikunja on your own server, giving you complete control. This is what we'll focus on for home use.
Vikunja operates using a backend and a frontend:
- Frontend: The web-based interface that allows you to create and manage tasks easily.
- Backend: The server component that stores and processes your data. This can be hosted on Vikunja's cloud service or self-hosted. The current API and frontend are bundled into a single deployable binary or container, so a basic installation does not need separate frontend and backend images.
Vikunja Cloud: What You're Paying For
Managed hosting pays for the infrastructure and the work of operating the service. Sharing projects is also possible when self-hosting; collaboration itself does not require buying cloud hosting. For someone who would rather pay than maintain a server, I still think the subscription is well worth considering. Check the current plan, support and backup arrangements against your needs.
Vikunja Pro is a separate offering for self-hosted instances. The core AGPL-licensed task manager remains usable without Pro. Its documentation describes optional instance administration, time tracking and audit features requiring an active Pro licence, and the Pro product page currently labels the offering a private beta. Do not assume every feature advertised across the website is included in a free installation or already generally available.
What You Need to Host Vikunja at Home
A spare Linux computer or suitable single-board computer can be a useful home for Vikunja, provided its architecture is supported by your chosen image. It needs to be running whenever you want access. We recommend Debian or Ubuntu Server as practical starting points; Raspberry Pi OS can also work with the appropriate architecture and Docker support.
Docker is my preferred straightforward deployment route. Install Docker Engine and the current Compose plugin using the instructions for your distribution. Check docker compose version before continuing. Avoid mixing obsolete standalone Compose installation commands with current plugin usage. On Windows, start with https://www.docker.com/ and its Docker Desktop documentation; the Linux ownership commands below are intended for a Linux Docker host.
A Small Local Docker Installation
This example deliberately uses SQLite and one container for a personal trial. Vikunja recommends MySQL or PostgreSQL for more than a handful of users; choose from its official examples when your workload grows. SQLite is a supported backend, not a promise that every workload below an arbitrary user count will perform identically.
Prepare Storage and Configuration
Create a dedicated project directory and the two writable folders. The official image runs as user ID 1000 by default; its documentation does not specify a matching group as a requirement. Confirm that ownership is appropriate for your host rather than granting broad write access.
mkdir -p ~/vikunja/files ~/vikunja/db
cd ~/vikunja
sudo chown 1000 ./files ./db
openssl rand -hex 32
Store the generated value in a private .env file as VIKUNJA_SECRET= followed by that value. Also set VIKUNJA_IMAGE= to the full official image name and a stable release tag you have selected, for example from the installation documentation. Keep the secret out of public repositories. The required-variable expressions below prevent Compose from silently starting with missing values.
Save this as compose.yml. It follows the current official SQLite paths, including a persistent database mount:
services:
  vikunja:
    image: "${VIKUNJA_IMAGE:?Set a tested stable vikunja/vikunja release tag}"
    environment:
      VIKUNJA_SERVICE_PUBLICURL: "http://localhost:3456/"
      VIKUNJA_SERVICE_SECRET: "${VIKUNJA_SECRET:?Set a private random secret}"
      VIKUNJA_DATABASE_TYPE: sqlite
      VIKUNJA_DATABASE_PATH: /db/vikunja.db
    ports:
      - "127.0.0.1:3456:3456"
    volumes:
      - ./files:/app/vikunja/files
      - ./db:/db
    restart: unless-stopped
VIKUNJA_SERVICE_SECRET is the current configuration name; the older VIKUNJA_SERVICE_JWTSECRET is documented as deprecated. A persistent secret avoids replacing the signing secret on every restart. The public URL must match the address the browser actually uses and include the appropriate scheme and port. Here, both the URL and port binding are for browsing on the Docker host itself.
Start and Test
docker compose config --quiet
docker compose up -d
docker compose ps
docker compose logs --tail=80 vikunja
Open http://localhost:3456/ on that host. Register a normal user account, create a project, add a task and attach a small non-sensitive file. Restart the container and confirm that the task and attachment remain. This checks the two storage paths before you entrust them with a household's task history.
The first registered account is not automatically an instance administrator. Current Pro documentation describes explicit CLI promotion and licence requirements for the admin panel. Project ownership and sharing permissions are separate from instance administration. If you do not want additional self-registration, configure VIKUNJA_SERVICE_ENABLEREGISTRATION after establishing the users you need.
Access, Backups and Updates
The localhost binding is a starting point, not access for other computers. For wider use, configure a deliberate LAN or reverse-proxy path and change the public URL to that actual address. A proxy running in another container cannot reach the host's loopback binding simply by using its own localhost; use the documented networking arrangement. Nginx Proxy Manager can be a convenient choice, but it still needs correct networking, HTTPS and authentication.
If you choose direct remote access, understand port forwarding and Dynamic DNS. Dynamic DNS updates a name; it does not provide encryption or authentication, and carrier-grade NAT may prevent inbound forwarding. A private VPN is another access approach. Keep a DHCP reservation or reliable local DNS entry for the host, and test access from the intended devices before changing router rules.
Back up the database and attachment files, plus your Compose configuration and private settings. Stop writes while taking a file-copy backup of SQLite, or use a supported database backup method. Vikunja's CLI also provides dump and restore operations; check that the archive is retained outside the container and test restoration in a separate environment. A volume preserves data during container replacement but is not an independent backup.
For updates, read release notes, preserve a recoverable backup, change the pinned image tag and then pull and recreate the service. Database migrations may mean that merely switching back to an older image is insufficient. Validate login, existing tasks and attachments after an update, and retain the older backup until you are satisfied.
Views and Quick Add Magic
List view suits quick capture; Kanban helps see task status; Gantt displays date-based planning; table view suits comparing task fields. These are views of tasks, not four copies of the work. Avoid assuming that displaying related tasks on a timeline automatically reschedules every dependent task.
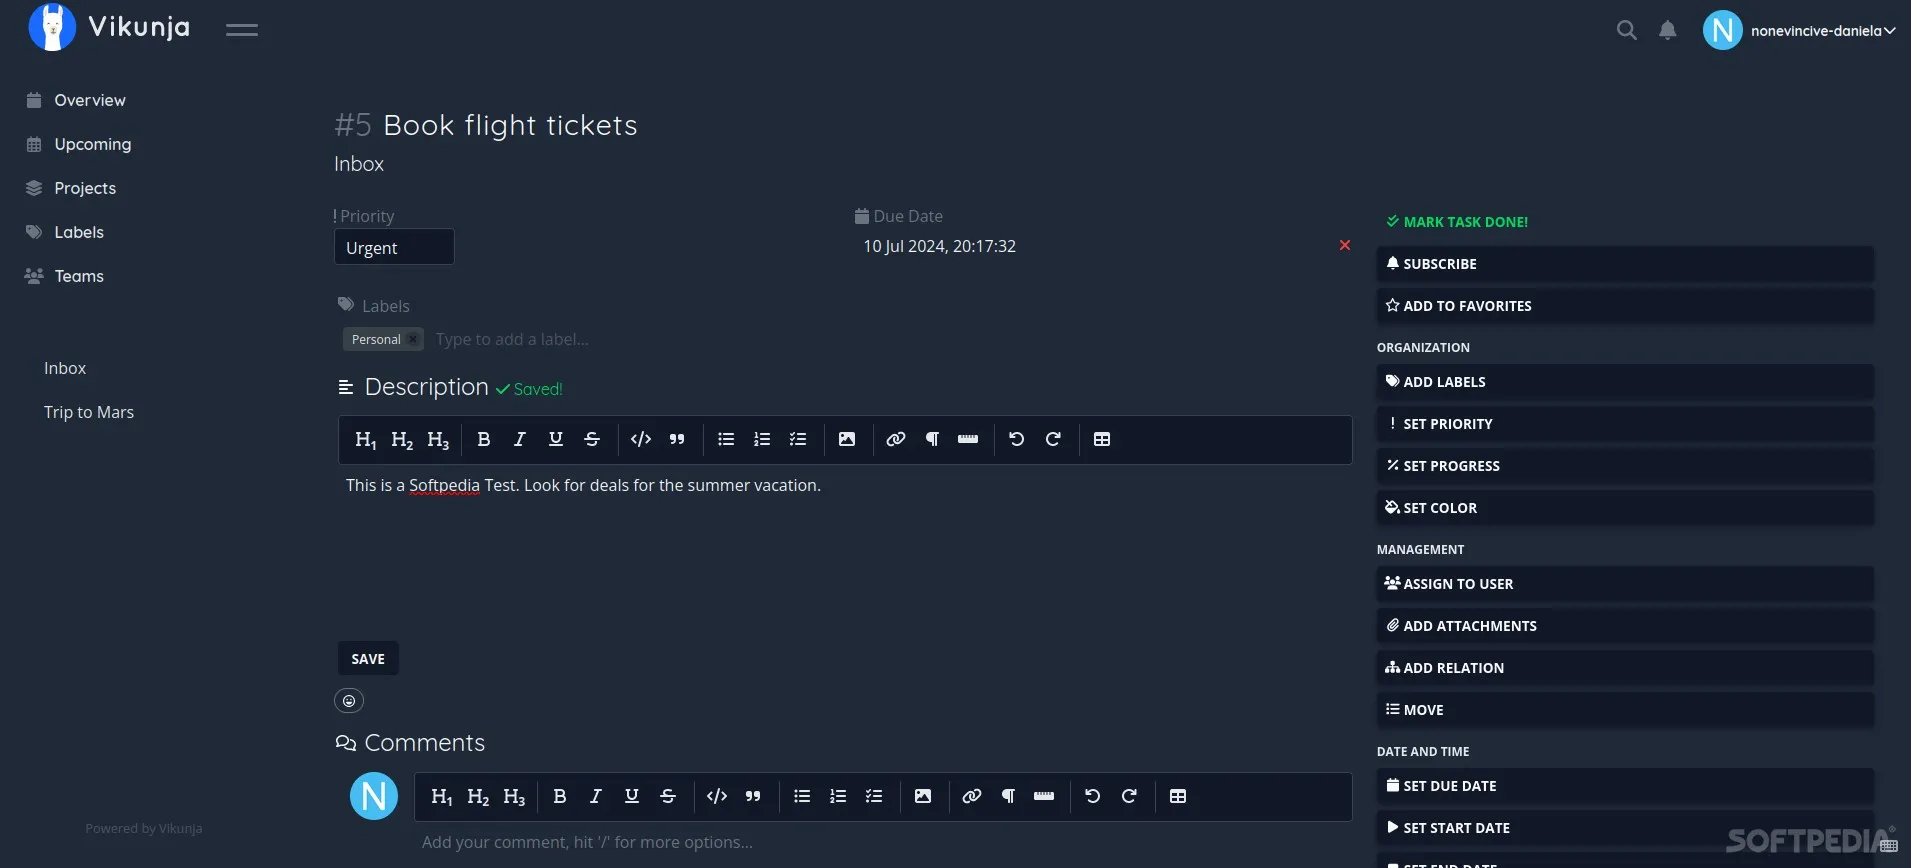
In the default Quick Add Magic mode, *homelab adds a label, @alice selects an assignee and +Infra selects an existing project. The official guide documents !1 through !5 for priorities and examples such as tomorrow at 5pm and every week. Shortcuts differ in Todoist mode. Check the parsed result and your timezone before relying on a reminder; quote the whole title when you want date-like words treated literally.
For a shopping list, keep tasks short and share the project with the appropriate household members. For a homelab project, give each task a clear outcome, owner and useful due date. Start with a small set of labels and views that make work easier to find, rather than recreating every possible feature on day one.
Conclusion
Vikunja is a fantastic tool for organising tasks and projects, including that shared shopping list. Cloud hosting offers convenience, while a free core installation gives you control over where the data lives. With appropriate storage, access rules and backups, a spare computer can become a useful task management server. Start with a small project and build a routine that helps you remember what matters.
See the official Docker examples, backup guidance and Quick Add Magic guide.