Raspberry Pi Connect provides browser access to a Raspberry Pi's existing desktop or a remote shell. Introduced in May 2024 by Raspberry Pi, it is useful for checking projects and managing a device when its keyboard or screen is inconvenient to reach. The Pi must already be powered, online, running a supported system and linked to your account; Connect cannot repair a device that has not booted or lost its network connection.
How Raspberry Pi Connect works
You link the Pi to your Raspberry Pi ID and then open the Connect dashboard from another device. Connect's service coordinates a WebRTC connection between the browser and the Pi. It normally attempts a direct connection and can use a TURN relay when the network prevents that path.
The publisher documents end-to-end DTLS encryption for screen sharing and remote-shell sessions, including input and clipboard data. A relay forwards encrypted session data; it does not receive the keys needed to decrypt it. Account, device and connection metadata are a separate matter, so encryption does not mean that the service knows nothing about your devices or connections.
This avoids configuring an inbound SSH or VNC port for this particular service. It does not bypass every restrictive firewall or replace all network-management tools. Both sides still need the necessary outbound connectivity, a compatible browser and an available Connect service.
Choose desktop sharing or shell access
Current Connect documentation requires Raspberry Pi OS Bookworm or later. The original launch had narrower screen-sharing requirements, but later releases added remote shell support across Raspberry Pi models, including older devices and 32-bit systems. Do not apply the original launch's 64-bit-only assumption to every current remote-shell installation.
| Installation | What it provides | Important condition |
|---|---|---|
rpi-connect on Raspberry Pi OS Desktop/Full | Screen sharing and remote shell | Screen sharing requires a supported Wayland compositor and an active graphical session |
rpi-connect-lite on Raspberry Pi OS Lite | Remote shell without desktop dependencies | There is no desktop-sharing mode in Connect Lite |
Current OS images include the appropriate package, although the service must be enabled before use. Check what is installed before adding it again. Screen sharing does not support the X window server, and a Wayland label alone is not enough if the desktop's compositor is unsupported. The normal Raspberry Pi desktop with labwc is a useful supported starting point.
Install and link your Pi
Start from a local terminal or another established administration connection on the Pi. Keep a recovery route available while updating packages. A full OS upgrade may update Connect and disconnect a current Connect session; do not run it from an unprotected Connect shell and assume that the terminal will remain attached.
Refresh package information and review the proposed upgrades before accepting them:
sudo apt update
sudo apt full-upgrade
If Connect is not already installed, choose the package appropriate to your system. For a supported desktop:
sudo apt install rpi-connectFor a shell-only Raspberry Pi OS Lite installation, use this alternative instead:
sudo apt install rpi-connect-liteReboot when the installed updates require it, using sudo reboot, then reconnect after the Pi has started. Run Connect commands as the ordinary Linux user who should own this connection, rather than using sudo to create a root-owned session.
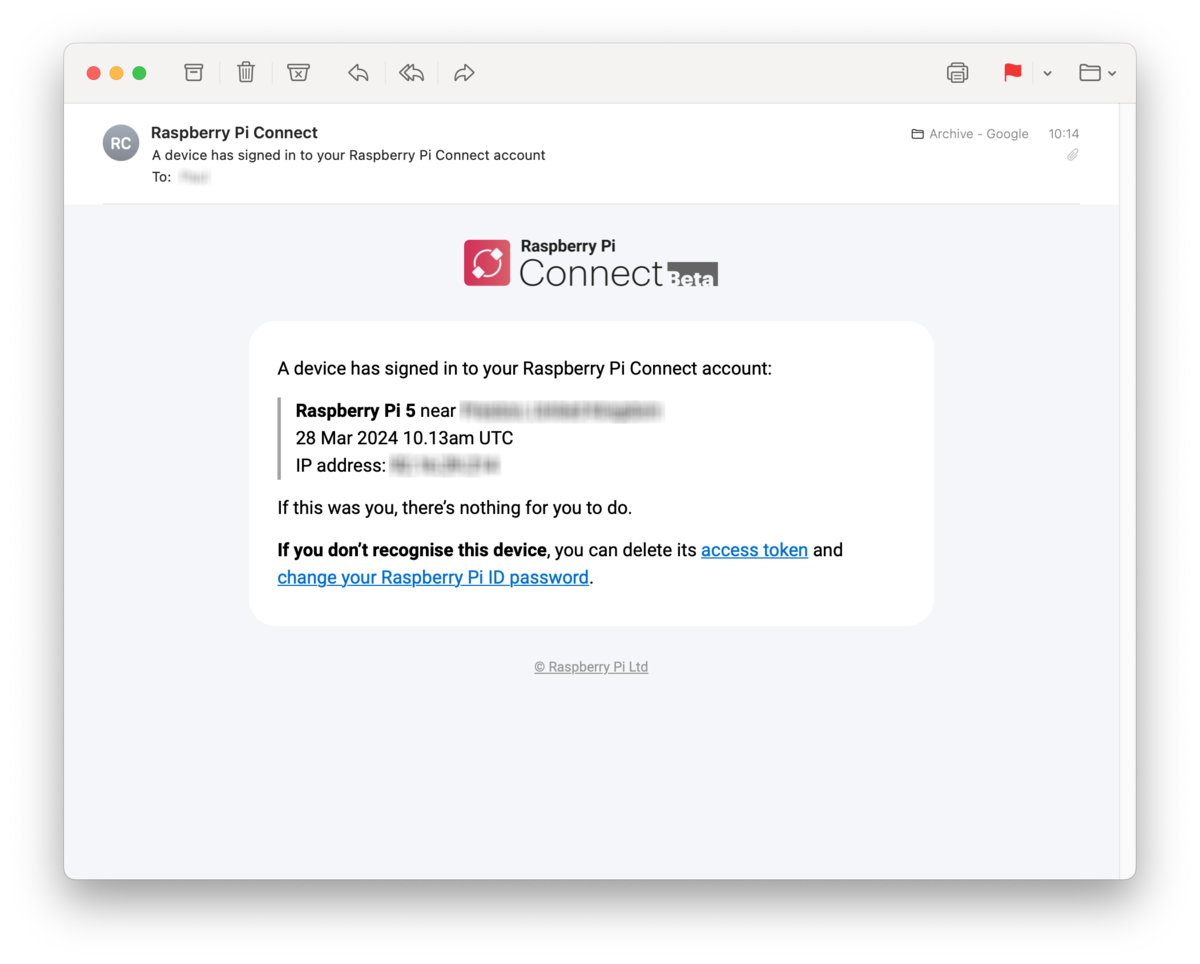
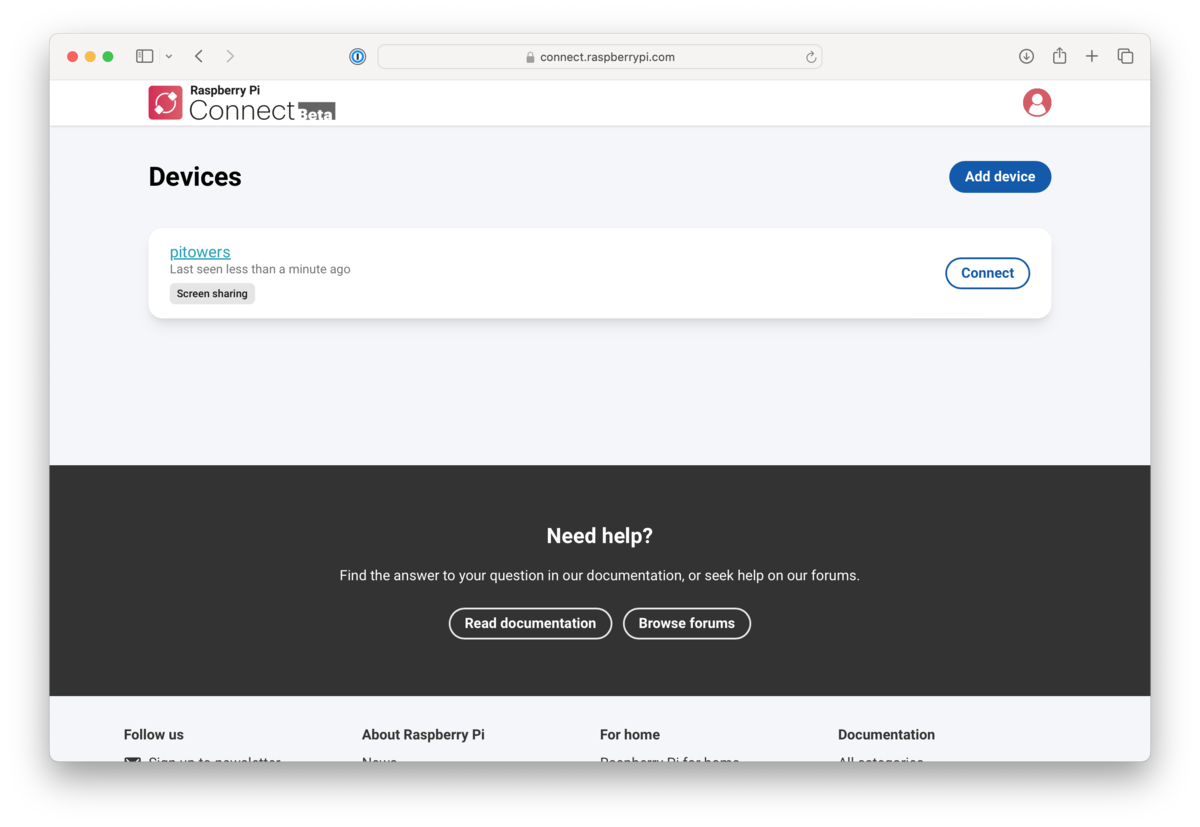
Create or sign in to your Raspberry Pi ID at connect.raspberrypi.com. The personal account is free; organisation accounts are a separate paid offering. On the desktop, select Turn On Raspberry Pi Connect from its tray icon and follow the linking prompts. The original sign-in email and device-list images below illustrate the process; current layouts may differ.
The command-line route also works when you have no local browser. Turn on the service, then request the verification link:
rpi-connect on
rpi-connect signin
Open the displayed verification URL on another trusted device if necessary, sign in and complete the device-naming/linking prompts. The command outputs a link; it does not require or guarantee opening a browser on the Pi. Treat that temporary URL as private. Check that you have linked the intended Pi and user account.
Open and test a session
- Sign in to the dashboard from your computer or phone and locate the Pi on the Devices tab.
- Select Connect via, then Screen sharing or Remote shell, depending on the available badge and your installation.
- For a shell test, use a harmless command such as
whoamiorhostnameand check that it identifies the expected user and machine. Connect's browser shell is not an SSH session to a newly exposed SSH port. - For screen sharing, confirm that the expected desktop is already running and that keyboard or mouse input reaches it. The browser's toolbar helps with keys intercepted by the local browser.
- End the shell with
exitor close it; use Disconnect for screen sharing. Repeat from an external network if off-site access is the goal.
Use the status and diagnostic commands when the device is linked but a session is unavailable:
rpi-connect status
rpi-connect doctor
Status distinguishes sign-in from enabled remote services. Doctor checks requirements and connectivity, including the compositor and signalling/STUN/TURN paths. Fix the reported failure rather than reinstalling the OS or forwarding random inbound ports. On a managed network, ask its administrator to allow the documented Connect destinations and protocols.
Keep shell access available after reboot
Connect runs as a user-level service. On an unattended Lite system, signing out or rebooting can end the user session on which it depends. From that same ordinary account, enable user lingering if you want the shell service available without another login:
loginctl enable-lingerTest a planned reboot while you still have physical access or a working backup administration route. Confirm that the device returns online and accepts a new shell session. Lingering does not create a graphical desktop. For screen sharing after boot, the Pi still needs an active supported desktop session; the publisher documents Desktop Autologin as one way to start it automatically. Consider access to the physical device when deciding whether autologin is appropriate.
Each remote shell opens a new session. If a long task must survive a disconnection, use a properly configured session tool such as tmux or screen. Connect's documentation specifically cautions that upgrading its own packages disconnects current sessions. A new browser window cannot recover a command that depended on a terminated shell.
Account security and access limits
Protect the Raspberry Pi ID with a strong password and two-factor authentication. Review new-device notification emails. For an unfamiliar device, change the account password and remove that device from the dashboard. Uninstalling the package alone does not fully remove the device's association with the account.
You can enable or disable shell and screen-sharing access separately. Keep another working route before disabling both during a remote session. Moving an SD card to another Pi also affects sign-in because Connect links communication to device identity. After hardware or account changes, verify the device list and connection again.
Connect is a convenient way to reach a Pi's desktop or terminal from a supported browser. It is not a general VPN carrying every NAS or homelab service, and it is not a backup of the Pi's files. Choose it for the access it provides, keep important data backed up and prove the unattended behaviour your project needs.
Follow the official Raspberry Pi Connect documentation for current menus, platform requirements and network diagnostics.