Now that we have quite a few services up and running via our Build your own Homelab series, we are going to need more ways of knowing when something goes wrong. We have Prometheus monitoring some nodes and we have Grafana that gives us a visual interface to monitor our probes. We will also be adding a Uptime Kuma service soon where we will be able to monitor our services. But monitoring is one thing if we aren't notified that there is an issue. So today we are going to add our own notifying service called ntfy (pronounced notify). (Read the official ntfy documentation)
Step 1: Get the install command
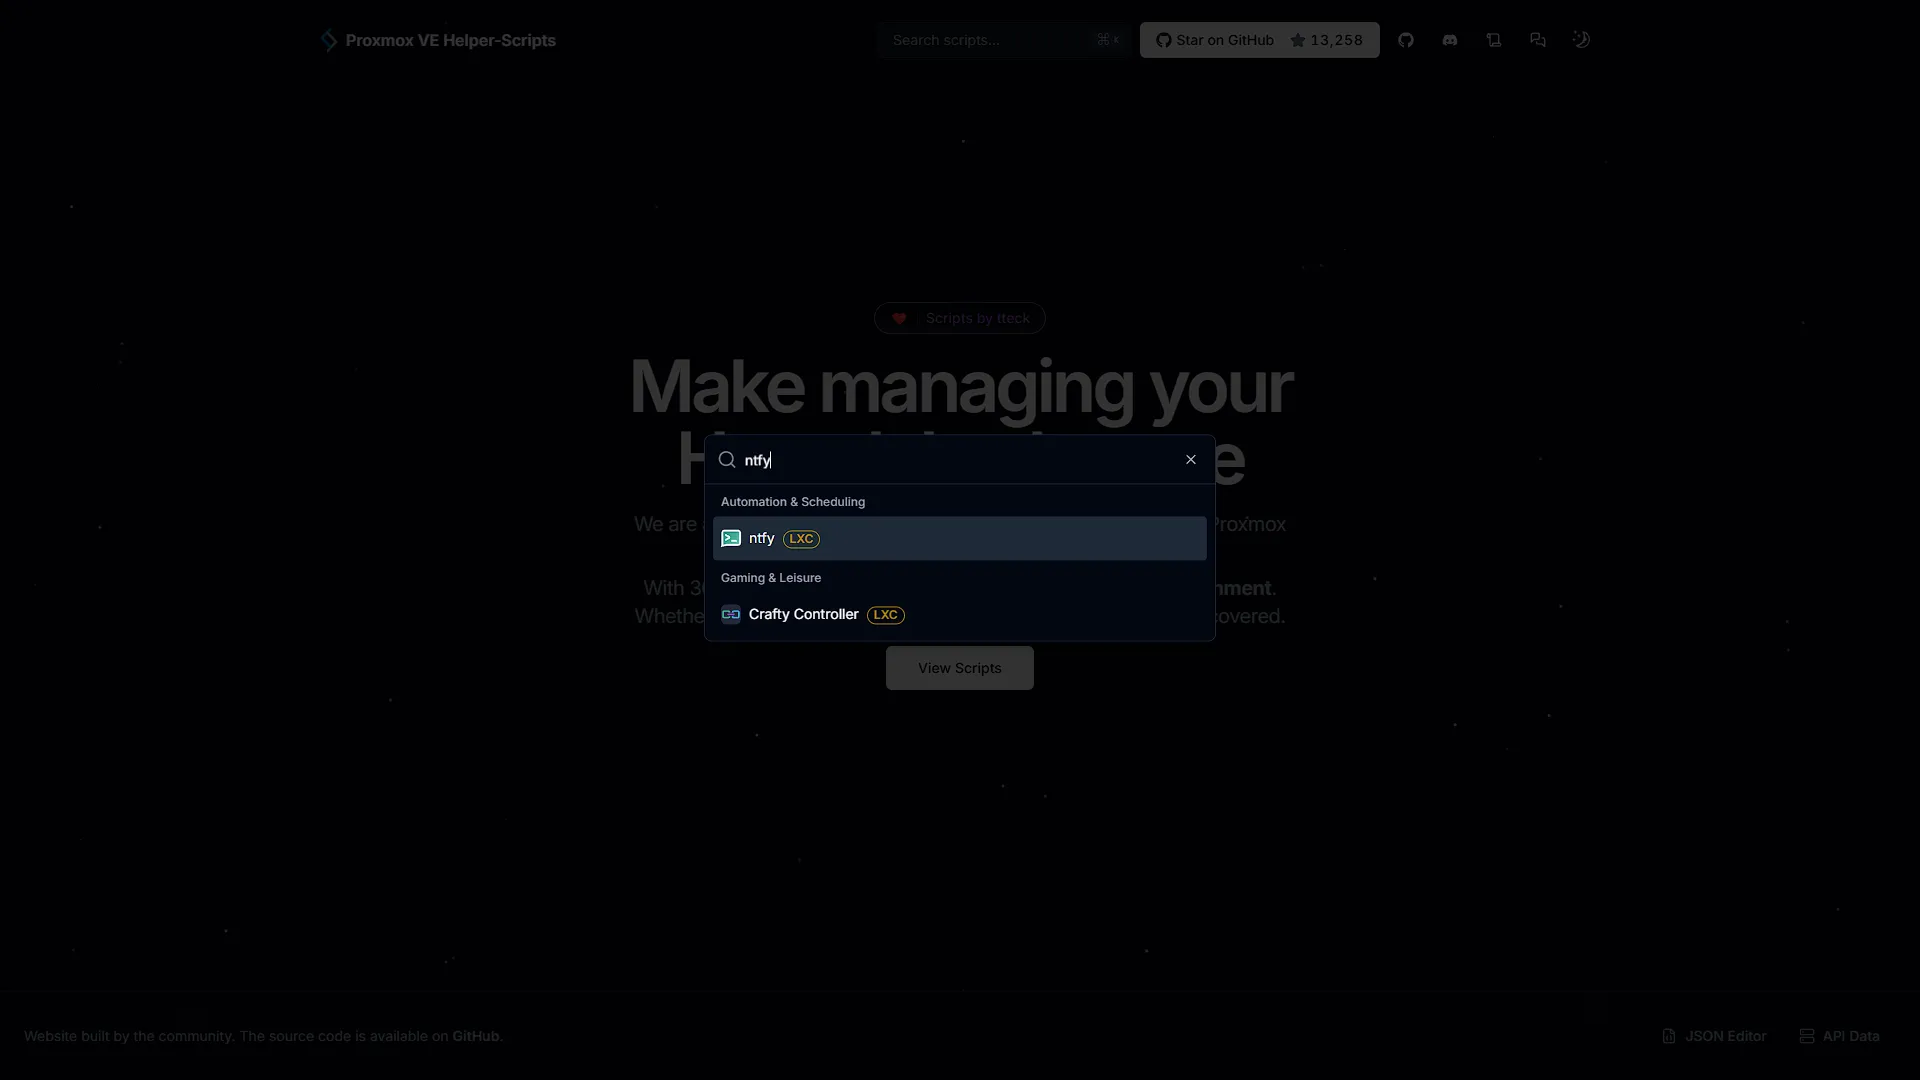
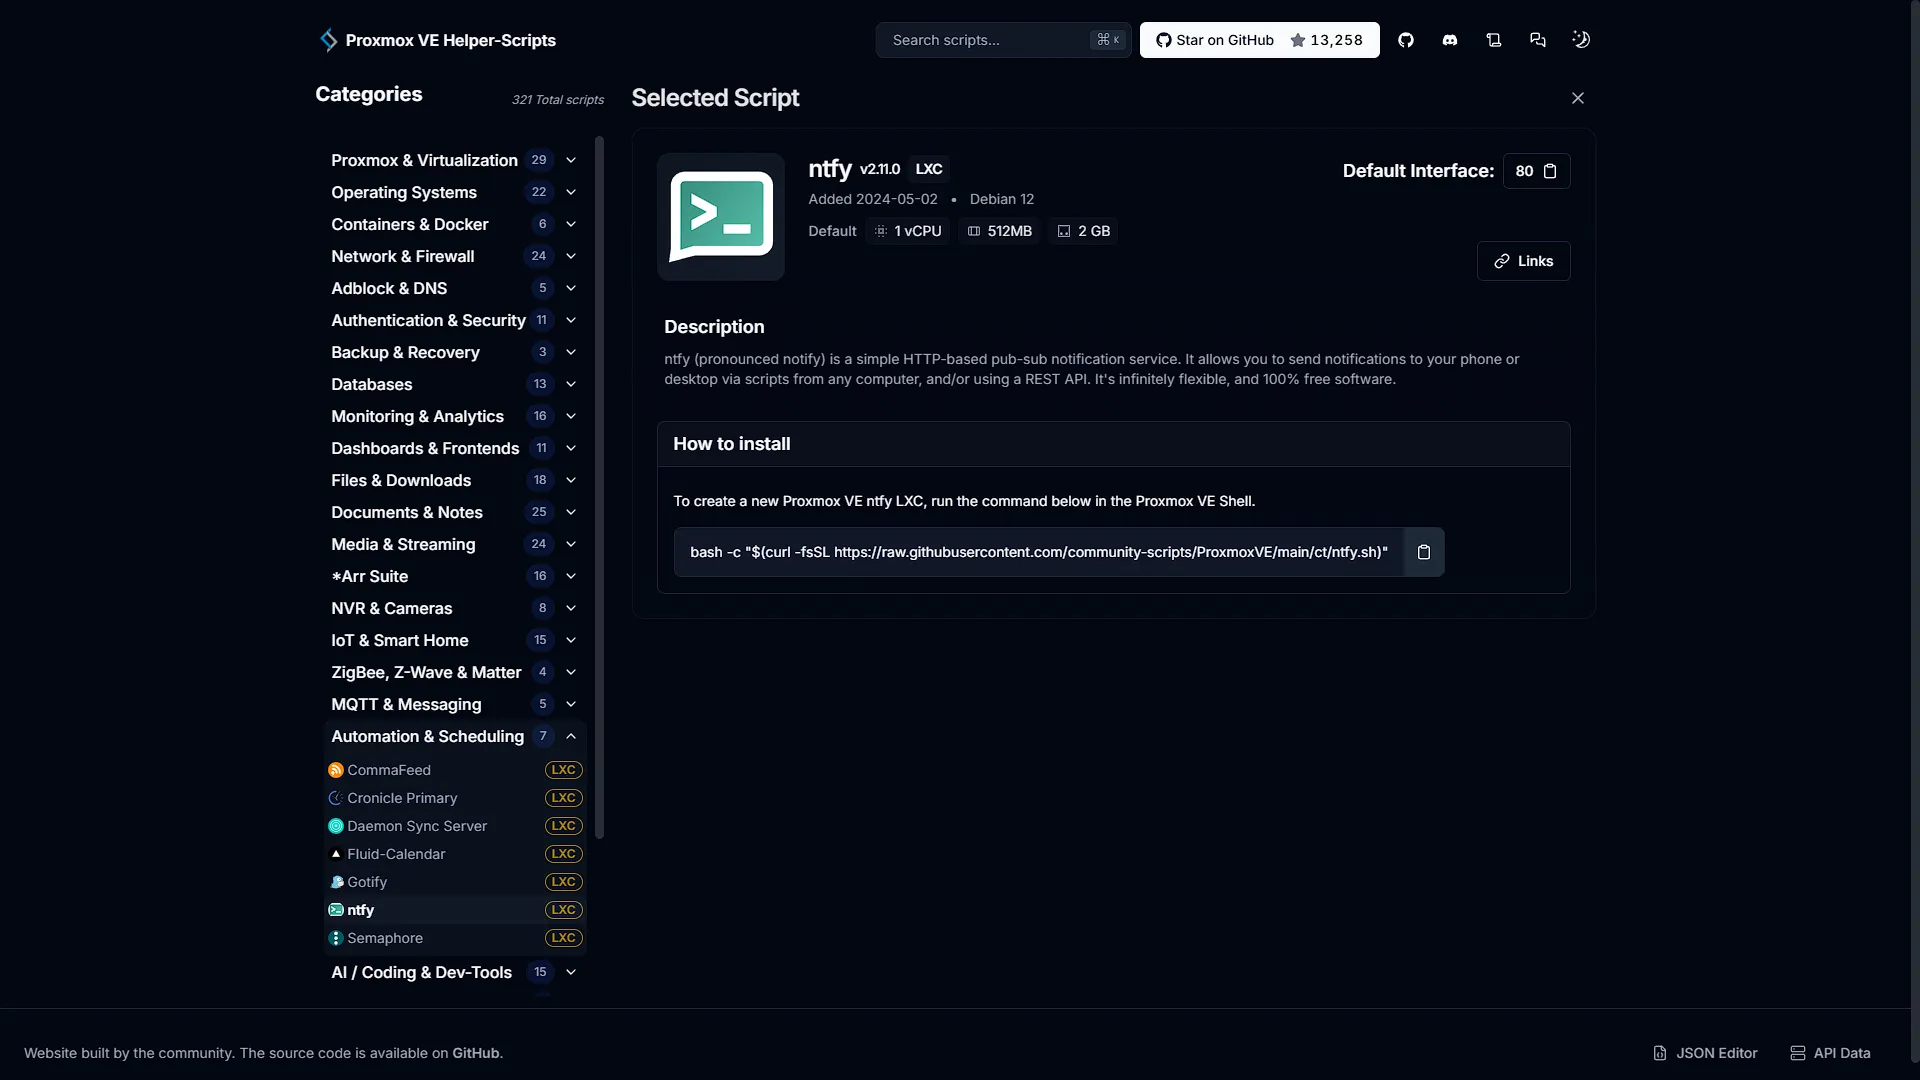
There are a few ways of installing ntfy, most notably as a docker container. We have a Docker LXC running as well as a Docker VM and we have Portainer running for deployment, so this approach should be fairly easy. However, our personal choice is to have it running as a separate LXC container because we are seeing ntfy as a primary and important service that needs to have a high priority and dedicated resources. So again, we are going to get help from Proxmox VE Community Scripts. Once on the site, search for ntfy, there should only be one result, an LXC Container. Click on it to get the install command and instructions.
The helper runs downloaded code with Proxmox host privileges. Review its current source and selected storage, network and resource settings before executing it. A dedicated container makes the service easier to manage separately, but does not guarantee delivery or automatically give it scheduling priority.
Step 2: Create a new LXC Container with ntfy
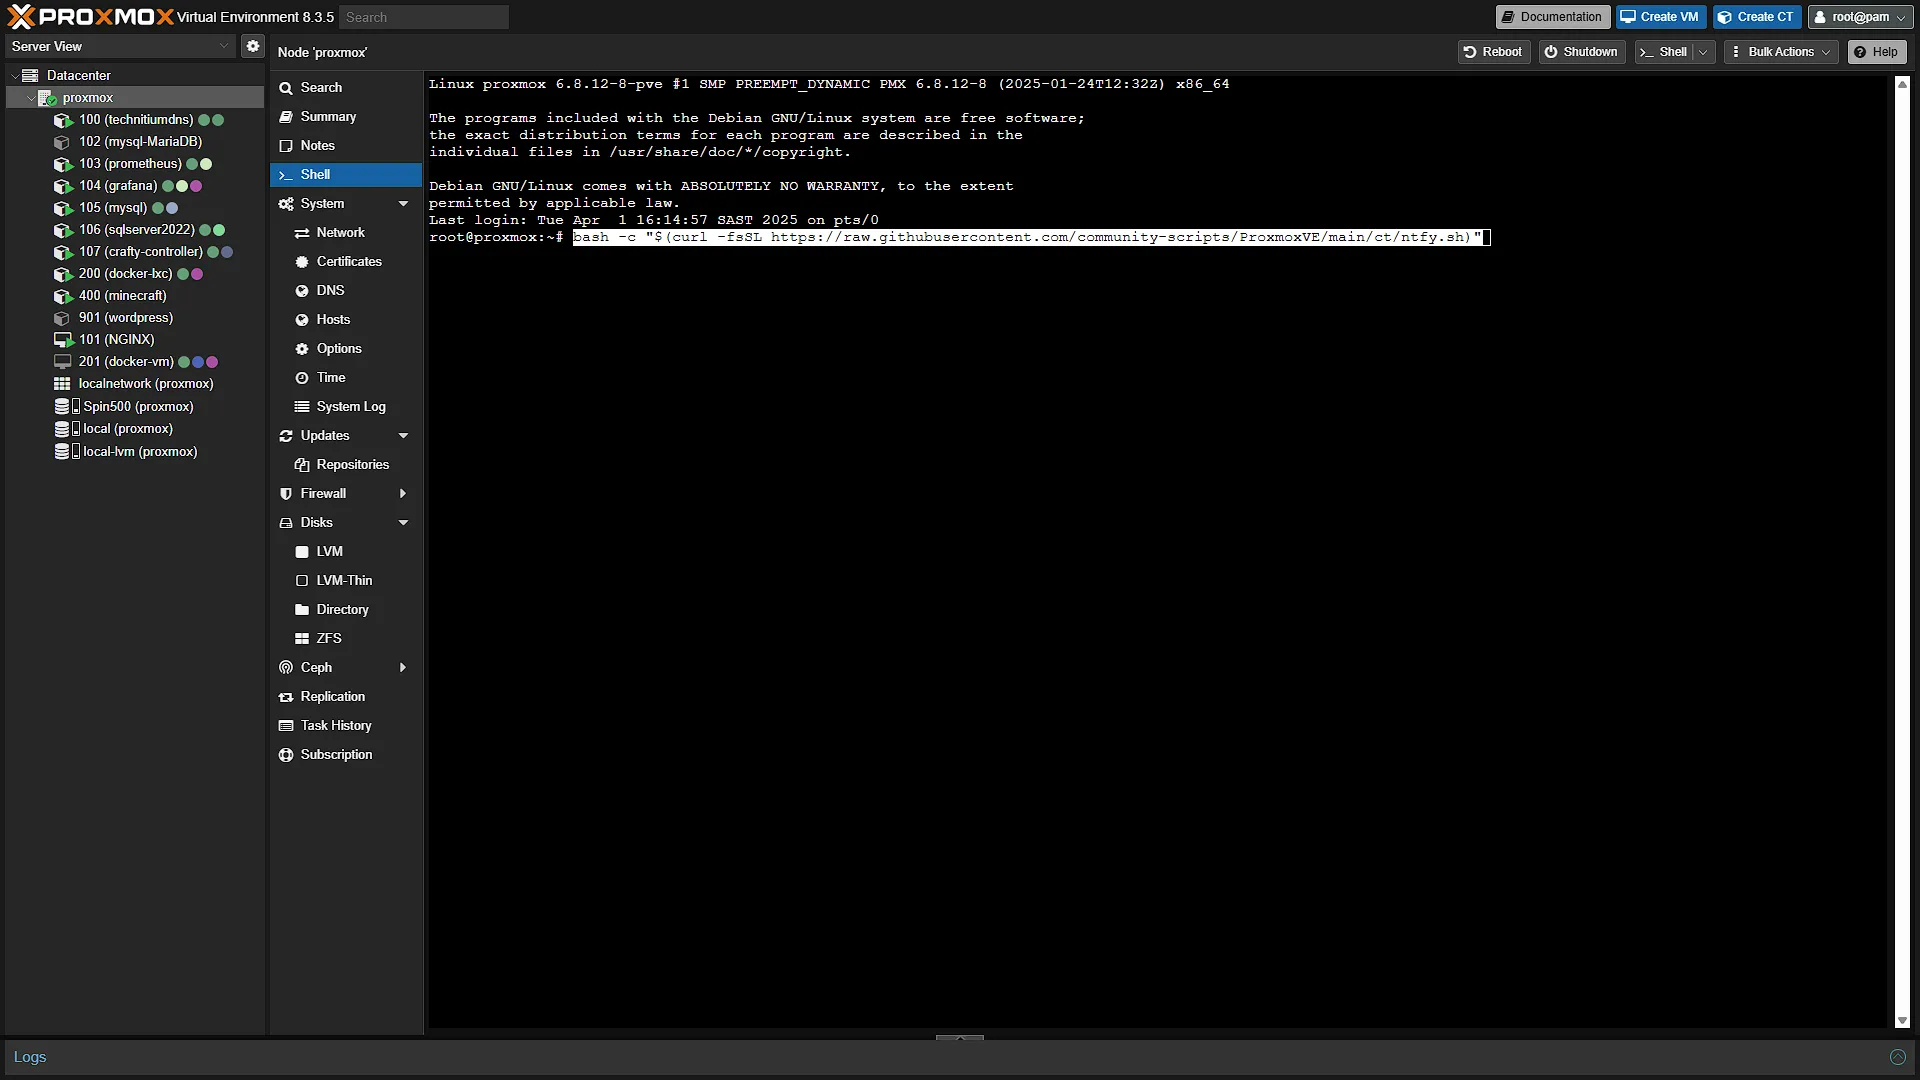
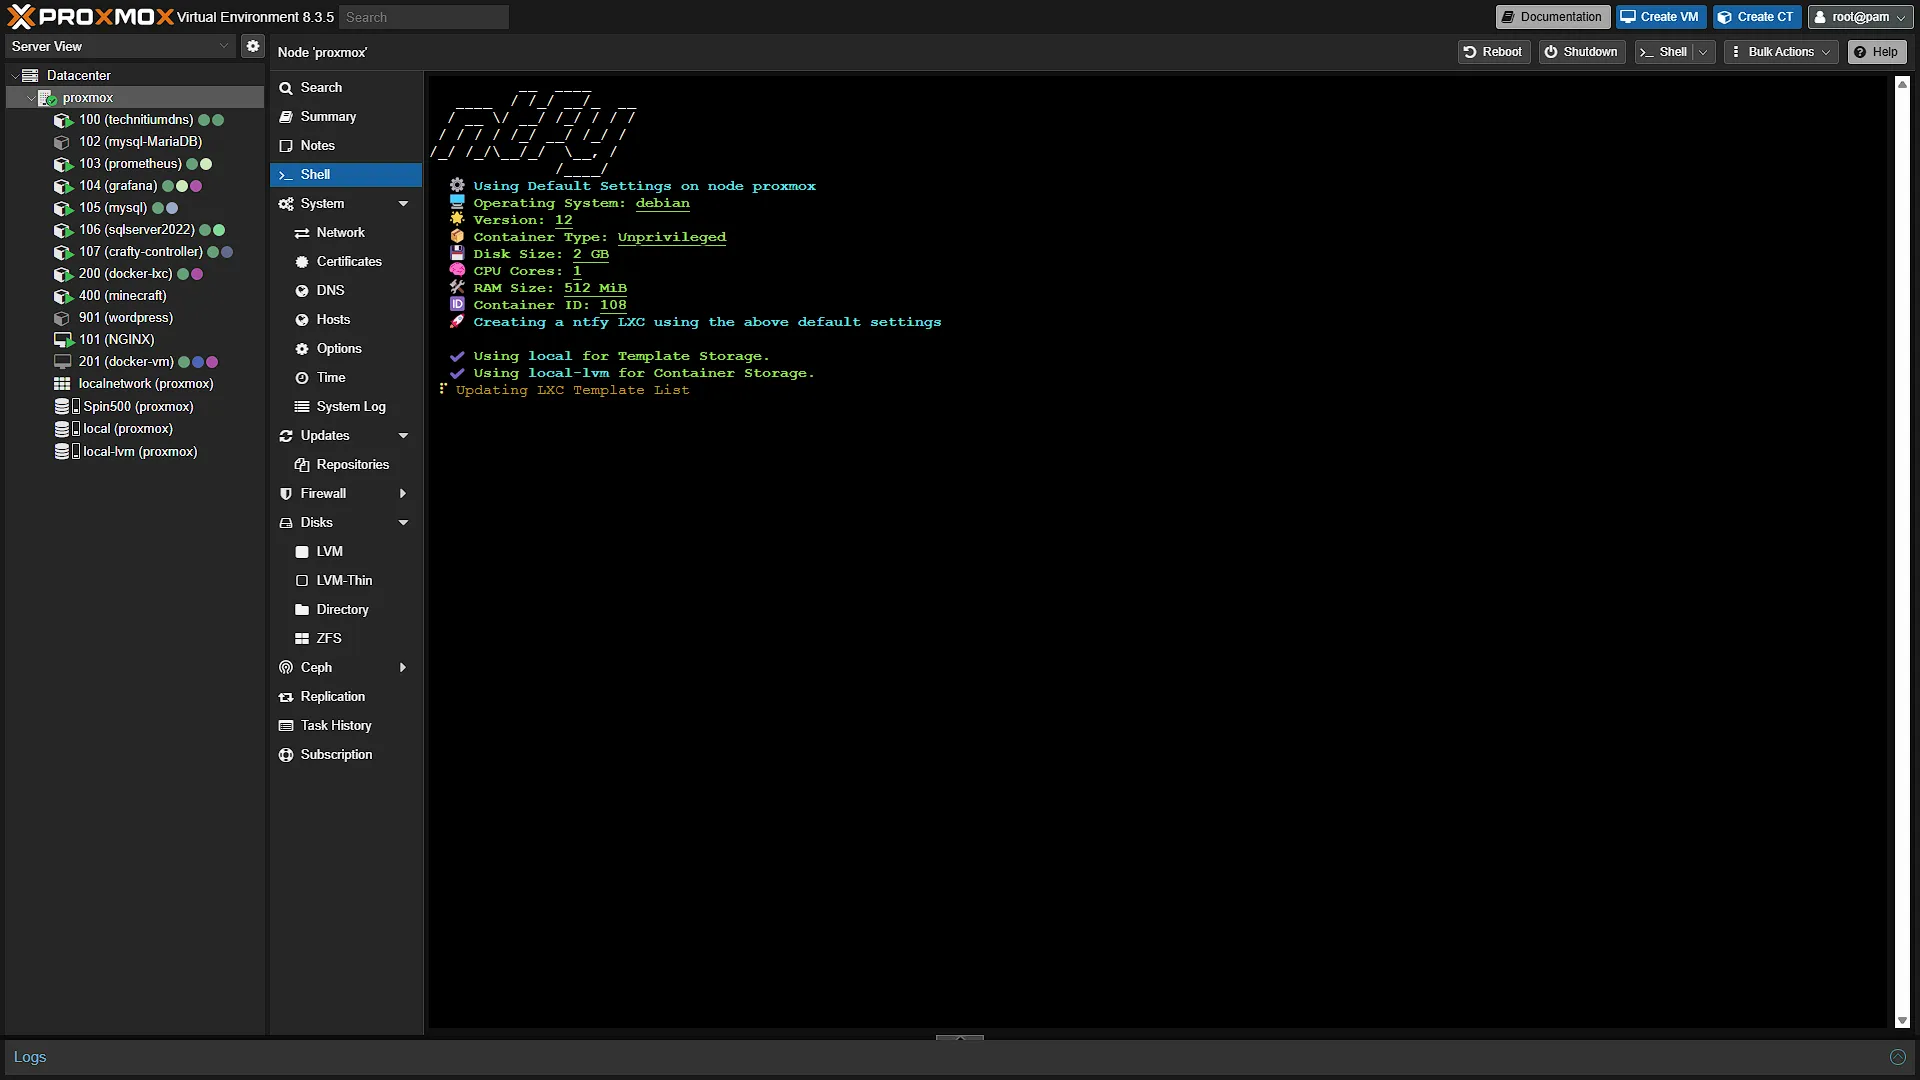
Open a new browser window and navigate to your Proxmox installation address. Log in and expand Datacenter in the left navigation window, then select the Proxmox node you wish to install ntfy on. In the middle navigation window click on  . Paste the install command from the first step and press enter.
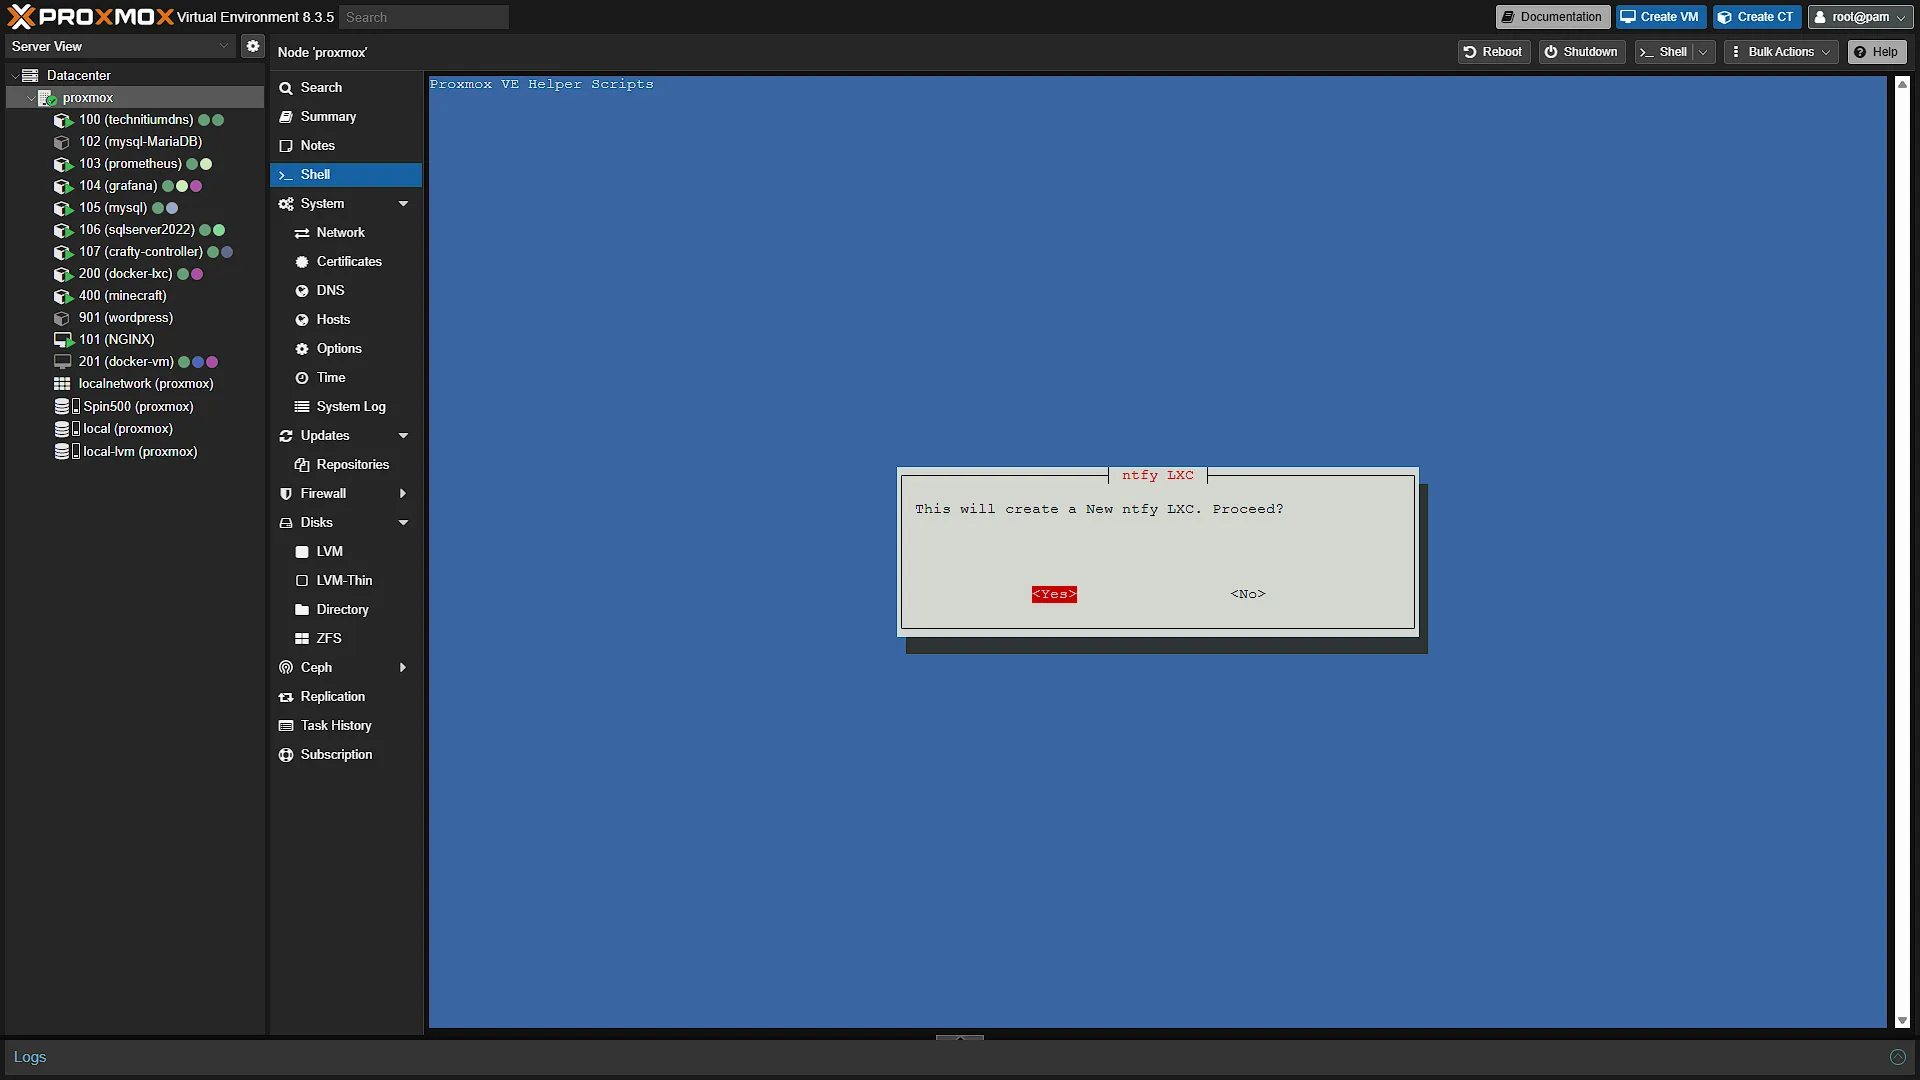
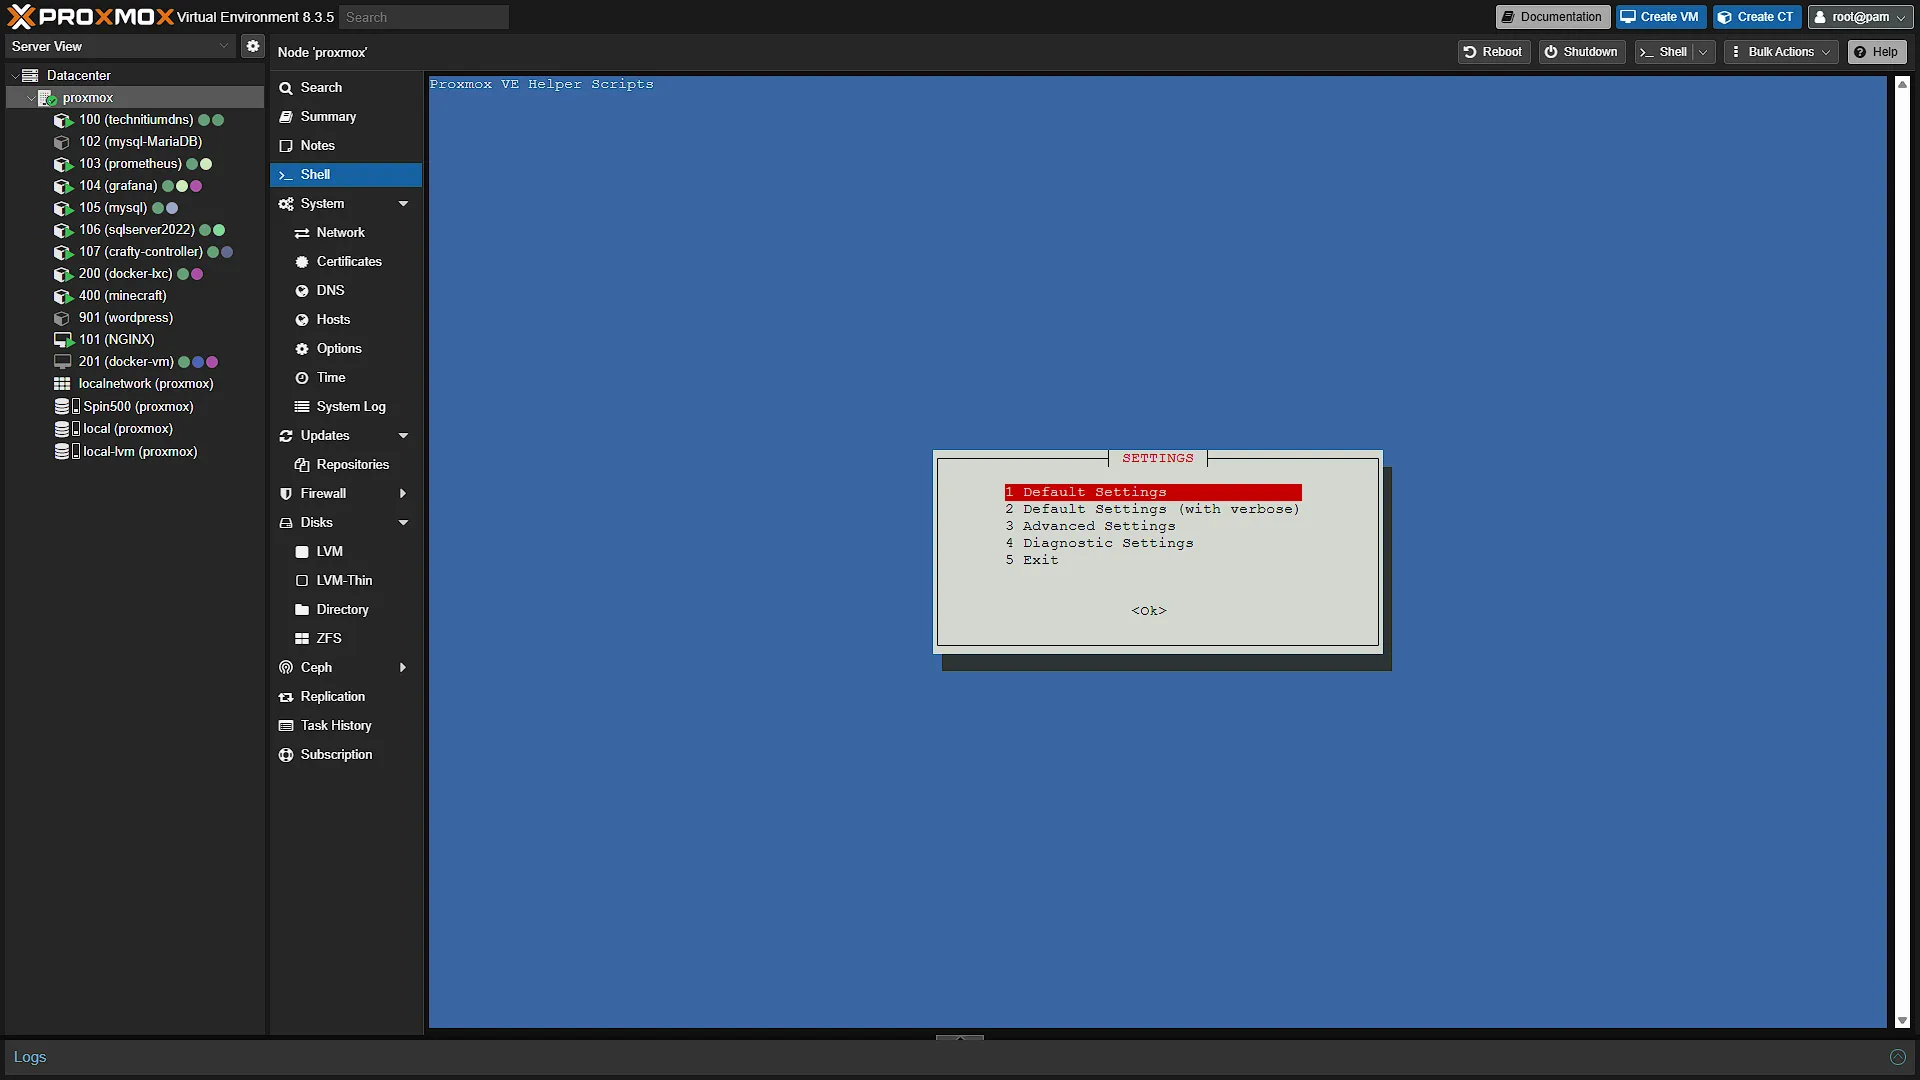
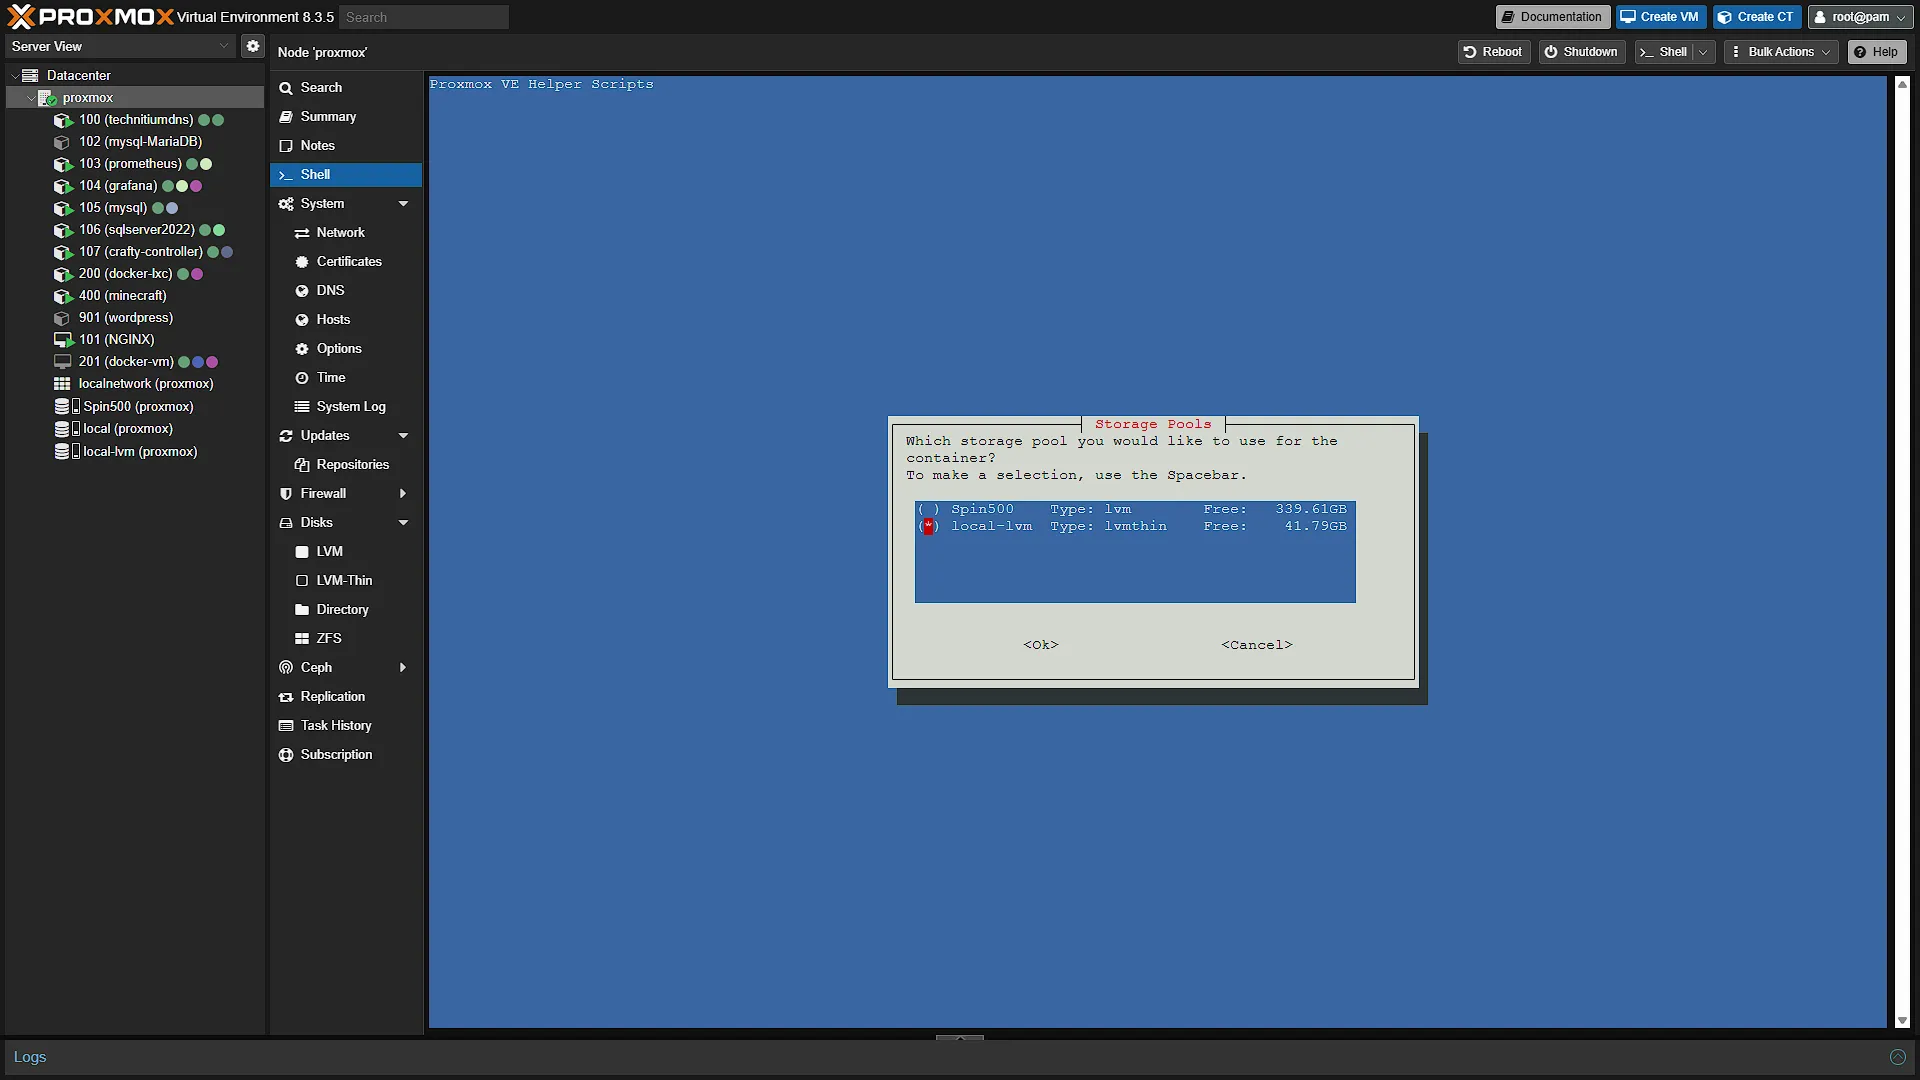
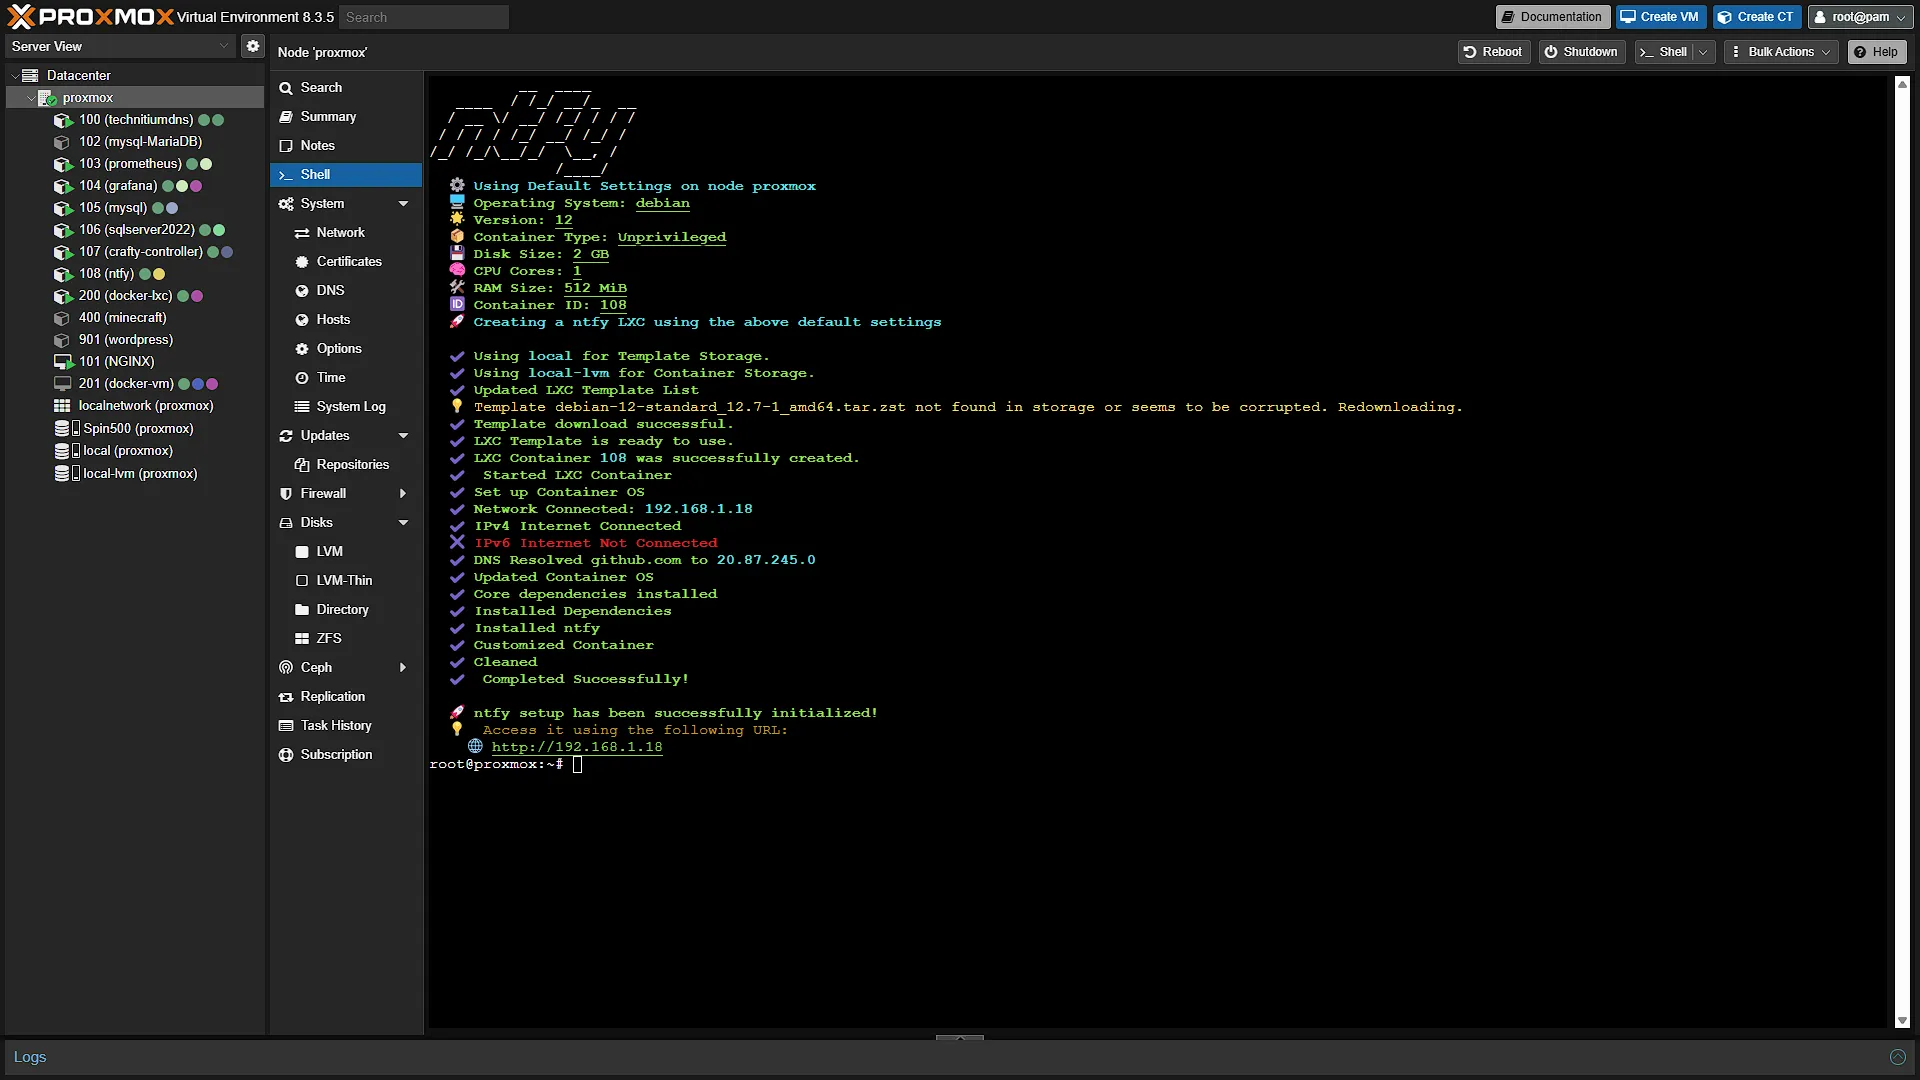
bash -c "$(curl -fsSL https://raw.githubusercontent.com/community-scripts/ProxmoxVE/main/ct/ntfy.sh)"A window will pop up in the main window confirming that you want to install a new ntfy LXC Container, select Yes. We will then be prompted if we want to use default settings, advanced settings or some other options. In our case, the Default settings are fine so we will select that and continue. If you have multiple storage locations in your Proxmox, you will be prompted to select the install location. After this, installation will start and should complete fairly quickly.
Once done you will be shown the IP address of the container where you are able to access ntfy. A good idea now would be to assign a dedicated IP address on your router for this machine so that we get the same IP every time it starts up.
Step 3: Configure ntfy
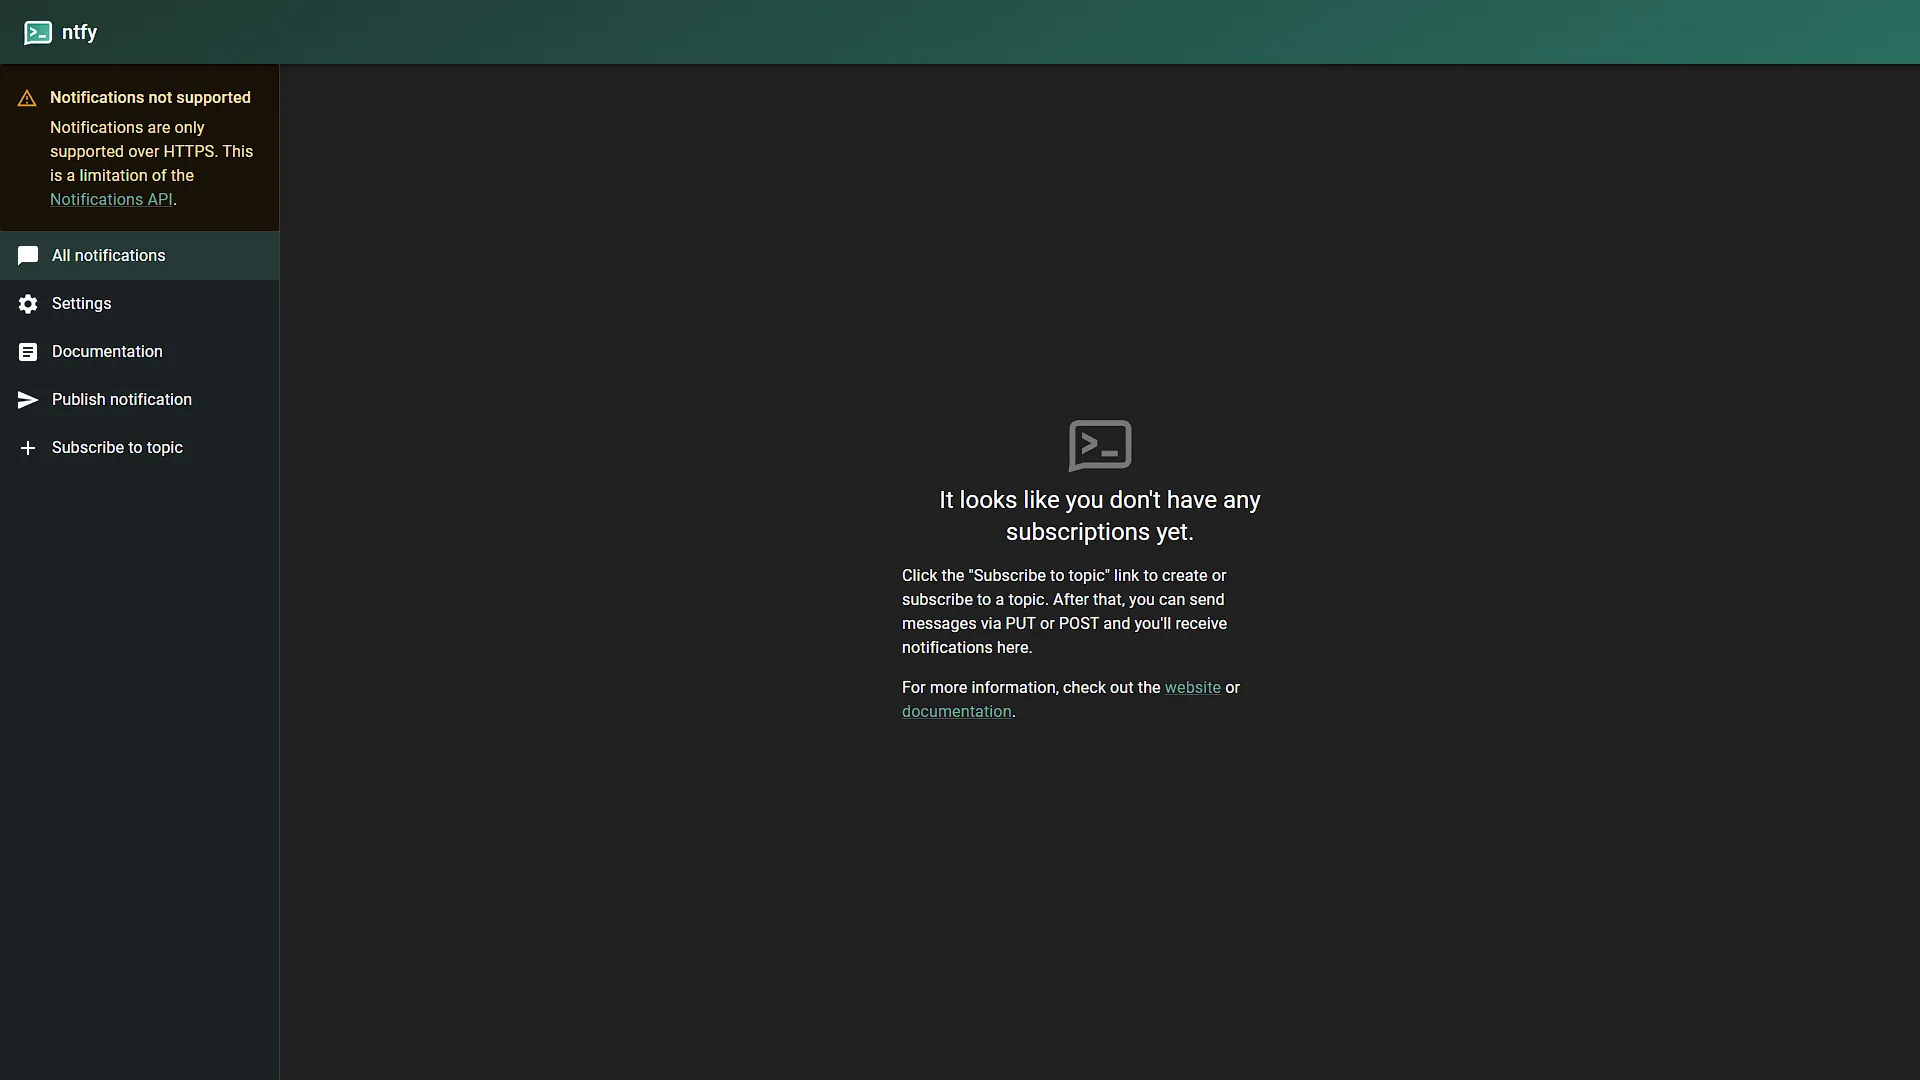
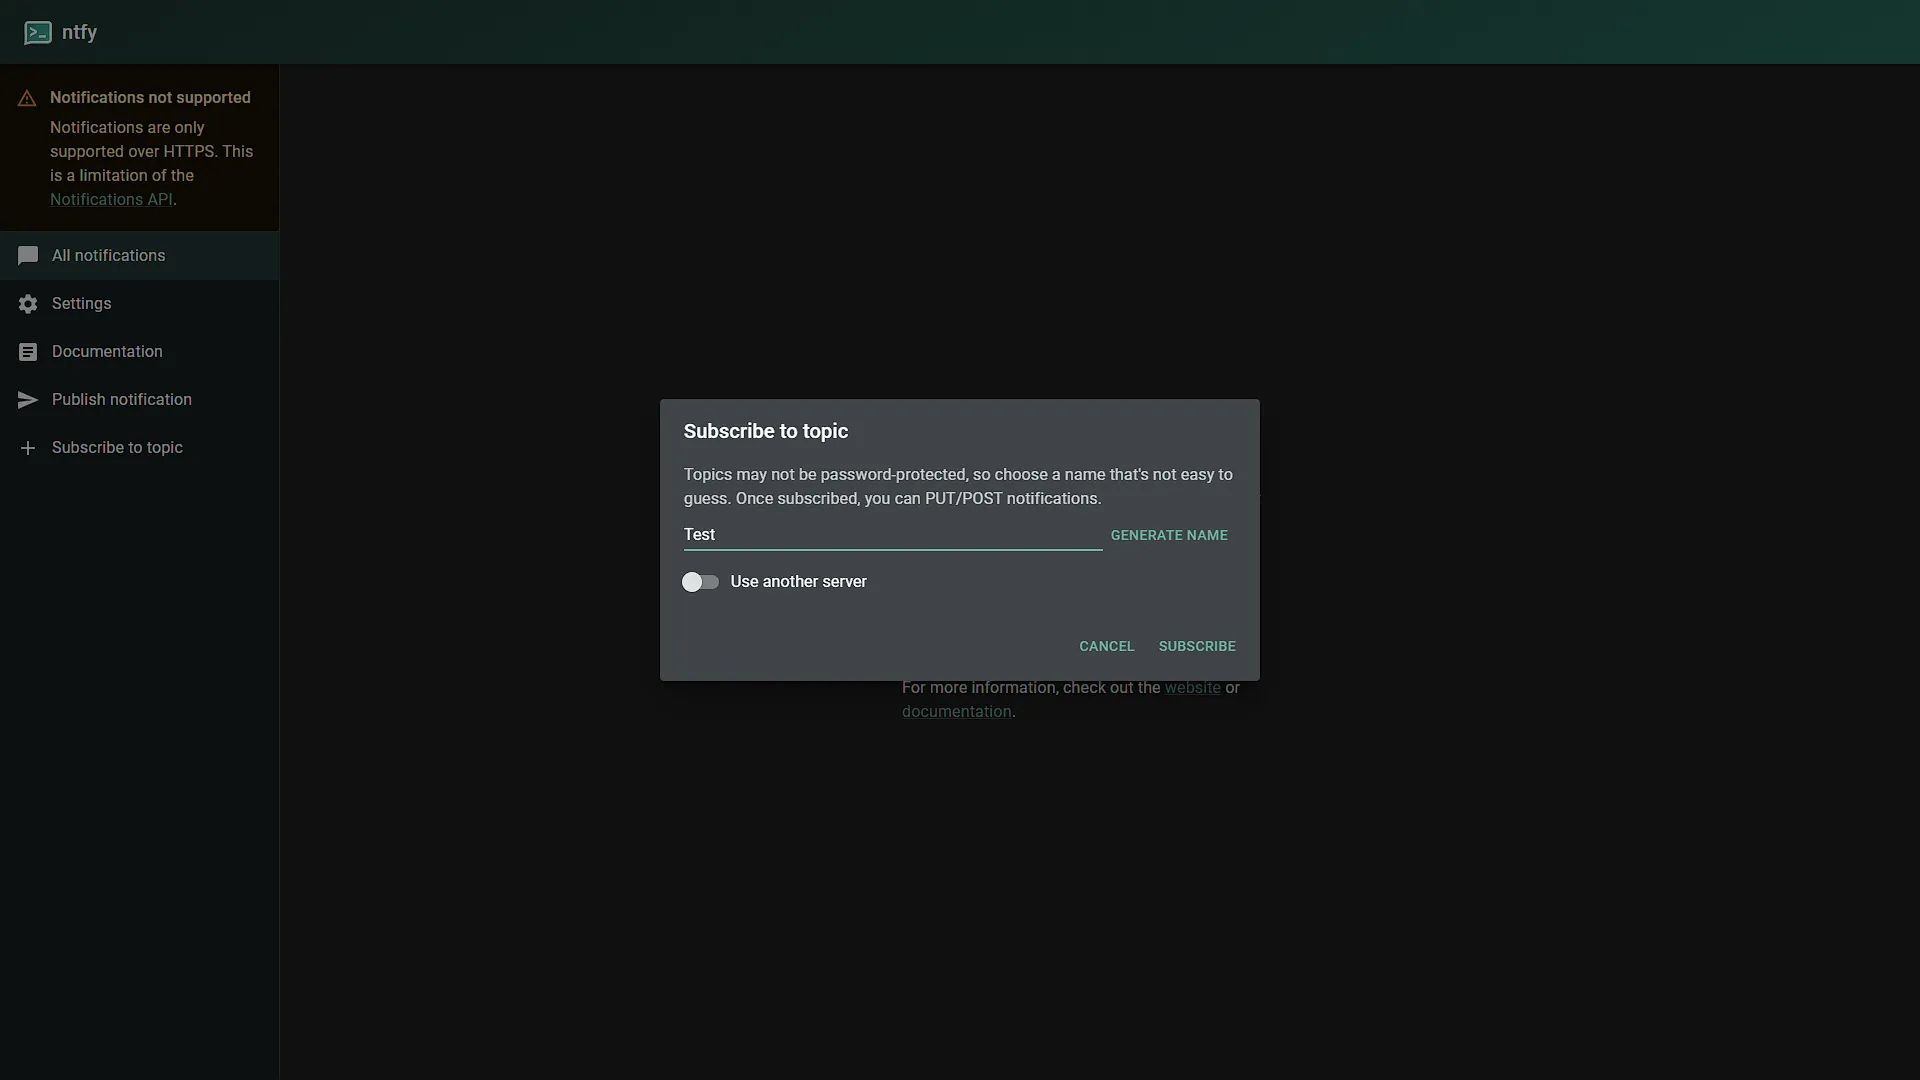
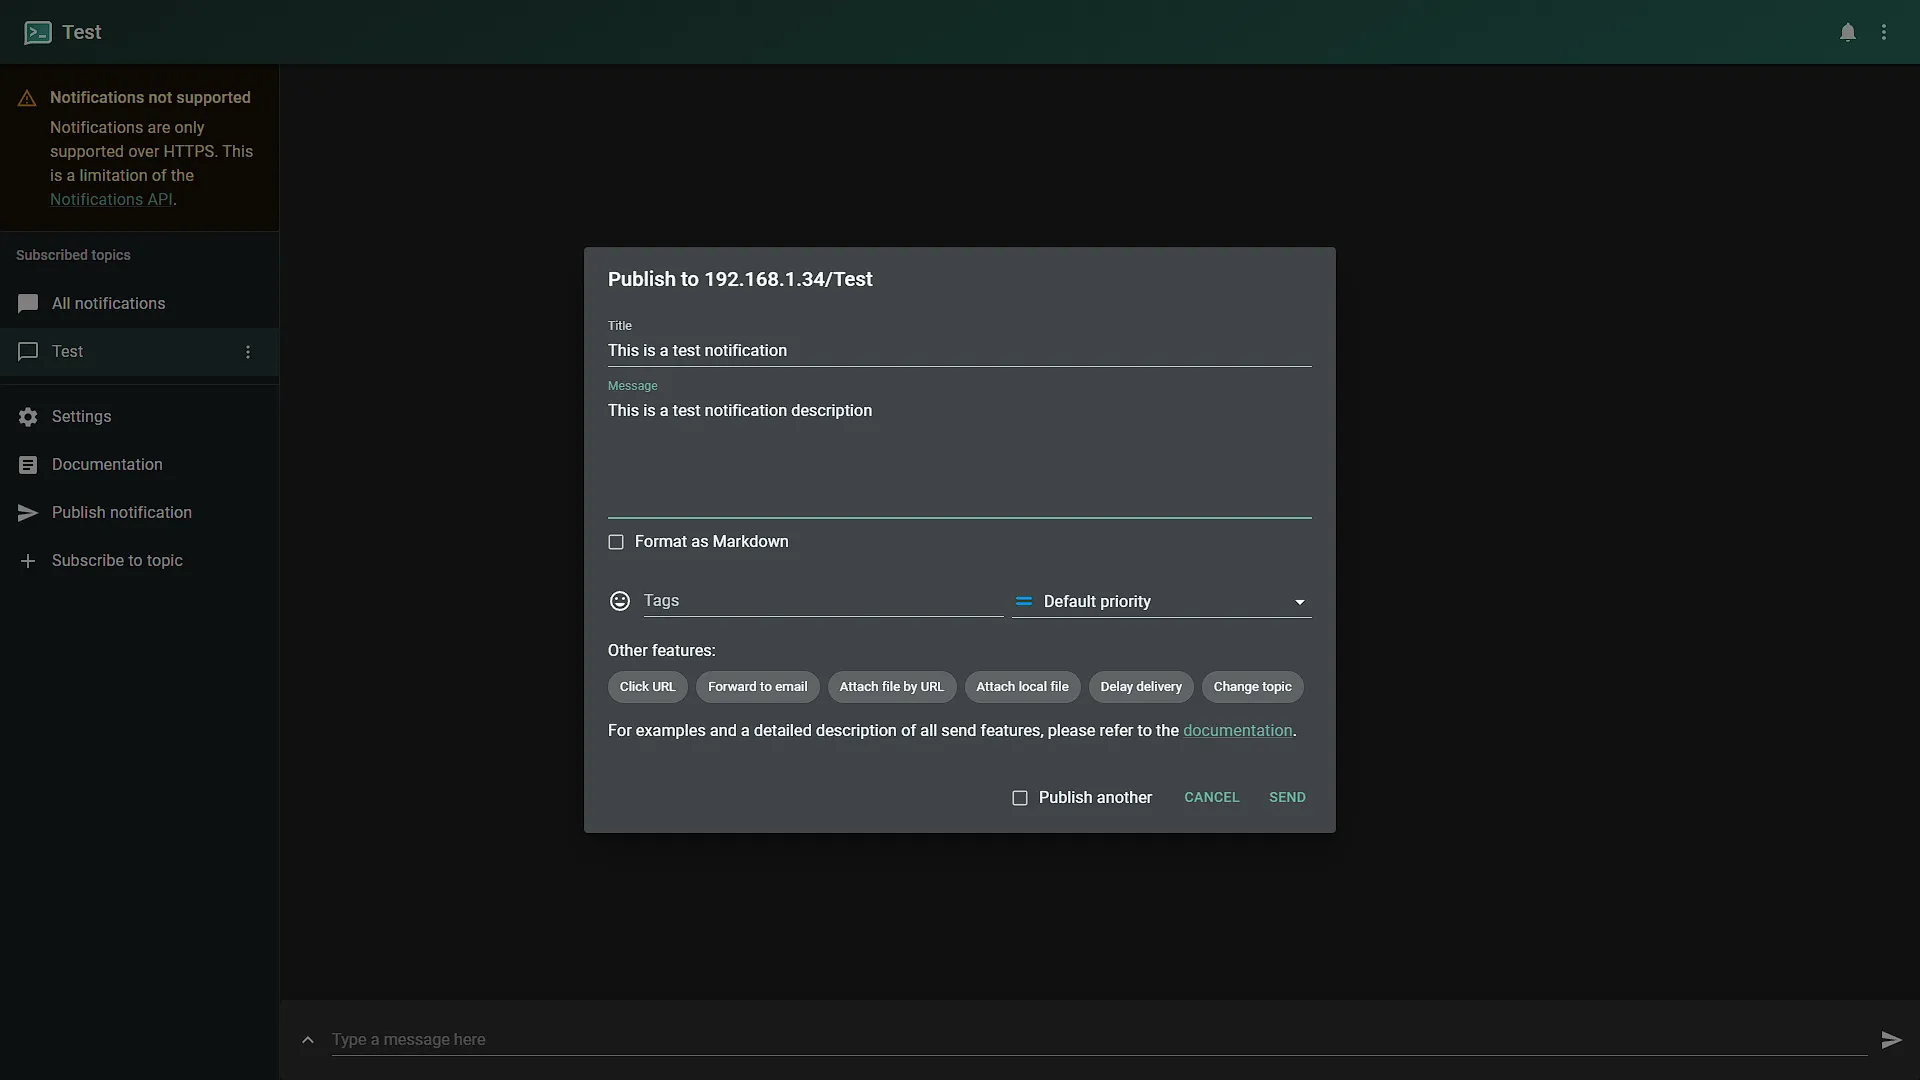
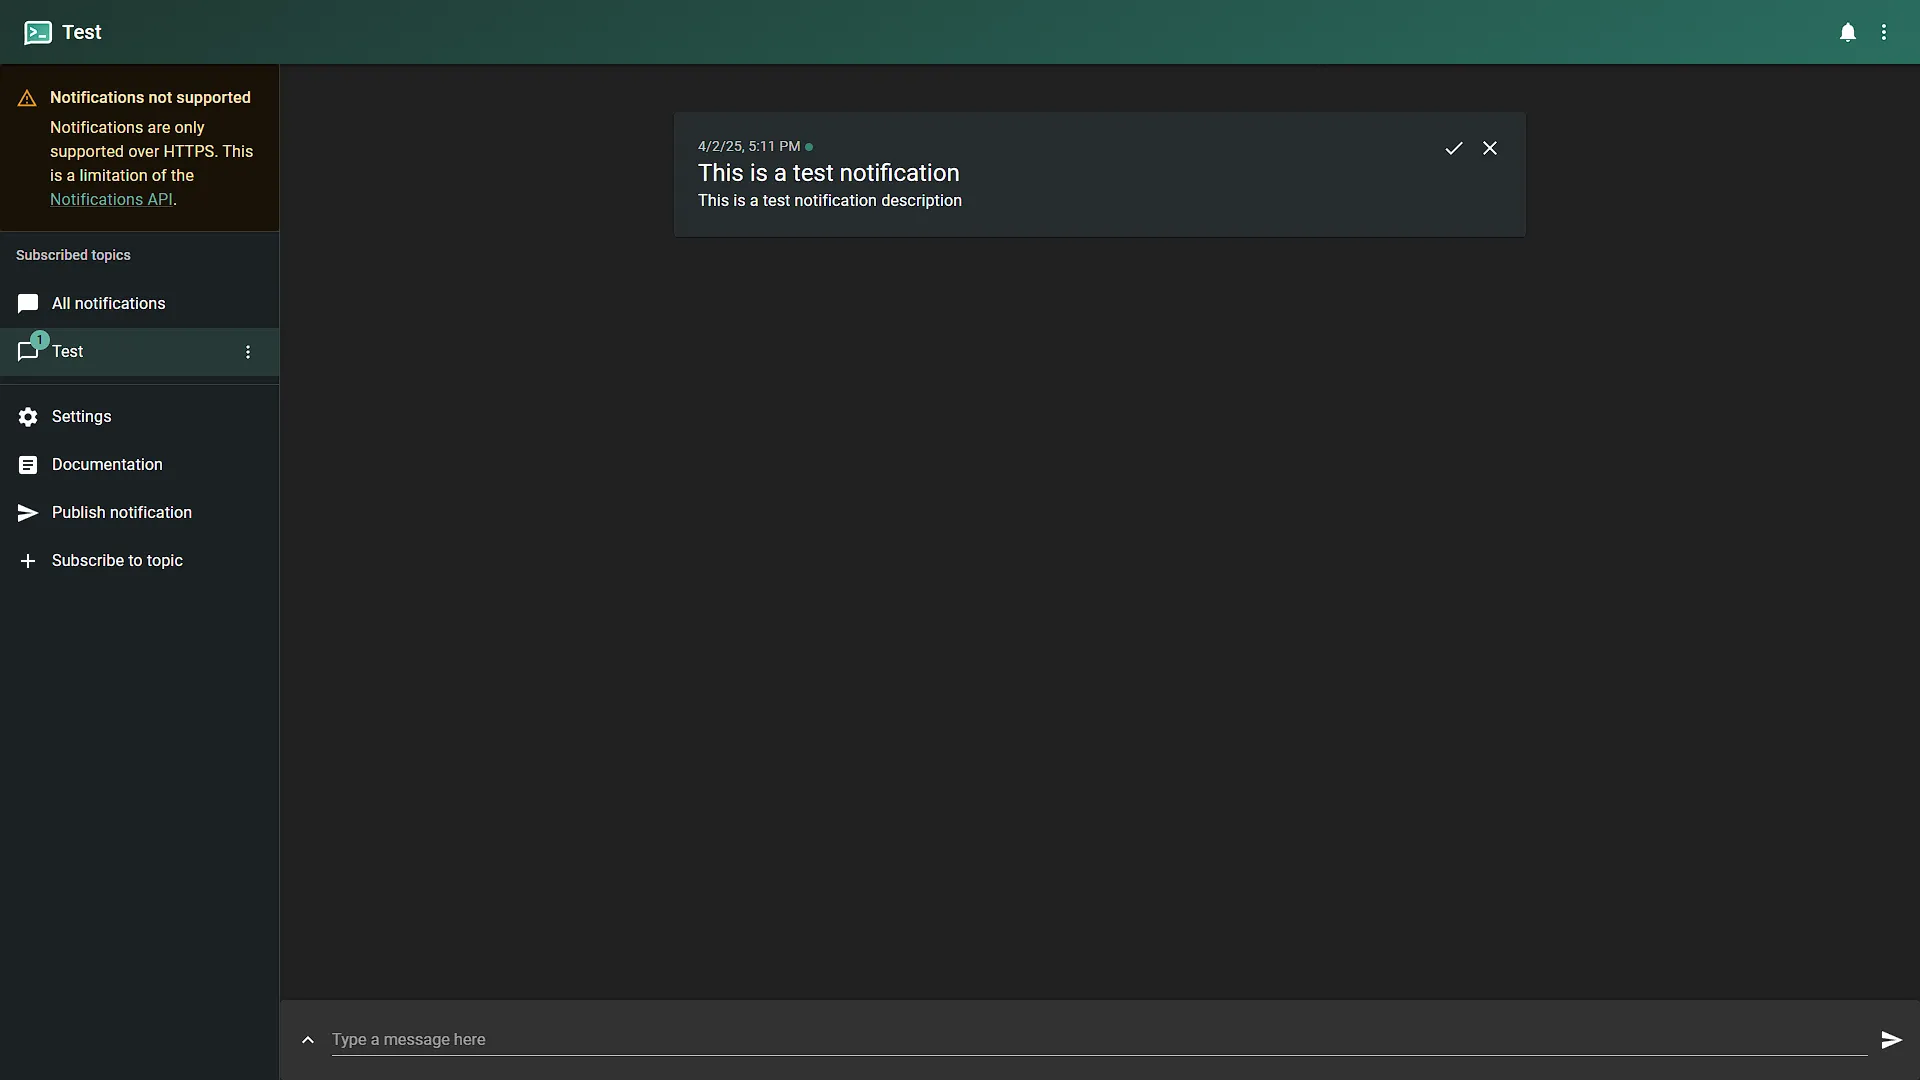
Open your browser to the indicated IP address. Here you will be able to create topics and send test messages. First, subscribe to a named topic to receive messages sent to that name. Subscribing does not reserve it or protect it from other users; access rules do that. In the left navigation menu, the last option is Subscribe to topic. Click that and create a new topic, anything you want. Once done, this topic will now be shown in the left navigation menu under Subscribed Topics. To test this, click on Publish notification and create a test notification. Once sent, you will see it in the feed. If this works, we need to get it set up on our phone for delivery.
Step 4: Set up ntfy on your phone
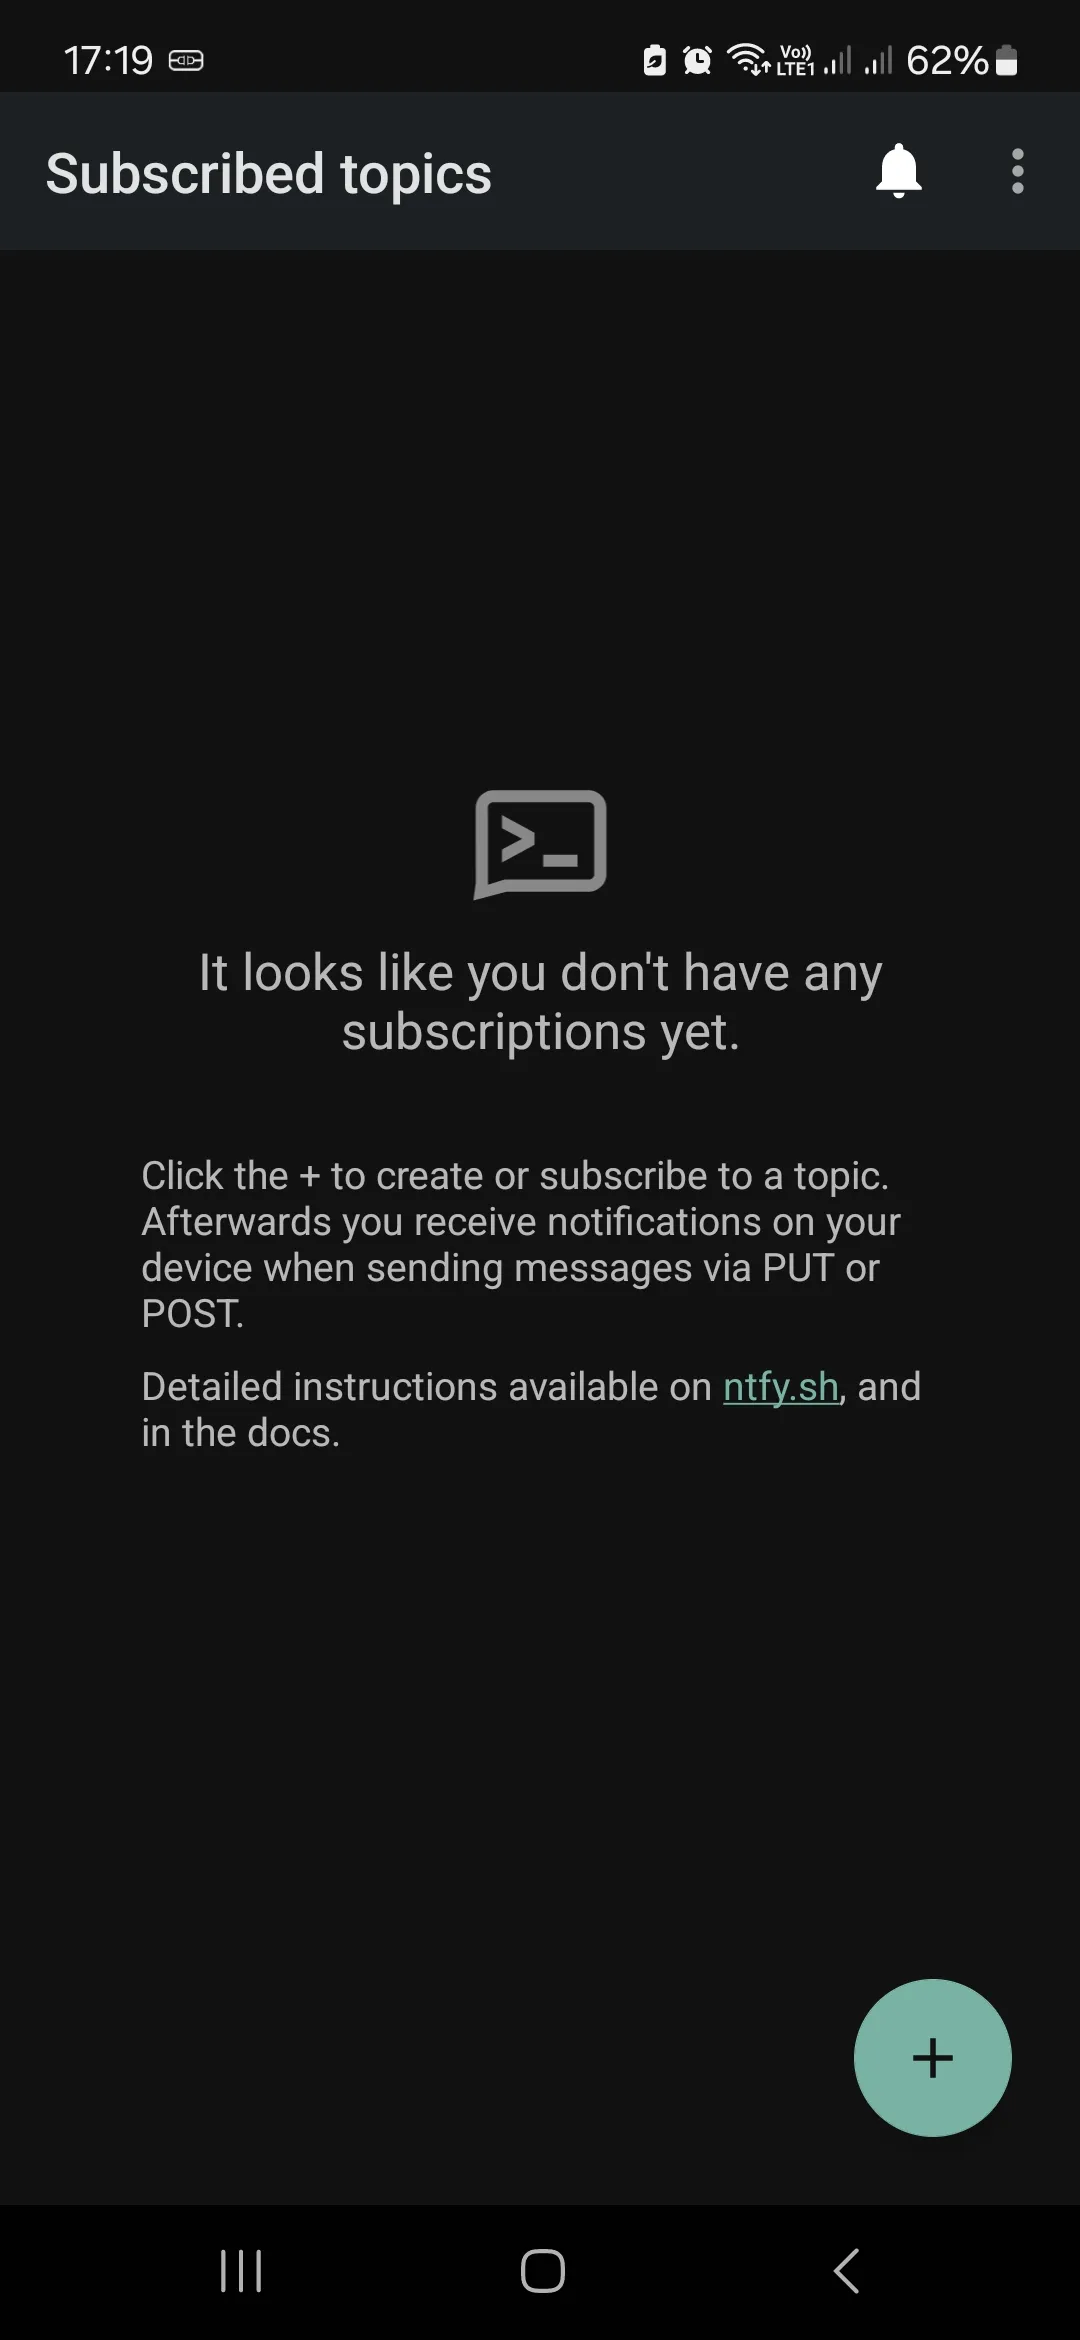
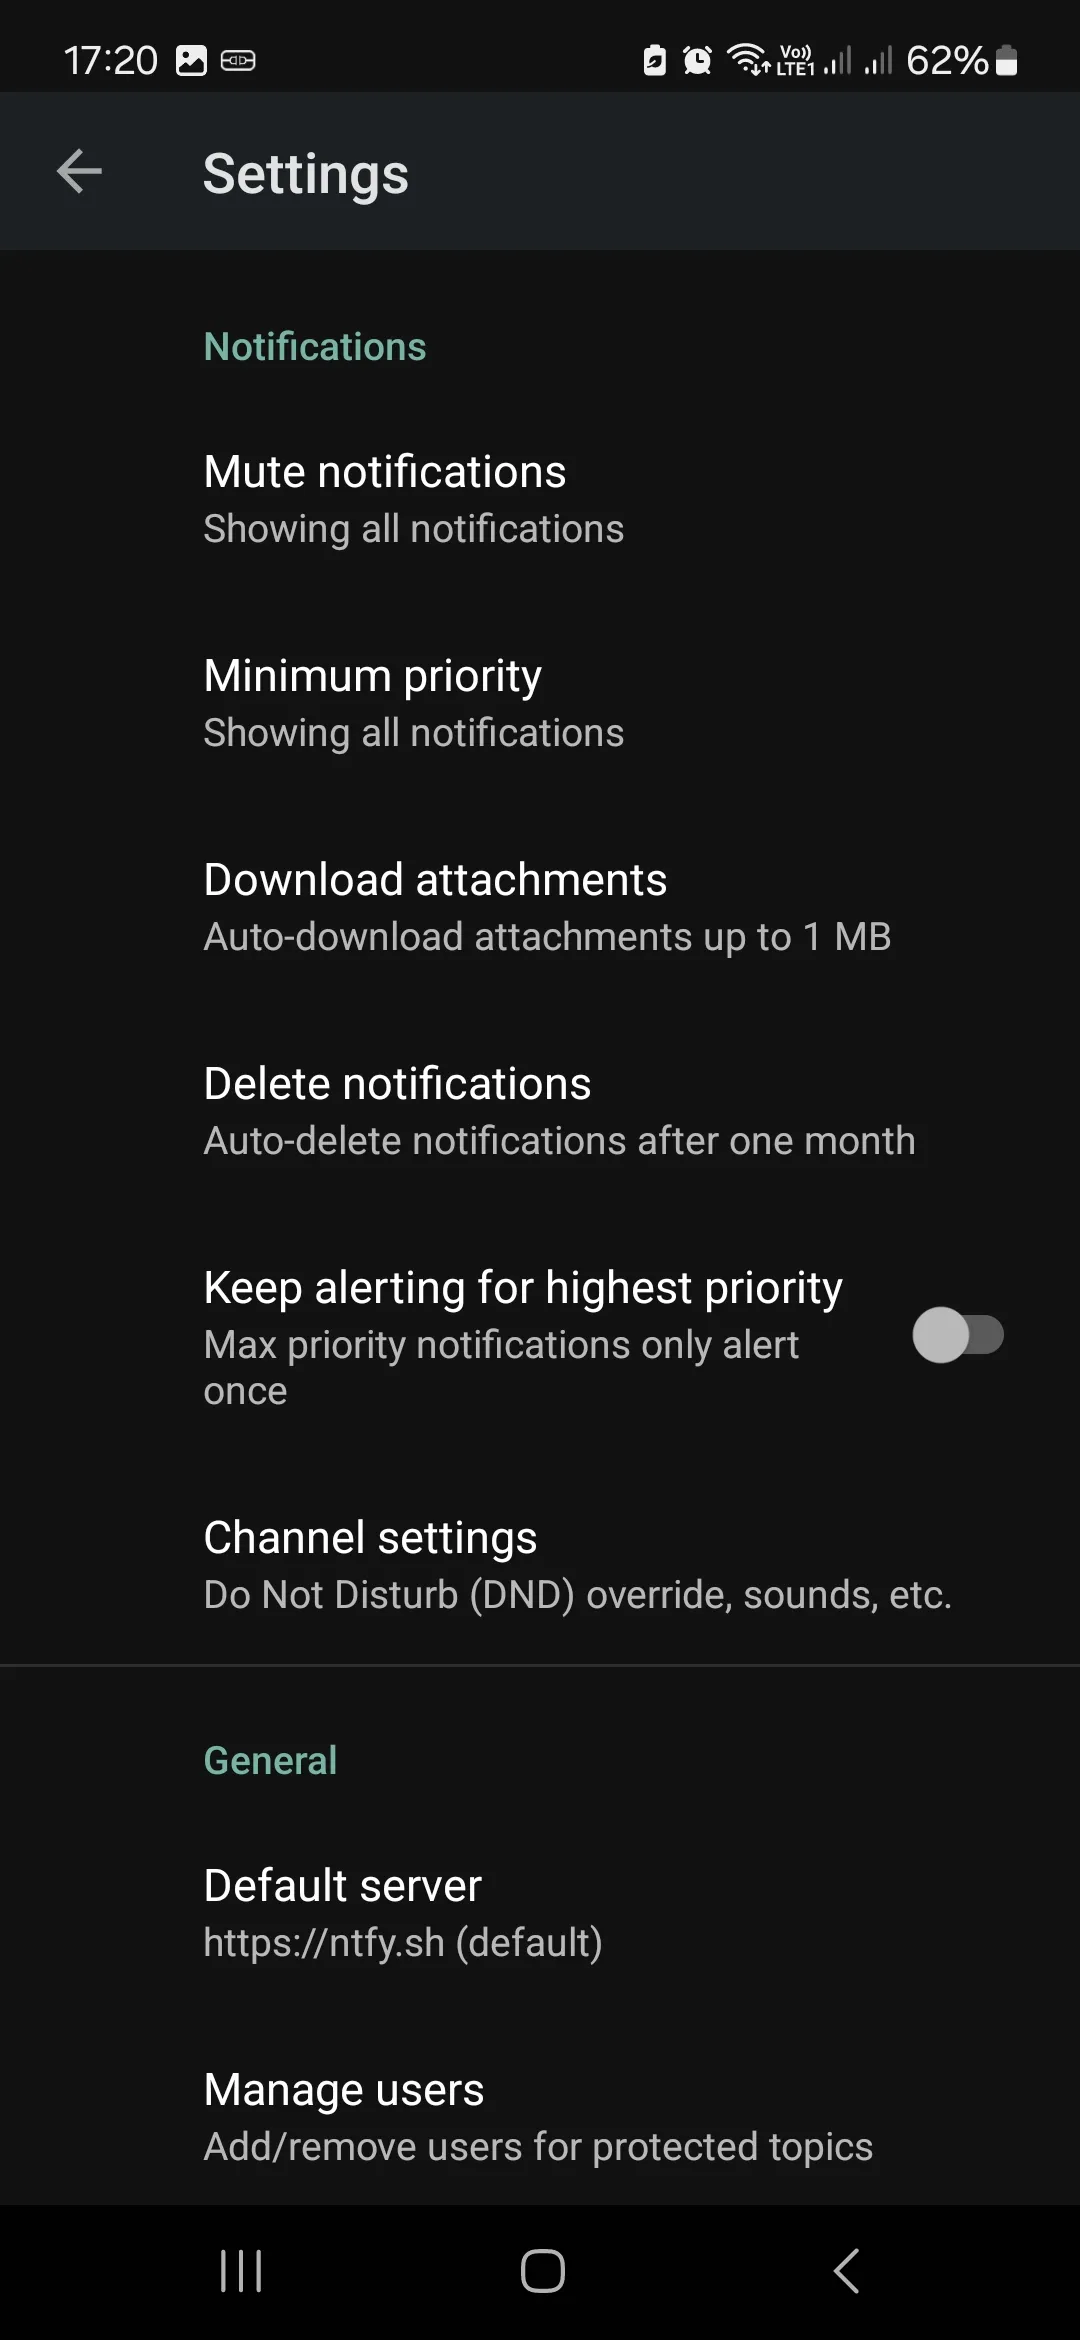
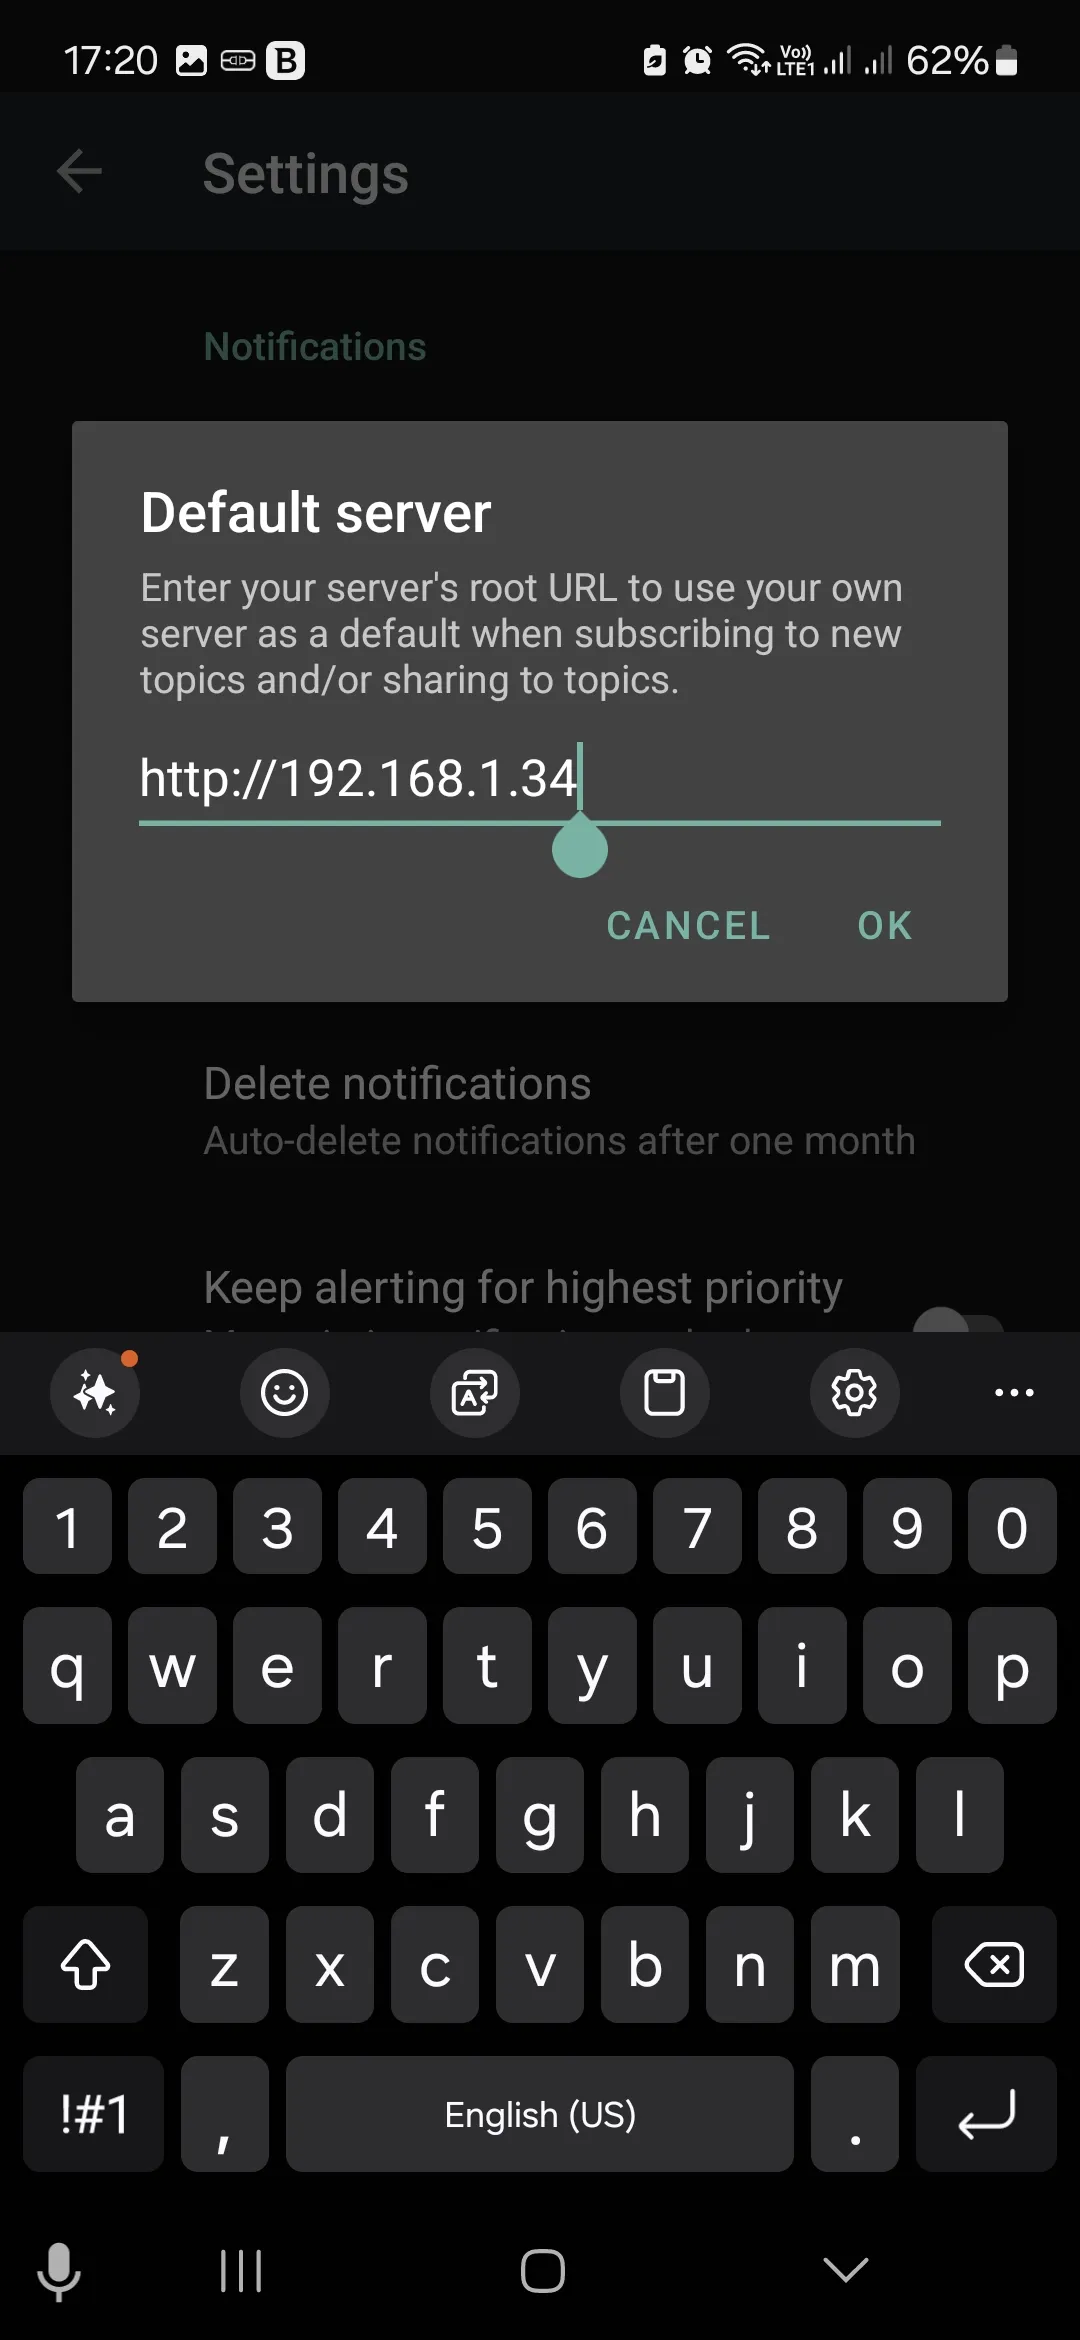
Get the ntfy app from your smartphone's app store: Google Play or Apple Store. Once installed, open the app where you will be shown a screen telling you that you have no subscriptions. That is absolutely correct. But first, we need to add our server from where we are receiving subscriptions. For that, click on settings, and scroll down to Default Server under the General section. Open it and enter the IP address of the ntfy server, including the http:// at the start. In our case:
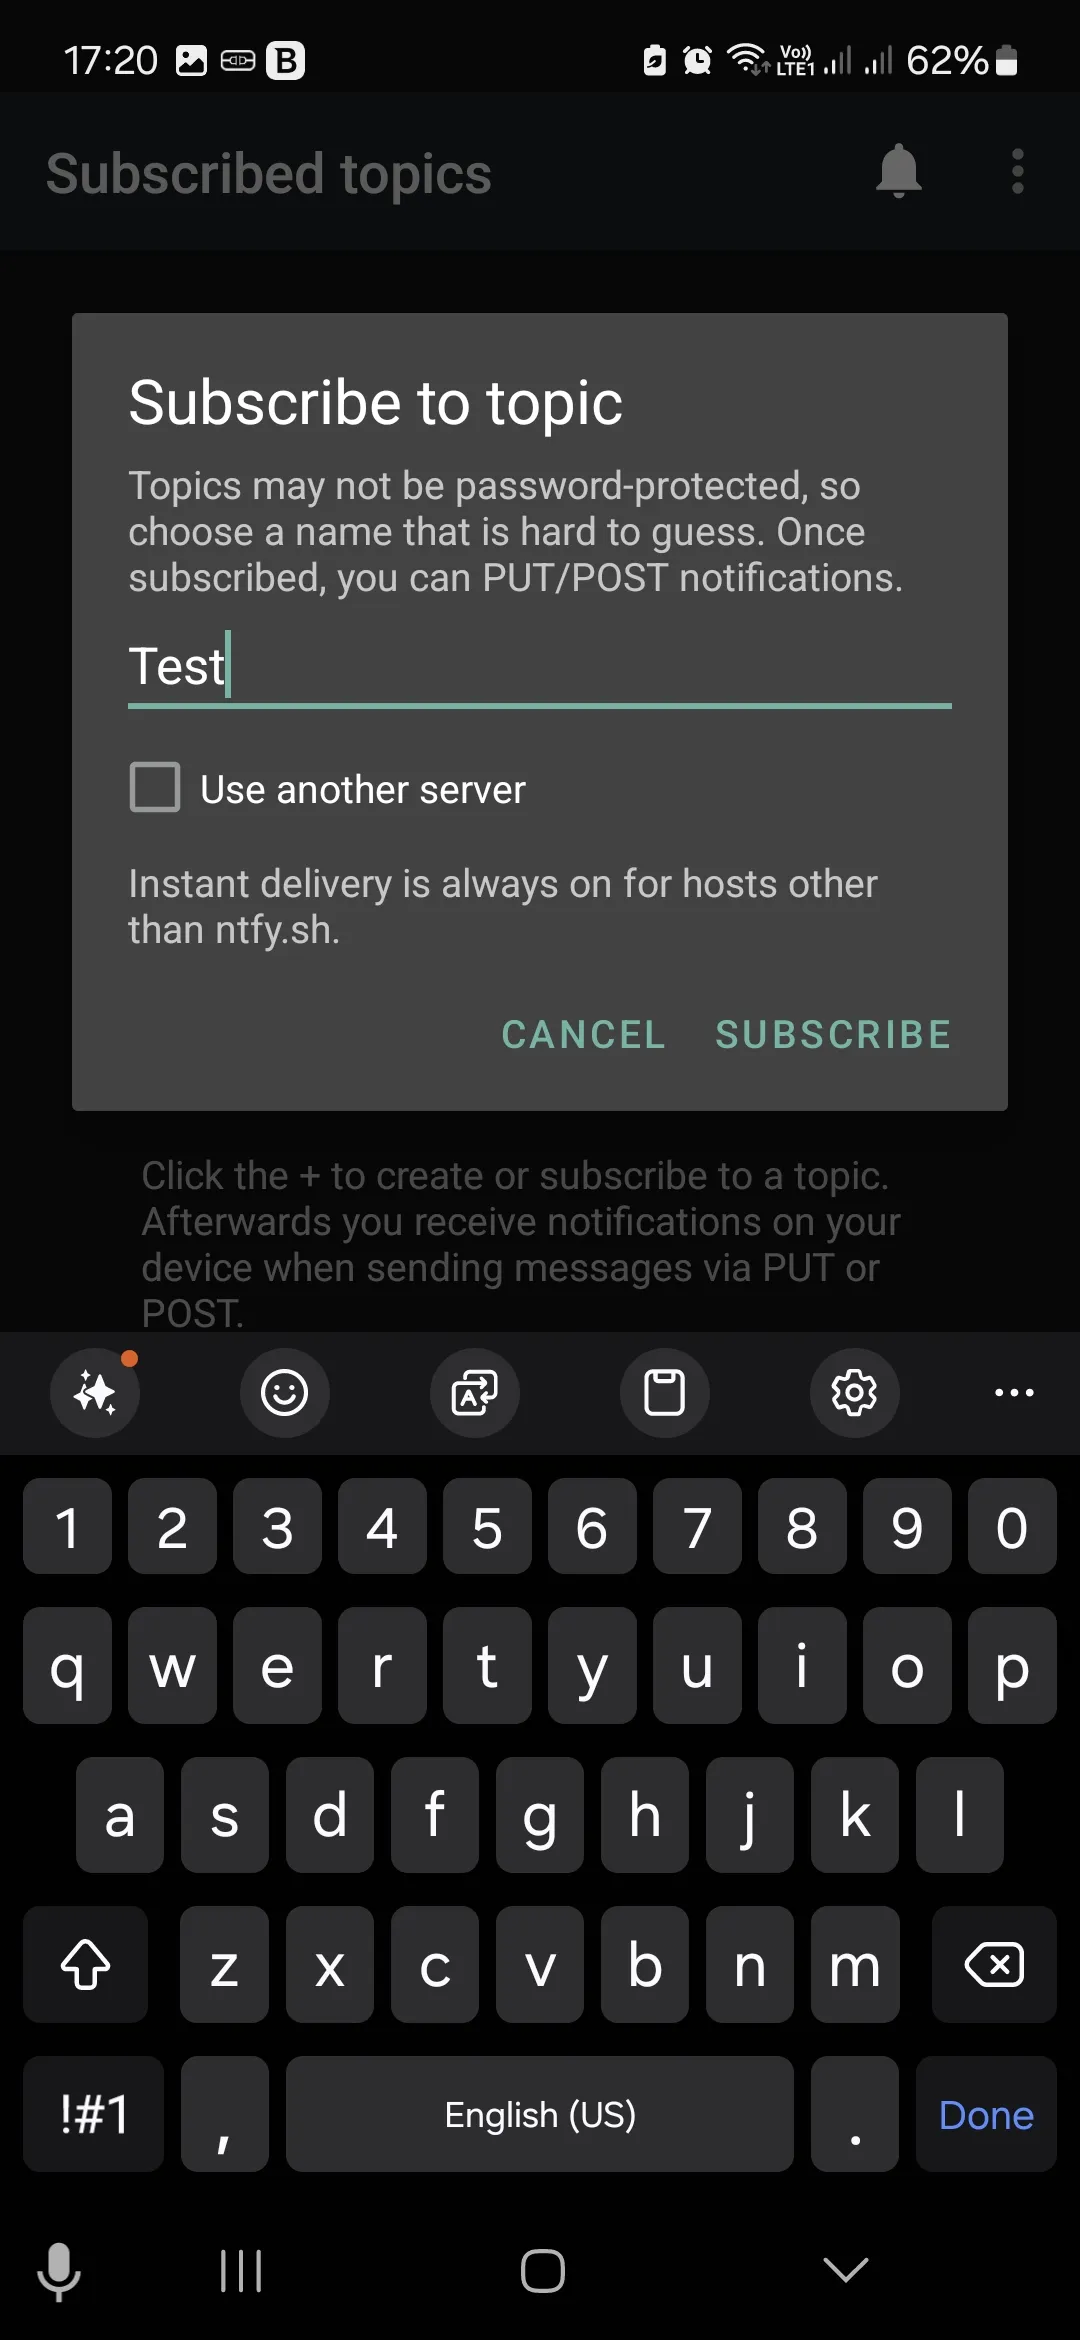
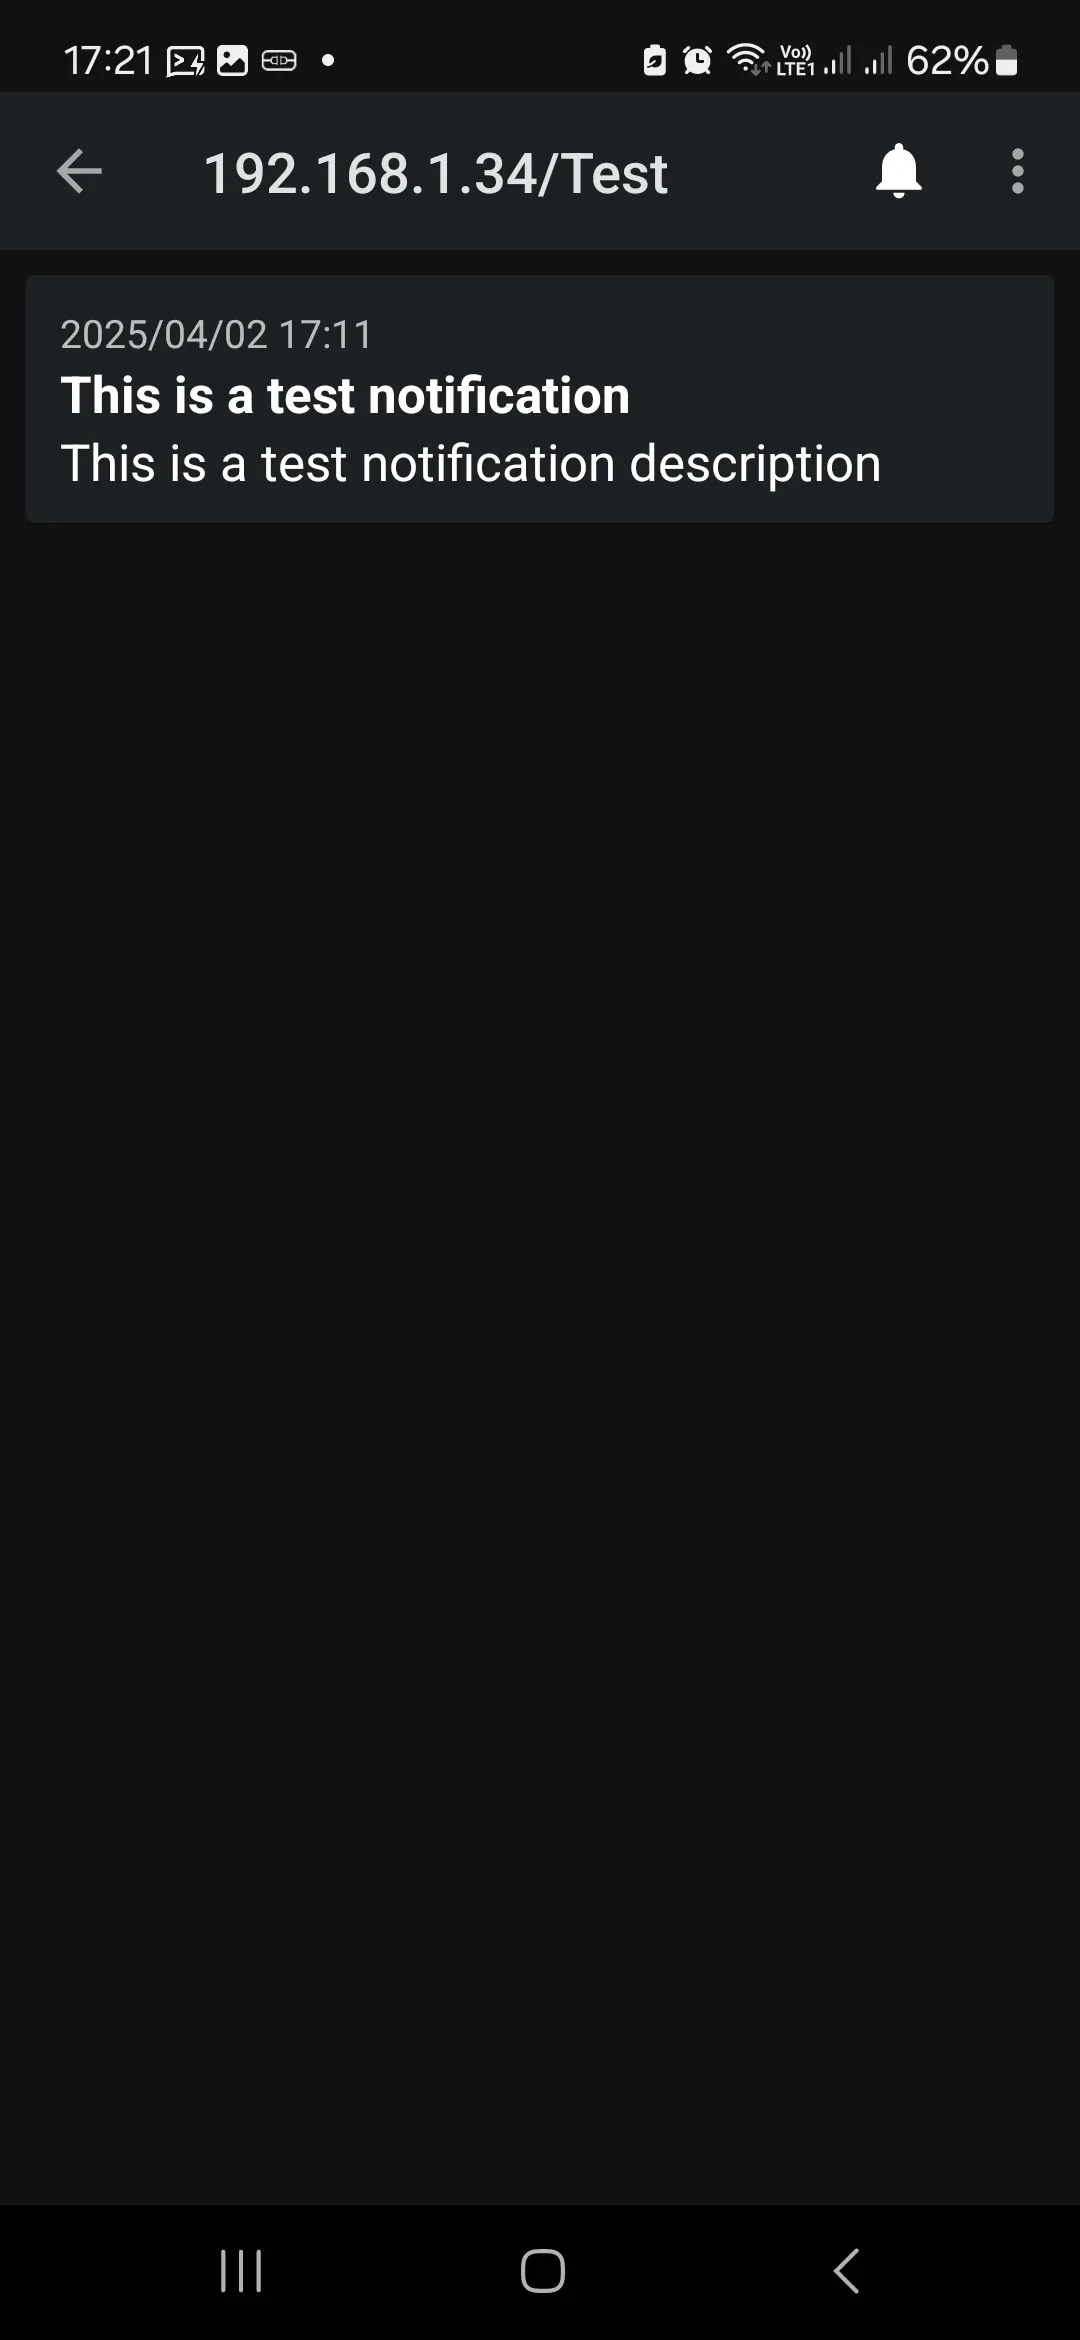
http://192.168.1.34Once done, hit the Add Subscription and add the test channel sub, then publish a fresh test message. Earlier messages are available only if they remain in the configured cache.
This LAN HTTP address is for a controlled test with non-sensitive messages. Use HTTPS or a suitably protected private connection before transmitting credentials or operational secrets. Foreground receipt does not prove background receipt: phone power settings and the iOS wake-up path require separate checks, covered in the HTTPS guide.
The walkthrough uses the topic test. Use that exact spelling on both the web app and phone. If you choose the homelab_alerts topic in the later API example, subscribe to it separately. Topic names are case-sensitive; Part 25 shows a Test example, so grant access to the exact topic you decide to keep.
Optional: Explore Local API Alerts
The four screenshot steps above complete the local setup. The examples below are optional LAN tests before authentication is enabled. They do not replace the next series steps: Part 24 tests external routing, Part 25 adds authentication and Part 26 adds HTTPS. After those changes, scripts need the chosen HTTPS address and authorized credentials.
The magic of ntfy is that its entire API is a simple HTTP POST or PUT request—no complex SDKs or API client libraries required. You can trigger rich notifications with custom titles, urgency levels, emoji tags, and action buttons from any Linux container, cron job, or Proxmox node using standard curl:
# Send a high-priority alert with a title and emoji tags
curl \
  -H "Title: Proxmox Backup Failed on Node 01" \
  -H "Priority: urgent" \
  -H "Tags: warning,skull" \
  -d "Nightly VZDump job for CT 200 (Docker) exited with status code 1. Check storage space on local-lvm." \
  http://192.168.1.34/homelab_alerts
You can even notify yourself the moment a long-running command finishes in a terminal session:
apt update && apt full-upgrade -y && curl -d "System upgrade complete on $(hostname)!" http://192.168.1.34/testFor Proxmox notifications, check which targets your installed release supports. Gotify and ntfy are different APIs; selecting Gotify does not automatically connect ntfy. A supported generic webhook target can publish to ntfy when its URL, body and authentication are configured correctly. Send the target's test notification before relying on backup alerts, and confirm its matcher selects the events you need.
Optional After Parts 25 and 26: Separate Publisher and Reader Accounts
Skip this extension while following the initial local screenshots. Follow Part 25's techdecode example first; a household account with read-write permission lets you publish and subscribe as demonstrated. Once authentication and HTTPS work, you can limit an automated sender to publishing and a dedicated subscriber to reading.
Keep the authentication database and deny-by-default settings already configured in Part 25. Do not replace that configuration or remove the existing account. These commands add two optional accounts with access to the sample homelab_alerts topic:
ntfy user add alerts-publisher
ntfy user add alerts-reader
ntfy access alerts-publisher homelab_alerts write-only
ntfy access alerts-reader homelab_alerts read-only
ntfy access
The user commands prompt for passwords. A reader-only account cannot publish from the phone; keep a read-write account if that is part of your use. These permissions do not grant access to test, Test or a later plants topic. Add deliberate rules for the exact topics each service needs, and test them without removing your working subscriptions.
Check that the publisher can send, the reader can receive and unrelated access is rejected. Use HTTPS for external credential-bearing tests. Keep passwords and tokens out of public scripts and message bodies. This is an optional least-privilege arrangement, not a requirement for completing the earlier walkthrough.
Design Alerts That Lead to Action
Start with two or three conditions that require a person to act, such as a failed backup or a service remaining unavailable. Give each alert a service name, time, observed failure and a useful next step. Avoid publishing complete logs: they can contain tokens, private paths or personal data. Link to a protected dashboard where deeper investigation belongs.
Assign priorities by consequence rather than using urgent for every event. Send a recovery message when a prolonged failure clears, and suppress repeated identical notifications while the problem persists. Otherwise, a broken service can overwhelm the topic and teach everyone to ignore it. Keep routine successful job messages in a separate topic if they are useful as a daily heartbeat.
The shell example above sends only after both update commands succeed because it uses &&. It does not report a failed upgrade. In a production job, retain the job's exit status, choose a success or failure message from that status and record notification errors separately. A failed delivery must not hide the original backup or maintenance result.
Prove the Whole Notification Path
Test from the machine that will actually publish, not only from the ntfy web interface. Check the HTTP response, then confirm the expected phone receives the message while locked. Temporarily remove network access in a controlled test and observe whether later messages can be recovered within your chosen cache policy. Receipt at the server and receipt by a person are different acceptance checks.
A notification server cannot reliably report its own loss of power or network connectivity. Use an independent monitor for the ntfy endpoint, and consider a second channel for critical failures. Document who receives each topic, who owns each publisher credential and when those credentials should be revoked. Revisit noisy or unused alerts as part of ordinary homelab maintenance.
Conclusion
The ntfy LXC and phone now exchange local test notifications using the screenshot workflow. Continue to Part 24 for external routing, then Part 25 for authentication and Part 26 for HTTPS. The alert-design and account-separation sections are optional additions; complete the series setup before using public credentials or confidential notifications.