A homelab gives the self-hosting enthusiast room to experiment and take control of data. As devices and services accumulate, keeping track of everything can become difficult. Reconya, styled reconYa by its developer, is an appealing network discovery tool for bringing that inventory into a visual console.
The original enthusiasm for clearer network visibility remains well placed. The useful question is what the tool can observe from its current network position, then how you turn those observations into an accurate inventory and sensible follow-up.
What Is Reconya?
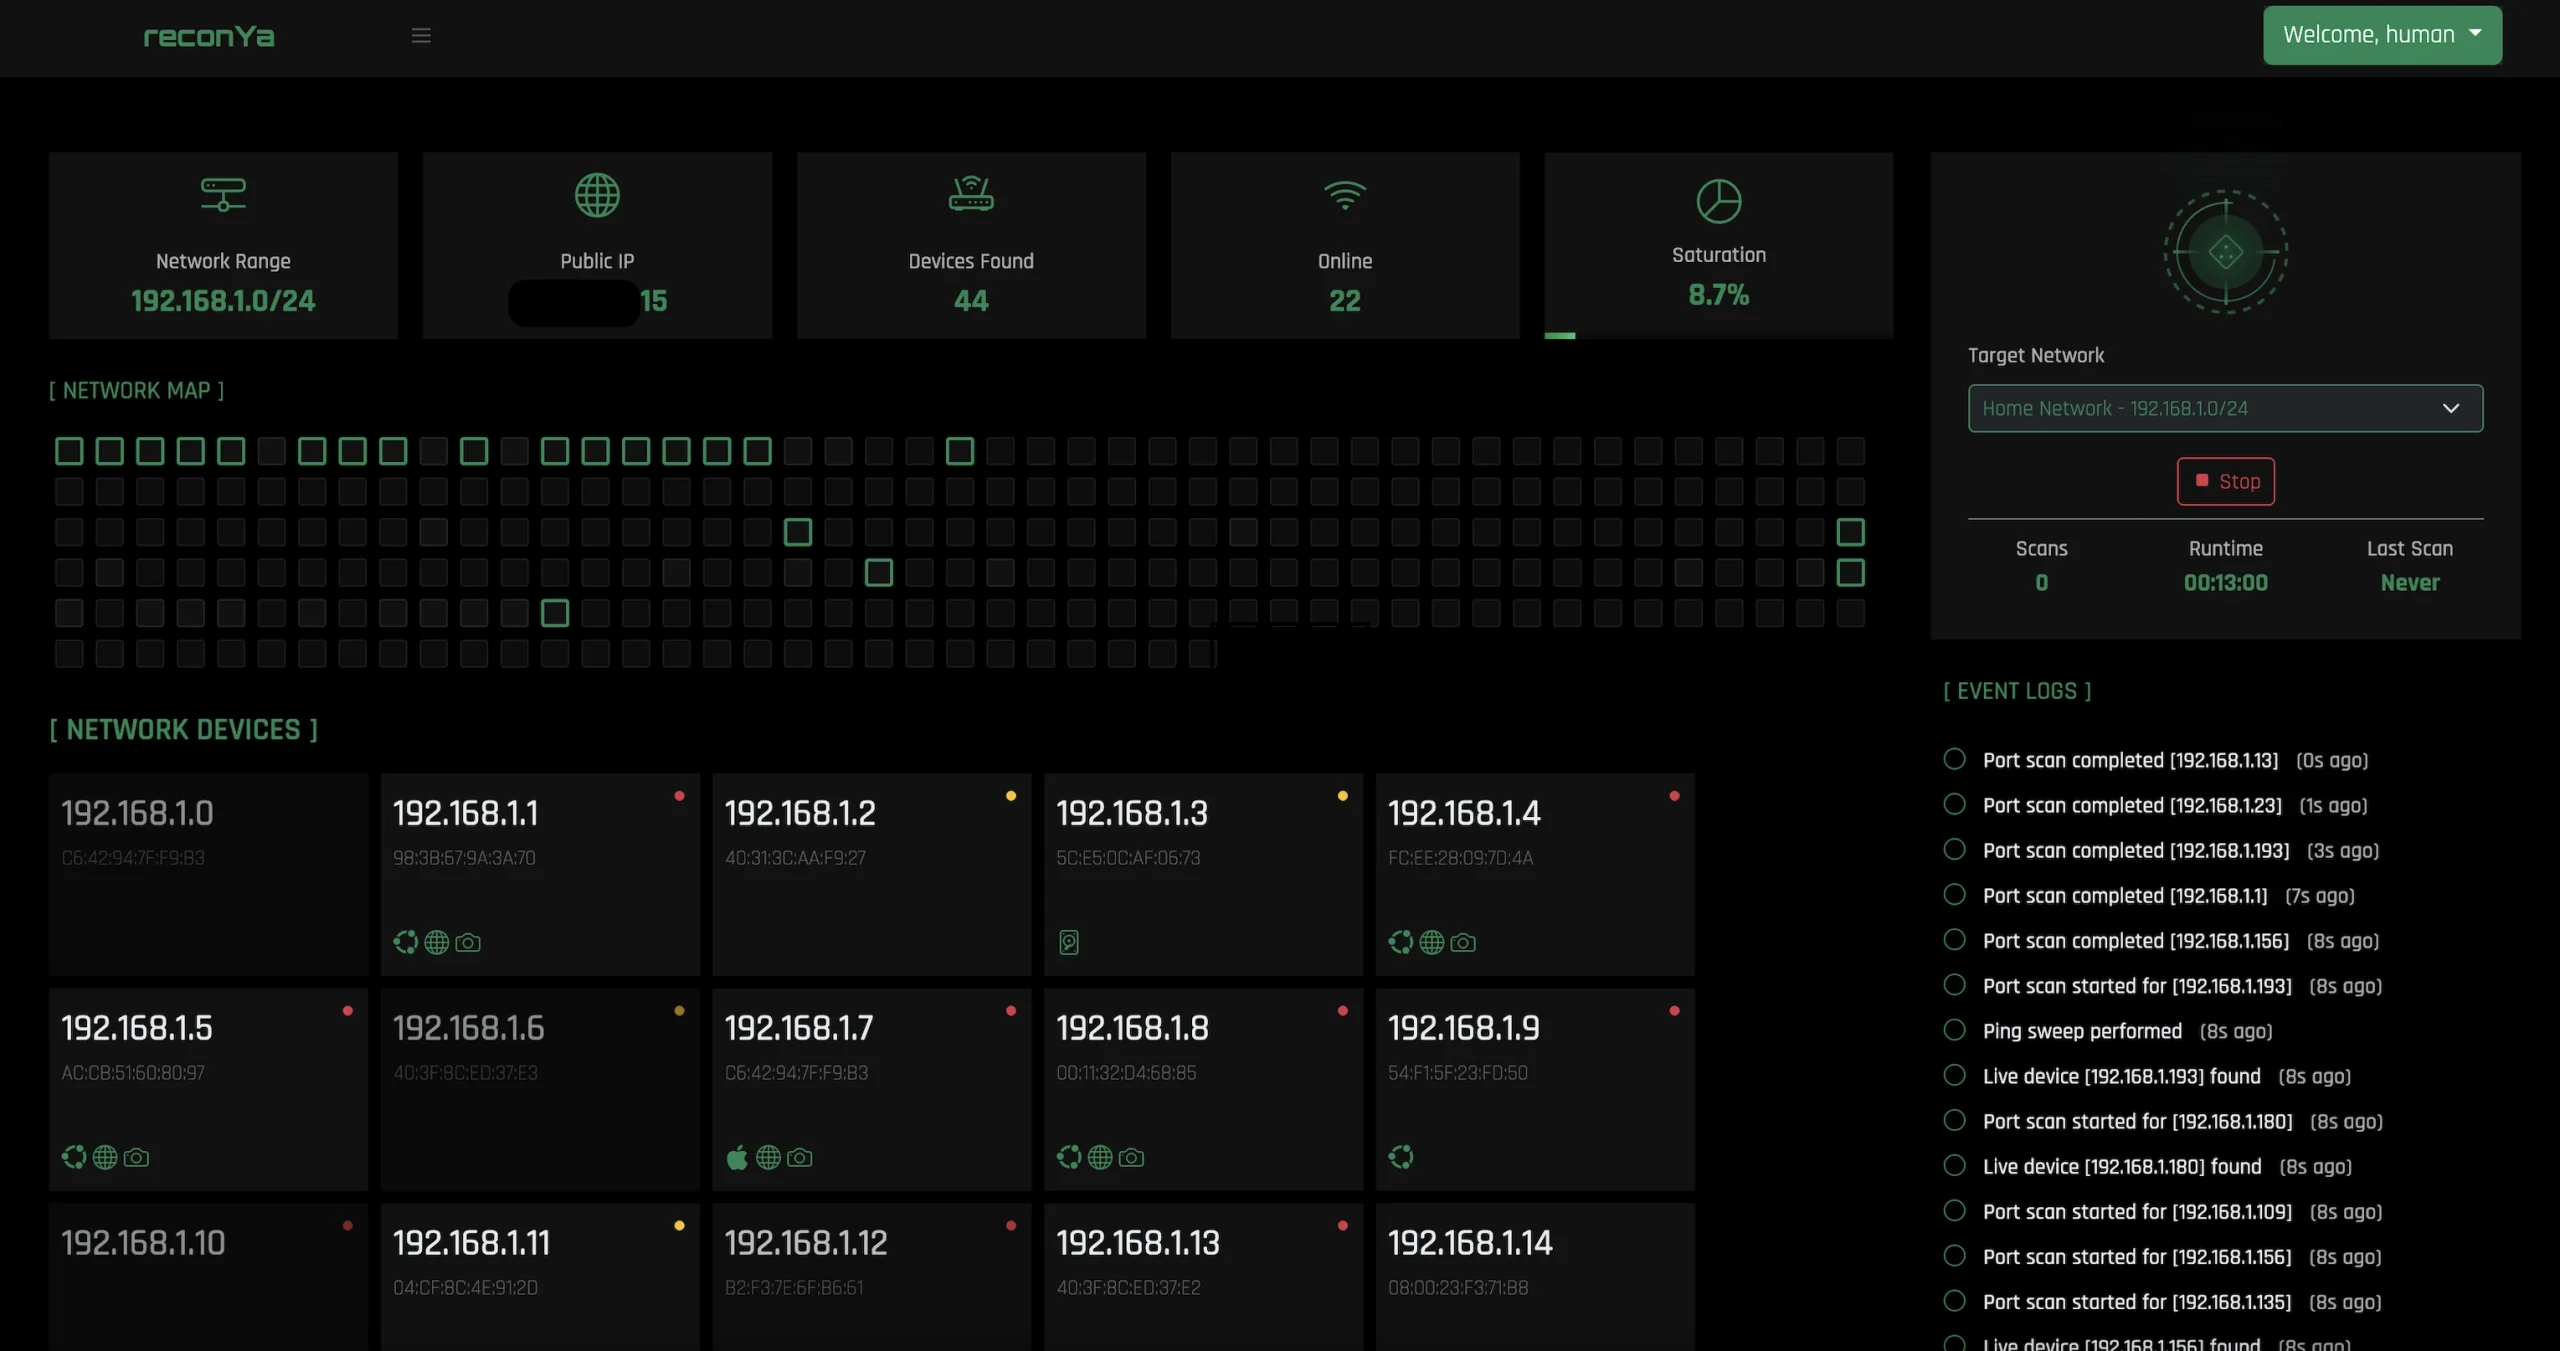
Reconya discovers hosts and tracks information such as addresses, names, vendors, observed ports and status changes. The current project provides a server-rendered web console with a host list, topology view, event history and acknowledgeable findings.
Discovery is an observation process, not proof that every connected device has been identified. Sleeping clients, filtering, network segmentation and incomplete naming can affect the results. An unfamiliar device deserves investigation, but is not automatically an intruder.
The Current Technology Stack
The current implementation is built in Go, with Go templates and vanilla JavaScript for the web interface and SQLite for storage. It does not require choosing between React and HTMX frontends. The source also uses native discovery and TCP port checks rather than requiring Nmap for the normal scanning pipeline.
This matters when following installation instructions: Node.js/npm-based commands from an earlier project layout are not the current source workflow. Use the instructions and configuration files for the revision you actually install, and keep that revision recorded with your backup notes.
How Discovery Works and Where It Stops
The native scanner uses several signals, including ICMP responses, TCP probes and ARP information for local IPv4 discovery. Its source distinguishes on-link and routed observations rather than accepting every TCP response as conclusive proof of a local device.
MAC address visibility generally depends on being on the same local network segment. Routing to another subnet does not carry that remote host's Ethernet MAC address across the router. Running a scanner locally, in a VM or with extra privileges does not remove that network boundary.
The port scanner checks a selected set of TCP ports and attempts identification for some services. It is not a complete scan of every TCP and UDP port, a guaranteed OS fingerprint or a full vulnerability assessment. A service name inferred from a port number is a clue; confirm the real application and its configuration.
The project also documents passive IPv6 monitoring through neighbour information and interfaces. Treat that as a different visibility mechanism from an active IPv4 range scan. Neither mode establishes that the network is secure simply because the results look quiet.
Turn Discoveries Into a Useful Inventory
A central view can save time compared with checking every device separately. Its greatest value comes when you identify expected systems and keep the record understandable. Start with a small known segment, compare it with your router's device/DHCP view and label the equipment you recognise.
- Record the purpose of a server, NAS, printer or smart-home device.
- Note whether an address is reserved, static or assigned dynamically.
- Compare a newly observed port with the services you intended to enable.
- Review devices that change identity or disappear before treating the event as a failure.
- Keep scan history and your configuration in a recoverable backup.
Phones can use private or rotating Wi-Fi addresses, and vendor identification is not a reliable owner identity. Missing hostnames or unfamiliar addresses call for checking the actual device and network configuration, rather than immediately blocking something important.
What It Adds to Security
Reconya can make unexpected hosts and ports easier to notice. That is useful when checking a newly installed service or comparing the network before and after a change. It does not automatically stop unauthorised Wi-Fi access, inspect every connection for malicious behaviour or correct a firewall rule.
An open port is not inherently a vulnerability, and a closed or unobserved port is not proof of safety. Check whether a service is intended, updated, authenticated and reachable from the networks that should use it. A scan from your LAN does not establish what is exposed from the internet.
Likewise, a discovery dashboard is not a substitute for sustained availability checks, bandwidth measurements or packet analysis. Add a monitoring tool when you need service health over time, and investigate traffic with a tool designed for that question.
History, Alerts and Privacy
The current project documents findings for new devices, changed or risky ports, unreachable hosts and identification issues. Acknowledge and investigate those findings in context. A sleeping laptop and an unexpected server shutdown should not receive the same interpretation solely because both become unreachable.
External enrichment is controlled separately from local discovery. The example environment leaves public-IP, geolocation, online vendor lookup and OUI download options disabled. Enabling them allows the corresponding third-party requests. The README also notes a browser-side Google Fonts dependency, so do not describe the entire browser experience as guaranteed to make zero external requests.
The dashboard and database contain useful information about the network. Keep the console private, choose deliberate access controls and review any optional screenshot/enrichment features before using them. Choose only the information that helps maintain your own inventory.
Getting Started With the Current Source Workflow
The current README describes pre-built binaries for supported Linux/macOS architectures and a source workflow requiring Go 1.25 or newer and make. The SQLite dependency uses cgo, so a suitable C build toolchain may also be required. Windows has a separate cgo/compiler note; the shell/daemon commands below should not be assumed to work unchanged in Windows PowerShell.
For the documented source workflow on an appropriate Unix-like environment:
git clone https://github.com/Dyneteq/reconya.git
cd reconya
make install
Review the chosen revision before running its build/install targets. The current make install target creates backend/.env when needed and obtains Go dependencies; it is not an OS-wide installer for Go, Node.js and Nmap.
Before the first start, edit backend/.env. Replace the default LOGIN_USERNAME/LOGIN_PASSWORD values, confirm PORT and SQLITE_PATH, and leave external lookups disabled unless you want them. The supplied file uses port 3008 and a relative database path under data. Resolve that path from the actual working directory and include it in backups.
make start
make status
make logs
# Stop the source-workflow daemon when required:
make stop
The documented local URL is http://localhost:3008, but the current server binds to the port on all interfaces. “Localhost” in a setup guide does not mean other hosts are automatically blocked. Limit access with the host's network controls and use a private, authenticated access arrangement for remote management.
Sign in, create a network with the range you intend to inspect and start the scan. For example, 192.168.1.0/24 is an illustrative private range, not a value to copy if your LAN uses another subnet. Scan only networks you manage or are authorised to assess. Check that several known devices appear before expanding to additional ranges.
Permissions, Persistence and Troubleshooting
The scanner tries available ICMP methods, including an unprivileged datagram method and a raw-socket fallback. Required privileges vary with the OS and configuration. Missing responses should lead to checking the logs, target filtering and network placement rather than indiscriminately granting administrator access.
For an always-on service, use the actual installed binary, working directory, account and configuration path in your service manager. Test startup and scanning under that account before enabling automatic boot. A unit that assumes /opt/reconya/backend exists and runs as root by default is not a complete hardened installation.
Docker remains explicitly experimental in the project's documentation. Its layer-2 visibility depends on the container network arrangement and host environment, and routed MAC visibility remains limited for native installations too. Extra container privileges are not a general cure for missing discovery data.
If the console fails, check port availability, environment values, database access and logs. If a known device is absent, confirm the range, network interface/segment and device state. Keep a working backup before updating or cleaning an installation; do not delete the database merely to make a display issue disappear.
Choosing the Right Discovery or Documentation Tool
| Tool | Useful role | What to assess |
|---|---|---|
| Reconya | Native discovery, observed ports and visual inventory | Host environment, visibility and release-specific workflow |
| NetAlertX | Asset discovery and change tracking through configured sources | Scanner/integration setup and network placement |
| WatchYourLAN | ARP-based presence/history tracking | Interface access, arp-scan dependency and console protection |
| NetBox | Documenting intended network/IPAM/DCIM state | Maintaining validated records alongside monitoring |
These roles can complement each other. NetBox is not itself a live network monitor, and a scanner's observations do not replace a curated record of how a network is intended to work. Compare maintenance effort and actual requirements rather than unsupported fixed memory figures.
Conclusion: Bring Clarity to the Network
Reconya remains an attractive way to make a growing homelab easier to understand. Treat its results as observations to validate, keep the installation and inventory maintained, and use that clearer picture to guide sensible follow-up.
The current repository is published under CC BY-NC 4.0, with commercial use requiring permission from the copyright holder. Check the project license for your intended use rather than assuming unrestricted open-source licensing.
Visit the official Reconya website and follow the current project instructions.