In the ever-expanding universe of self-hosting, the quest for the perfect applications to populate our homelabs is a never-ending adventure. And if you are new to building a homelab, check out our series taking you step-by-step to building your own homelab. From notification services to self-hosting a DNS server, each service we bring online adds another layer of control and customization to our digital lives. After all, the purpose of self-hosting is to take control of our data for privacy while saving us some money in the long run. Today, we're diving deep into a tool that promises to bring order to your most valuable asset: your time. Meet TimeTagger, a powerful and intuitive time-tracking application that you can host yourself (although they have paid subscriptions as well).
What is TimeTagger and What Does It Do?
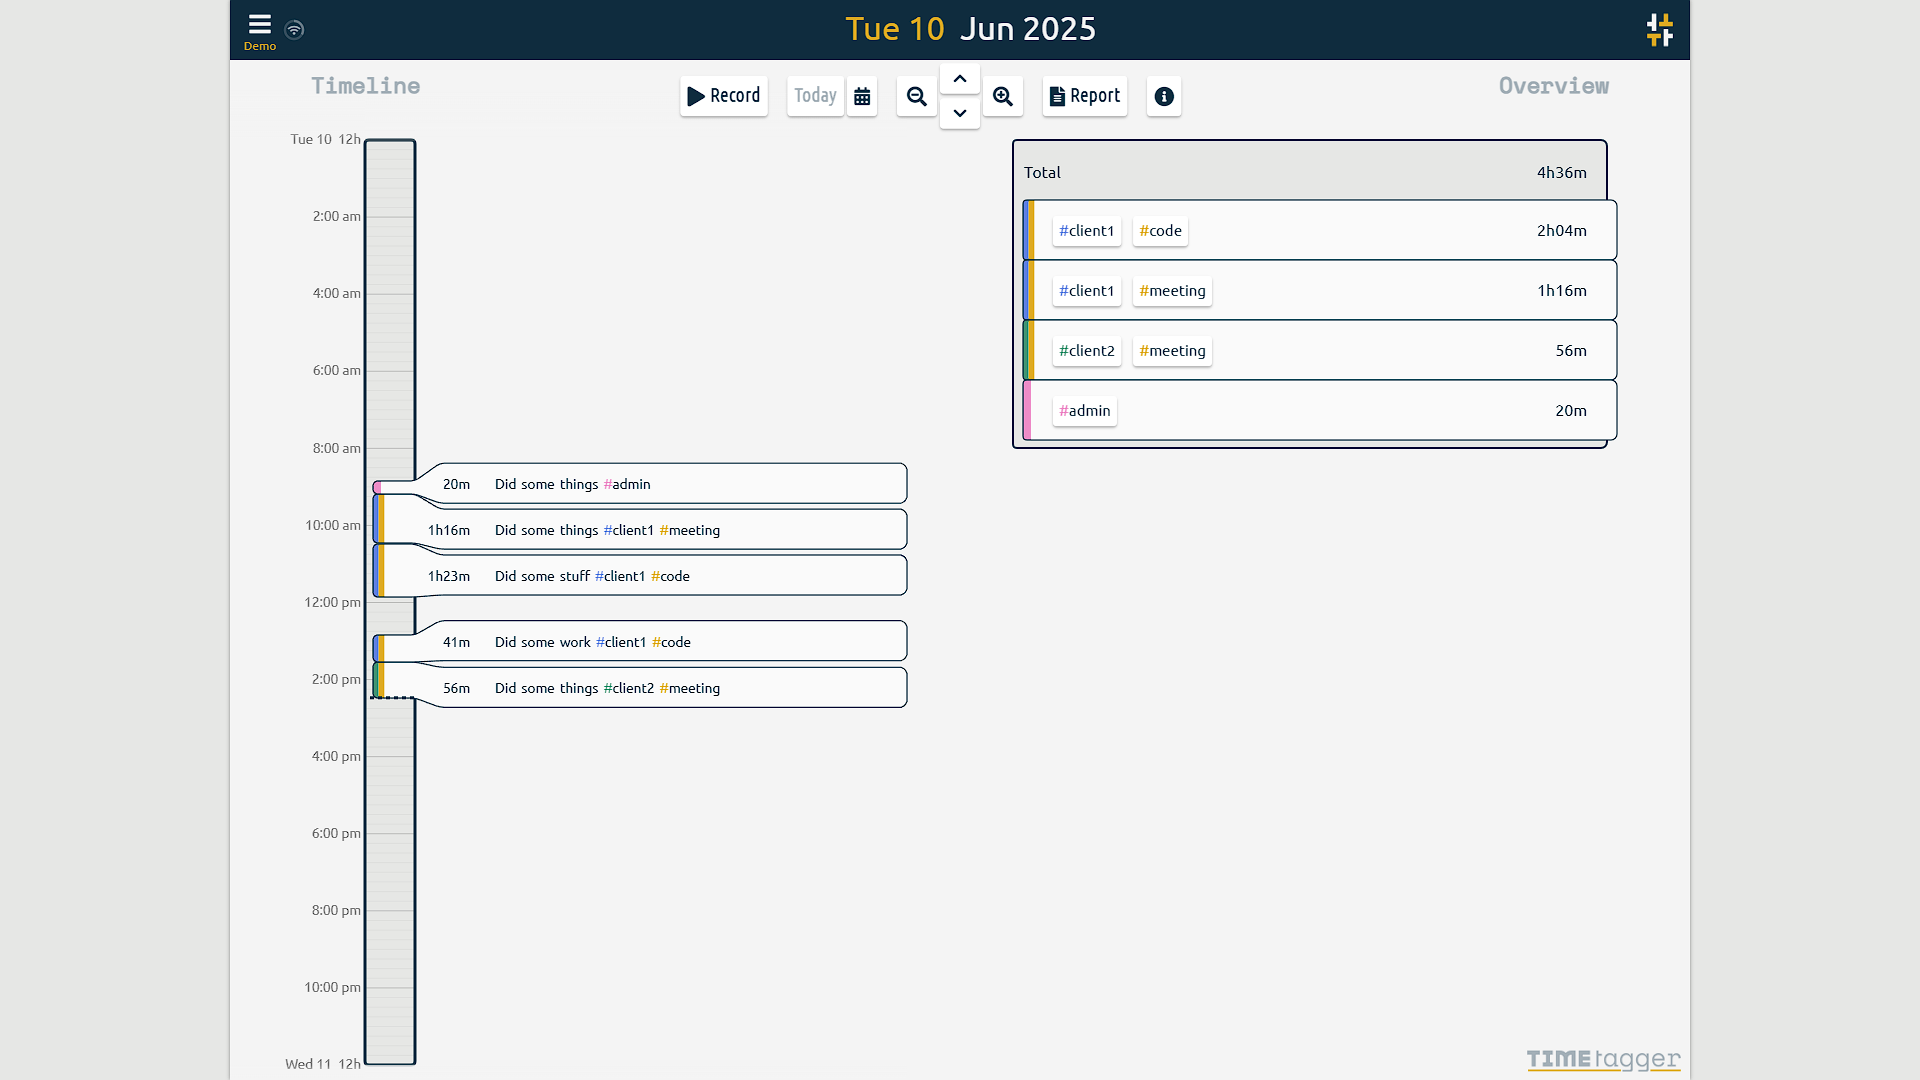
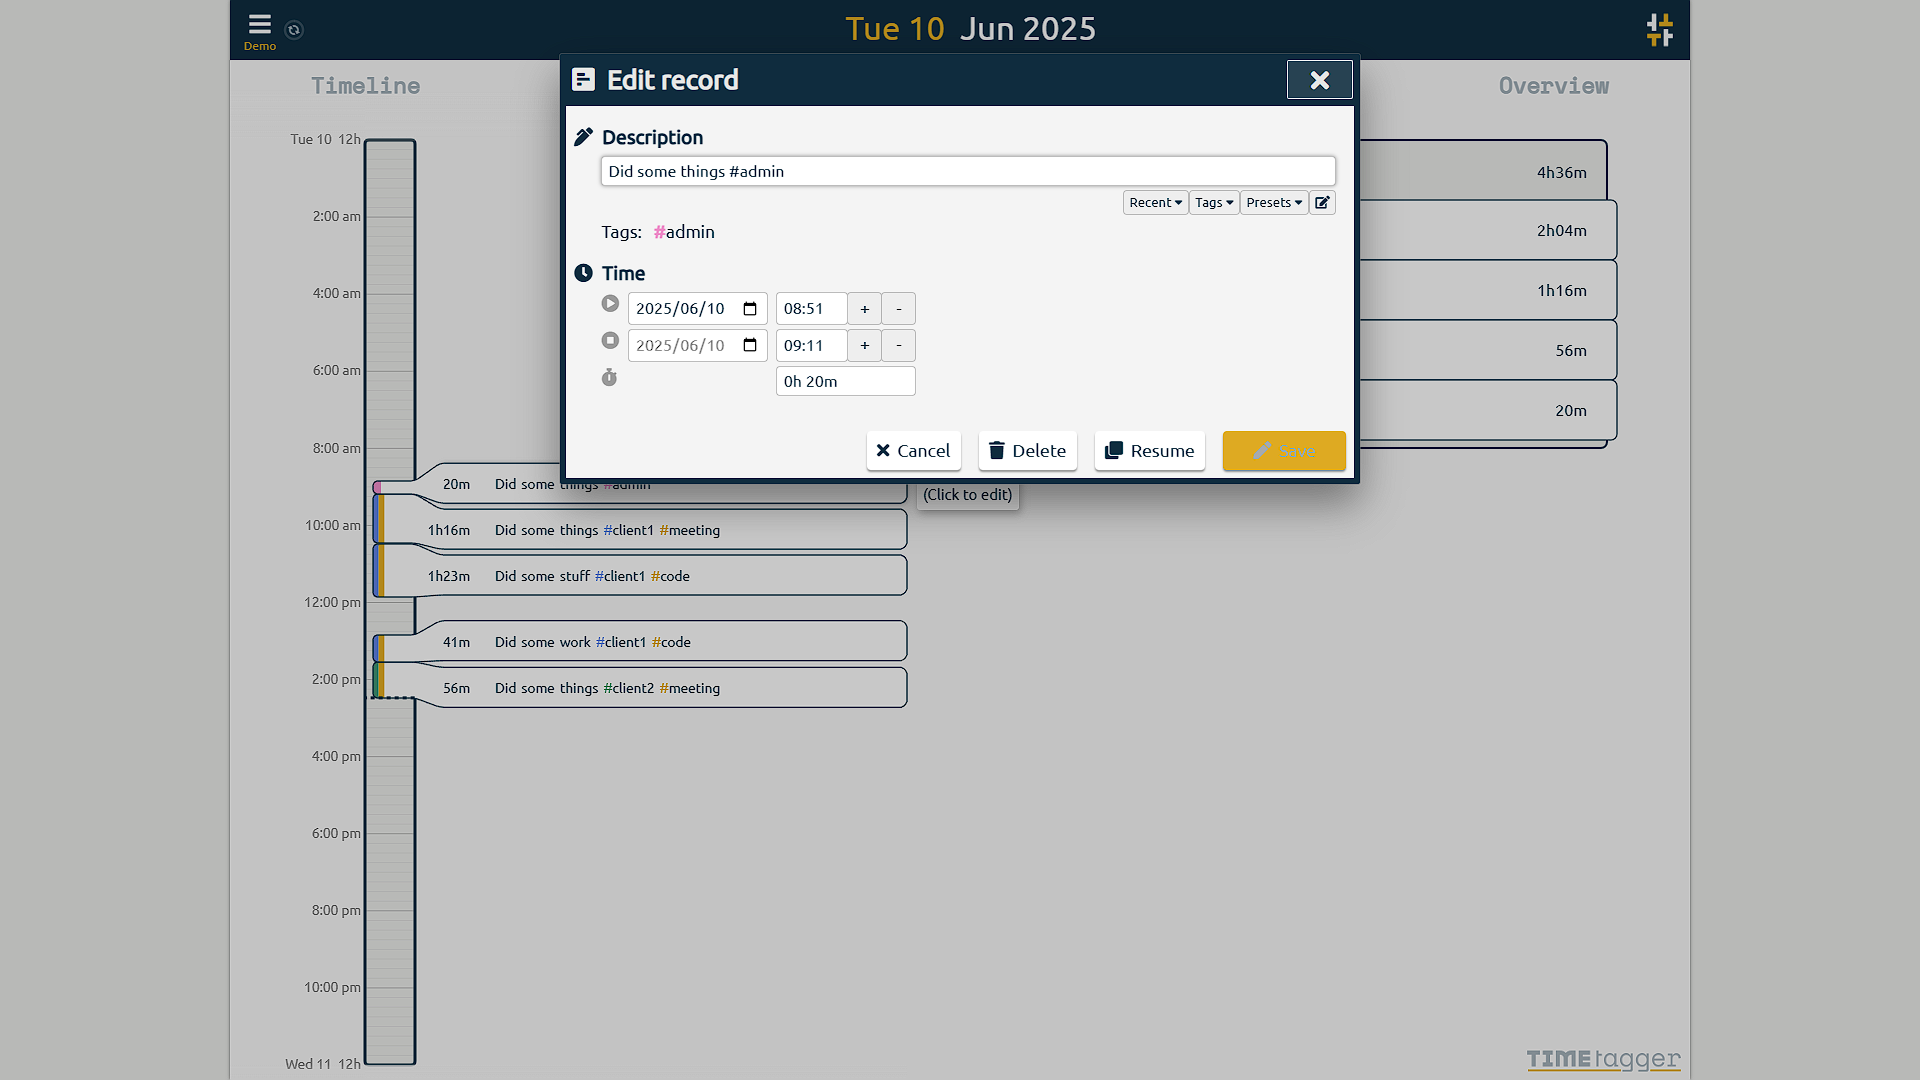
At its core, TimeTagger is a web-based application that allows you to meticulously log your time against different activities. Its intuitive interface is built around a visual timeline, making it easy to see your day at a glance. Instead of rigid project structures, TimeTagger utilizes a flexible tagging system. This means you can categorize your time with multiple labels, offering a granular yet straightforward way to analyze your productivity. Whether you're a freelancer tracking billable hours, a student managing study sessions, or a developer logging time on different projects, TimeTagger adapts to your workflow.
Key Features of TimeTagger:
TimeTagger comes packed with features designed to make time tracking a seamless and insightful experience:
- Interactive Timeline: A clear, visual representation of your day, allowing for easy entry and modification of time blocks.
- Flexible Tagging: Assign multiple tags to your time entries for powerful and customizable reporting.
- Powerful Reporting: Generate detailed reports and export your data to PDF or CSV for further analysis or invoicing.
- Cross-Device Sync: Keep your time logs synchronized across all your devices, from your desktop to your smartphone.
- Pomodoro Timer Integration: Try the integrated Pomodoro method if it suits your workflow; the project lists this feature as experimental.
- Open Source: The application is open source (GPLv3), giving you complete transparency and the freedom to customize.
- Responsive Design: A clean and user-friendly interface that is designed to work on both small and large screens.
The Allure of Self-Hosting: Why Host TimeTagger Yourself?
For the homelab enthusiast, the "why" of self-hosting is often self-evident. However, the benefits extend beyond the simple joy of ownership.
General Pros of Self-Hosting:
- Complete Data Ownership and Privacy: Your data resides on your server. You choose who administers it and how it is accessed. Privacy still depends on accounts, host security, proxy configuration and backups.
- No Subscription Fees: Once you have the hardware, the software is free. You escape the cycle of recurring monthly payments.
- Ultimate Customization: Tweak the application to your heart's content. While TimeTagger is already feature-rich, the truly adventurous can dive into the source code.
- Enhanced Security: You control the security environment. Implement your own robust security measures, such as fail2ban, and manage access as you see fit.
- Skill Development: Each new service you host is a learning opportunity, deepening your understanding of Linux, Docker, networking, and security.
Specific Pros of Self-Hosting TimeTagger:
- Privacy of Your Productivity Data: Your work habits, client information, and project details remain entirely within your control.
- Long-Term Cost Savings: For long-term use, self-hosting can be significantly more economical than a paid subscription.
- Integration with Your Existing Ecosystem: Run TimeTagger alongside your other self-hosted services for a truly integrated and personalized digital workspace.
The Other Side of the Coin: Considerations and Cons of Self-Hosting TimeTagger
While the benefits are compelling, a responsible self-hoster must also weigh the potential downsides.
- Initial Setup and Maintenance: You are the IT department. This means handling the initial installation, configuration, updates, and troubleshooting any issues that arise.
- Security Responsibilities: With great power comes great responsibility. You are solely responsible for securing your instance from potential threats. This includes setting up firewalls, managing user access, and keeping the software and underlying system up-to-date.
- Backup and Recovery: Data loss is a real risk. You'll need to implement a robust backup strategy to protect your valuable time-tracking data.
- Hardware and Resource Costs: While the software is free, it needs a home. This means dedicating hardware resources (CPU, RAM, and storage) on your server.
- No Official Support: When you run into a problem, you can't file a support ticket. You'll be relying on community forums, documentation, and your own problem-solving skills.
A Glimpse into the "How-To": Self-Hosting TimeTagger with Docker
Getting TimeTagger up and running in your homelab is surprisingly straightforward, thanks to the magic of Docker. Here's a brief overview of the process:
- Prerequisites: You'll need a server with Docker and Docker Compose installed.
- Create a
docker-compose.ymlfile: This file will define the TimeTagger service, its Docker image, and its configuration. You can find excellent examples in the official TimeTagger documentation. - Configure Environment Variables: You'll use environment variables within your
docker-compose.ymlto set crucial parameters like the data directory, user credentials, and timezone. - Persistent Storage: To ensure your time-tracking data survives container restarts, you'll need to mount a volume from your host machine to the container.
- Run
docker compose up -d: This command will pull the TimeTagger image and start the container in the background. - Access and Configure: Once the container is running, you can access the TimeTagger web interface through your server's IP address and the specified port. Use the credentials configured for your server to sign in and start tracking; the documented credential-based setup does not depend on a public registration screen.
For a detailed, step-by-step guide, be sure to consult the official TimeTagger documentation and the numerous community guides available online.
Conclusion: Take Control of Your Time, Your Way
TimeTagger stands out as a powerful, flexible, and user-friendly time-tracking tool. For the self-hosting enthusiast, it offers the perfect opportunity to bring a genuinely useful service into their homelab ecosystem. By hosting it yourself, you control the server and can avoid the hosted service’s subscription while sharpening your technical skills. Hardware, maintenance and backup costs still count.
While the path of self-hosting requires a degree of responsibility in terms of setup, security, and maintenance, the rewards of a private, customizable, and cost-effective time-tracking solution are well worth the effort. So, fire up your terminal, pull that Docker image, and start your journey to becoming the master of your own time.
Visit the official TimeTagger website
A Compose starting point and credentials
The project publishes container images and documents persistent storage under /root/_timetagger for its root image. Treat this as a starting point for a local deployment, then configure HTTPS or a private access path for remote use. Credentials travel to the server during login, so a password hash in configuration does not make an unencrypted HTTP connection private.
Generate your own username and BCrypt password-hash string with the project’s credential helper or a trusted local BCrypt tool. Store the complete username:hash value in a single-quoted TIMETAGGER_CREDENTIALS entry in a private .env file beside Compose. Single quotes preserve literal dollar signs in that file; this differs from placing a hash directly into YAML, where the upstream example doubles dollar signs for Compose.
services:
  timetagger:
    image: ghcr.io/almarklein/timetagger:latest
    restart: unless-stopped
    ports:
      - "127.0.0.1:8080:80"
    environment:
      TIMETAGGER_BIND: "0.0.0.0:80"
      TIMETAGGER_DATADIR: /root/_timetagger
      TIMETAGGER_LOG_LEVEL: info
      TIMETAGGER_CREDENTIALS: "${TIMETAGGER_CREDENTIALS:?Set your generated username and BCrypt hash}"
    volumes:
      - ./timetagger-data:/root/_timetagger
This binds the host port to loopback. A browser on the Docker host can use http://127.0.0.1:8080; another device cannot reach that mapping directly. A reverse proxy running in another container needs an explicitly shared network and the service’s container port instead. Choose the access arrangement deliberately, and use the project’s documented nonroot image/configuration if that is your preference. The floating latest tag receives changes, so record the working image digest before planned upgrades.
Keep the credential file out of public repositories and avoid sharing fully expanded configuration output containing it. Back up the persistent data consistently, then prove that a separate test instance can recover your records. Restarting a container preserves mounted data; replacing a host without a backup does not.
Tracking Time from the Terminal with timetagger_cli
If you spend most of your workday inside a terminal, you don't even need to open a browser tab to start or stop timers. The official Python CLI client (pipx install timetagger_cli) interacts directly with your self-hosted TimeTagger REST API:
# Authenticate with your API token from the TimeTagger web UI
timetagger setup

# Start tracking a task with multiple tags
timetagger start "#client-acme #backend #api"

# Inspect current running timer and today's logged hours
timetagger status

# Stop the current running timer
timetagger stop
Make tags and reports useful
Use a small, consistent tag vocabulary, such as a client tag and a type-of-work tag, instead of inventing a new project spelling each day. Tags are entered with # in the description and are case-insensitive. The overview can filter by one or several tags. Select the desired reporting range before exporting, so a client’s weekly report does not accidentally include unrelated work.
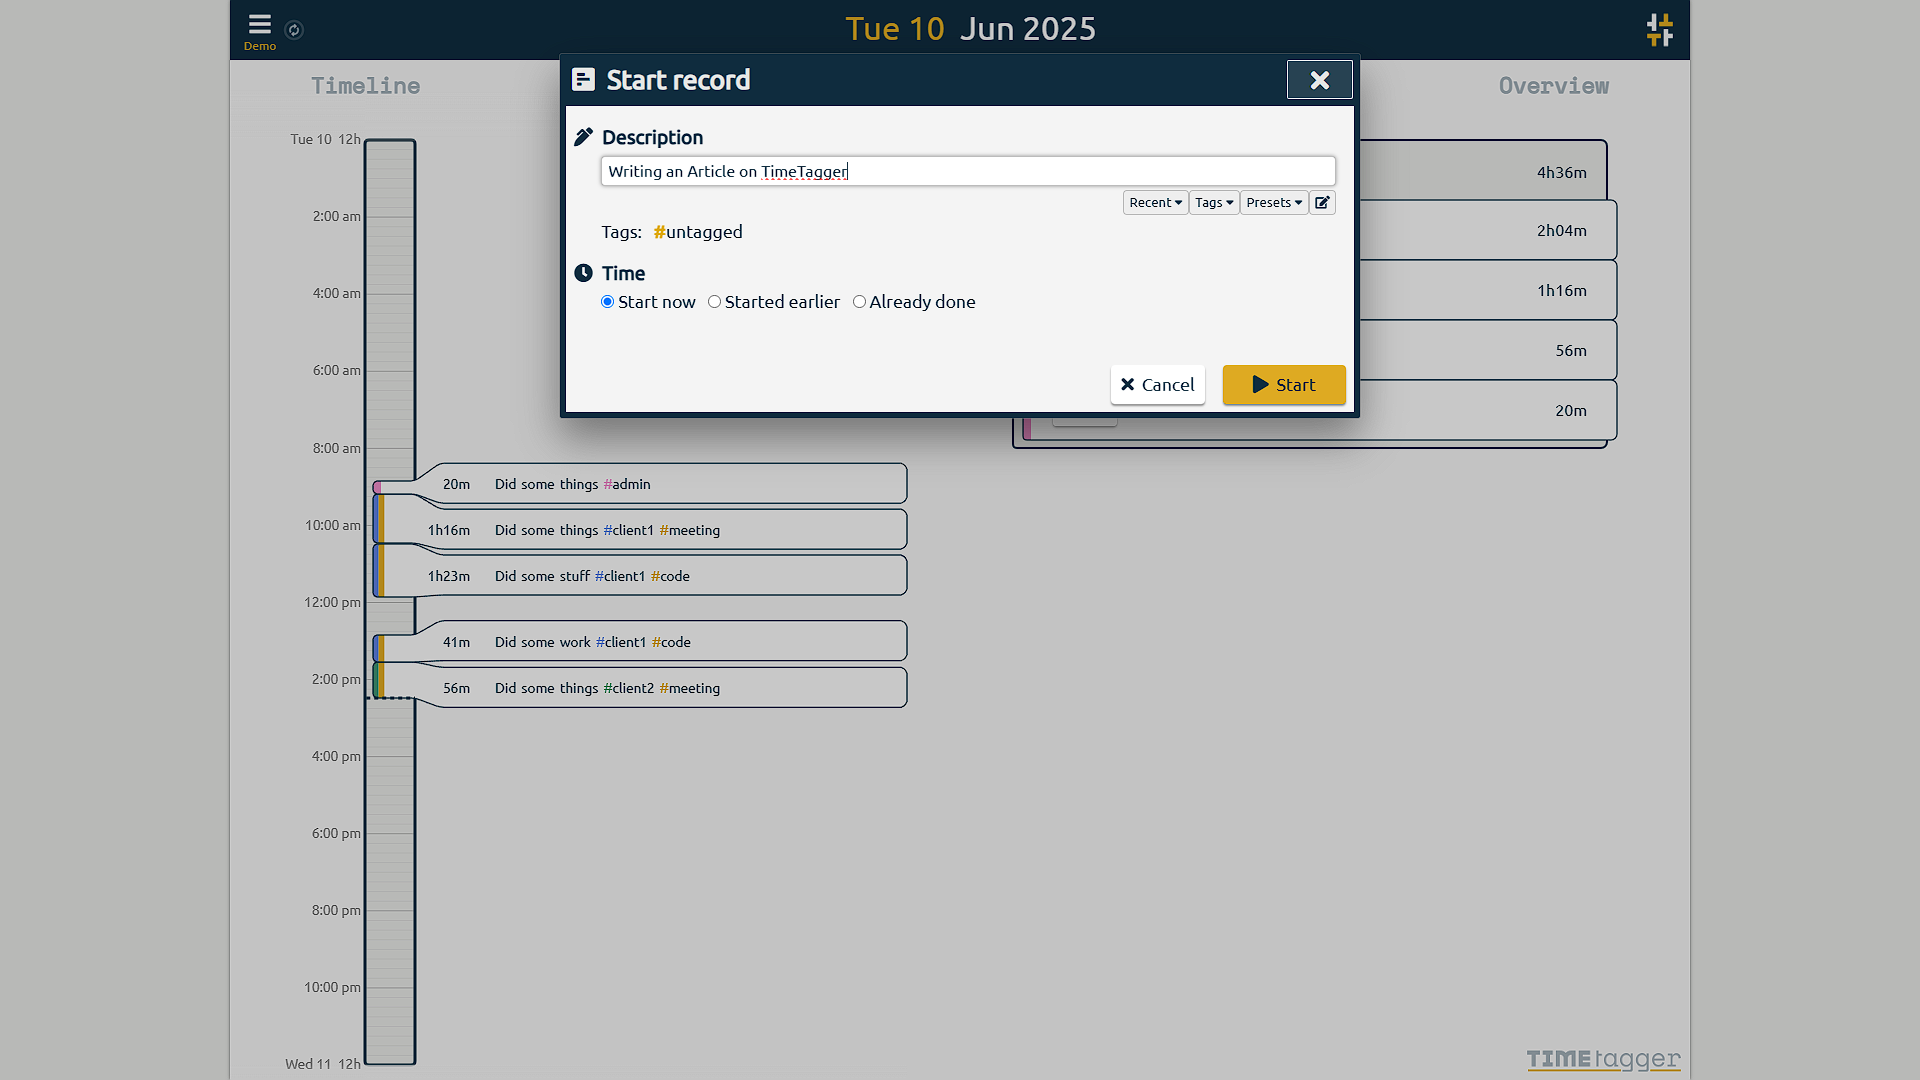
TimeTagger can create a record after the work is finished and edit an existing record through its dialog or timeline. Correct a forgotten timer promptly and review breaks before producing billable hours. Starting another timer automatically stops the current one according to the user guide. A running timer measures elapsed time, so it cannot decide whether that time is billable or productive.
PDF reports suit sharing, while CSV is useful for further processing. The guide recommends decimal time formatting for spreadsheet work. Verify a small known-duration record and the selected date range before trusting a larger invoice calculation. Reports are a convenient source of recorded hours; they do not replace your contract’s billing rules.
TimeTagger’s tag-focused approach remains appealing for individuals who want a visual, flexible workflow. If you need team approvals, payroll or customer/project accounting, compare those specific requirements with the current capabilities before choosing a service. Neither a fixed RAM figure nor a claim of perfect responsiveness tells you whether a tool fits your own process.